
 Seasonal & Holiday Crochet
*This post may contain affiliate links to support the cost of this blog. At no cost to you, I may make a small commission if you purchase through these links. Read our Privacy Policy HERE
Hanging a matching row of handmade stockings along the fireplace mantel is one of the most cherished traditions of the holiday season. This Ribbed Fold-Over Cuff Crochet Christmas Stocking With Contrast Heel features four classic color-blocked variations—combining festive cherry red, crisp snow white, and warm tea leaf sage green—so every member of the family can have their own personalized color combination while keeping a cohesive heirloom look. Worked from the top ribbed cuff down to the tapered toe using simple single crochet stitches and a 5.0 mm (US H-8) hook, each 17-inch stocking is sturdy enough to hold plenty of Christmas morning treasures.
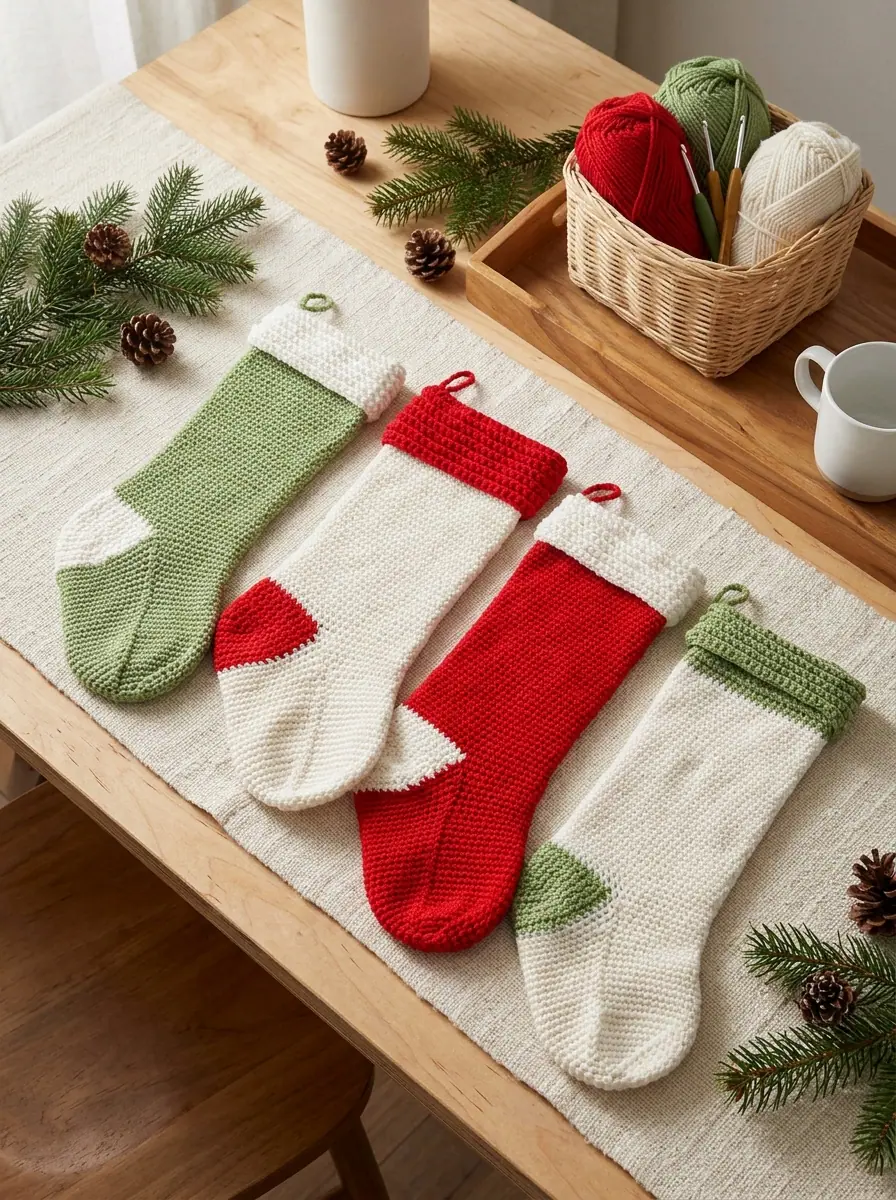
Even if you have never crocheted a sock or stocking before, the top-down construction makes every stage easy to visualize. You will begin with a turned back-loop-only cuff that naturally folds over with plush horizontal ridges, transition into smooth single crochet rounds for the leg, shape a snug pocket heel using short rows with single crochet two-together decreases, and finish with a seamlessly seamed foot, tapered toe, and a self-twisting three-strand hanging cord.
Pattern Overview
- Skill Level: Easy (confident beginner comfortable working single crochet in joined rounds and short-row heel shaping)
- Finished Measurements: Approximately 17 inches (43 cm) long measured from top of folded cuff to base of heel
- Gauge: 13 single crochets and 14 rows = 4 inches (10 cm)
- Construction Method: Top-down circular construction (ribbed BLO cuff, seamless leg tube, short-row contrast heel, joined instep/foot, and 4-point decreased toe)
- Recommended Hook: 5.0 mm (US H-8) crochet hook (or size needed to obtain gauge)
- Yarn Weight: Medium Worsted Weight (#4) Acrylic Yarn in Cherry Red, Soft White, and Tea Leaf Green
Table of Contents
- Four Festive Family Color Combinations
- Gauge, Measurements & Section Dimensions
- Stitch Abbreviations & Special Stitches (US Terms)
- Step-by-Step Crochet Christmas Stocking Instructions
- Personalization & Mantel Styling Ideas
- Yarn Care & Seasonal Storage Instructions
- Frequently Asked Questions (FAQ)
- Save This Holiday Crochet Stocking Pattern on Pinterest
1Home2Seasonal & Holiday Crochet3Ribbed Fold-Over Cuff Crochet Christmas Stocking With Contrast Heel
Four Festive Family Color Combinations
One of the best features of this holiday stocking design is how effortlessly two skeins of worsted weight yarn can be swapped between Contrast A (Main Body, Foot & Toe) and Contrast B (Folded Cuff, Short-Row Heel & Hanging Loop) to create four distinct family stockings:
- Version 1 (Evergreen & Snow): Contrast A in Tea Leaf Green (0624) for the leg and foot, paired with Contrast B in Soft White (0316) for the ribbed cuff and heel.
- Version 2 (Snowy Pine): Contrast A in Soft White (0316) for the main stocking body, accented with Contrast B in Tea Leaf Green (0624) at the cuff, heel, and twisted hanging loop.
- Version 3 (Candy Cane Snow): Contrast A in Soft White (0316) for the body and toe, paired with vibrant Cherry Red (0319) as Contrast B on the cuff and heel.
- Version 4 (Classic Santa Crimson): Contrast A in Cherry Red (0319) for the body and foot, topped with a snowy Soft White (0316) Contrast B cuff and heel.
Materials & Tools Needed
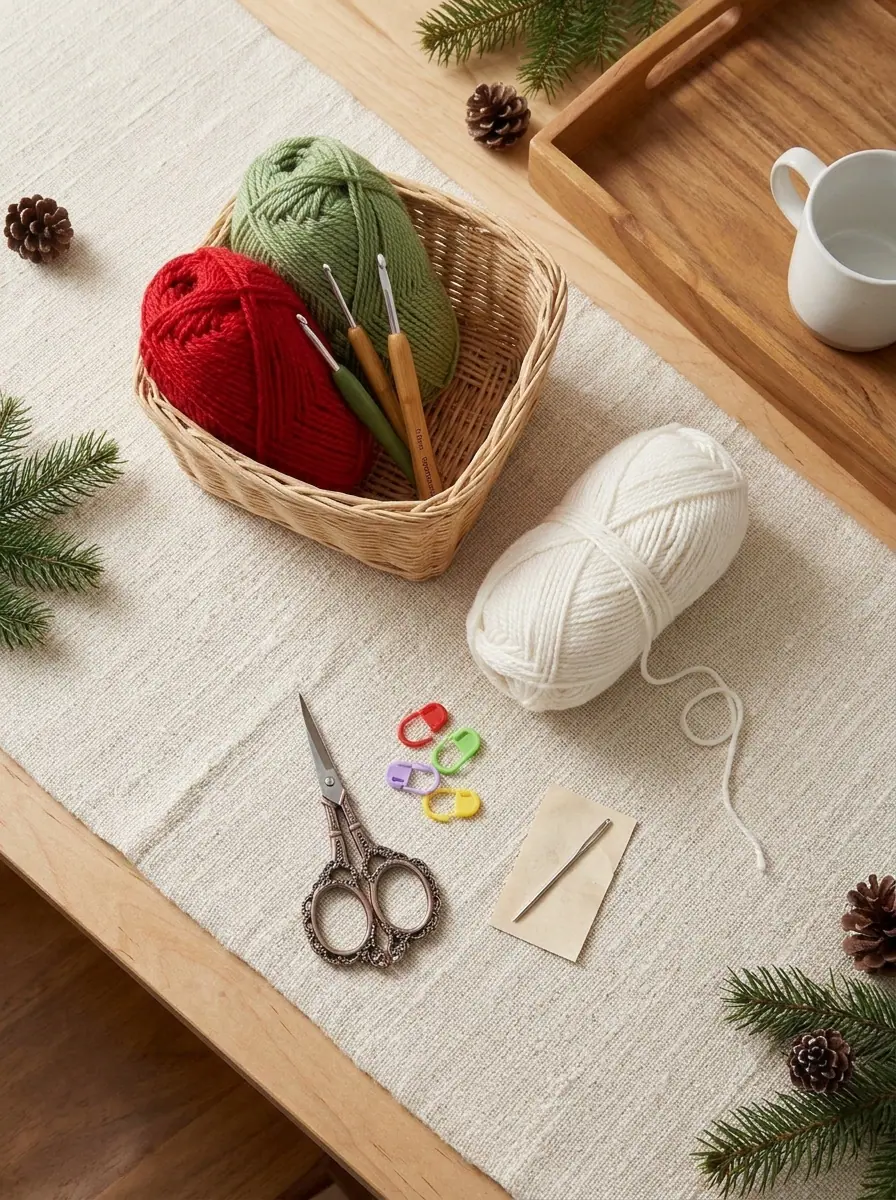
- Medium Worsted Weight (#4) 100% Acrylic Yarn (7 oz / 198 g, 364 yds / 333 m per skein):
- Contrast A (Leg, Foot & Toe): 1 skein in Cherry Red (0319), Soft White (0316), or Tea Leaf Green (0624) (approx. 175 yds / 160 m per stocking)
- Contrast B (Ribbed Cuff, Heel & Hanging Cord): 1 skein in contrasting holiday shade (approx. 95 yds / 87 m per stocking)
- Maker Note: Just 1 skein each of Cherry Red, Soft White, and Tea Leaf Green provides enough yardage to crochet a multi-stocking family set!
- Crochet Hook: 5.0 mm (US H-8) ergonomic crochet hook
- Notions: Locking stitch marker (essential for marking the instep during the heel-joining round), blunt-tip metal tapestry needle for weaving in ends and attaching the twisted cord loop, tape measure, and sharp scissors
Gauge, Measurements & Section Dimensions
Because single crochet creates a dense, non-sagging fabric, hitting the recommended gauge ensures that your finished stocking measures a full 17 inches (43 cm) in length with a generous 14-inch (35.5 cm) opening circumference.
| Stocking Section | Stitch Count | Finished Measurement |
|---|---|---|
| Unfolded Ribbed Cuff (BLO) | 46 sc per round | 5 inches (12.5 cm) tall before folding |
| Leg Tube (Measured from Cuff Base) | 46 sc per round | 9 inches (23 cm) long |
| Short-Row Heel Flap & Turn | Worked across 23 sc, shaped to 15 sc | 2 inches (5 cm) straight + 8 shaping rows |
| Foot Tube (Joining Round to Toe) | 52 sc decreased to 44 sc | 5.5 inches (14 cm) long before toe shaping |
| Total Finished Length | Tapered to 12 sts at toe tip | Approx. 17 inches (43 cm) cuff to heel |
Stitch Abbreviations & Special Stitches (US Terms)
All instructions use standard US crochet terms. Every round is joined with a slip stitch to the first single crochet of the round:
- A, B: Contrast A (Main Body Color), Contrast B (Cuff & Heel Contrast Color)
- approx: approximately
- beg: beginning
- BLO: back loop only
- ch: chain(s)
- cont: continue
- dec: decrease(ing)
- PM: place stitch marker
- rem: remaining
- rep: repeat
- rnd(s): round(s)
- RS: Right Side
- sc: single crochet
- sc2tog: single crochet 2 together (decrease — see below)
- sl st: slip stitch
- sp(s): space(s)
- st(s): stitch(es)
- WS: Wrong Side
- yoh: yarn over hook
Special Decrease: Single Crochet 2 Together (sc2tog)
Used to shape the short-row heel turn, the gusset sides of the foot, and the four-point tapered toe:
How to work sc2tog: Insert your hook into the next stitch and draw up a loop, then immediately insert your hook into the following stitch and draw up a second loop (3 loops now on hook); yarn over hook and draw through all 3 loops on hook. One stitch decreased.
Step-by-Step Crochet Christmas Stocking Instructions
General Round Note: Unless otherwise instructed (such as during the flat heel rows), join the end of every round with a slip stitch to the first single crochet of that round.
Step 1: Crocheting the Turned Ribbed Cuff & Straight Leg
The cuff is worked in joined rounds that are turned at the end of every round while working in the back loops only. Turning alternates Right Side and Wrong Side rows so the horizontal ridge texture looks identical when the cuff is folded down over the top of the leg.
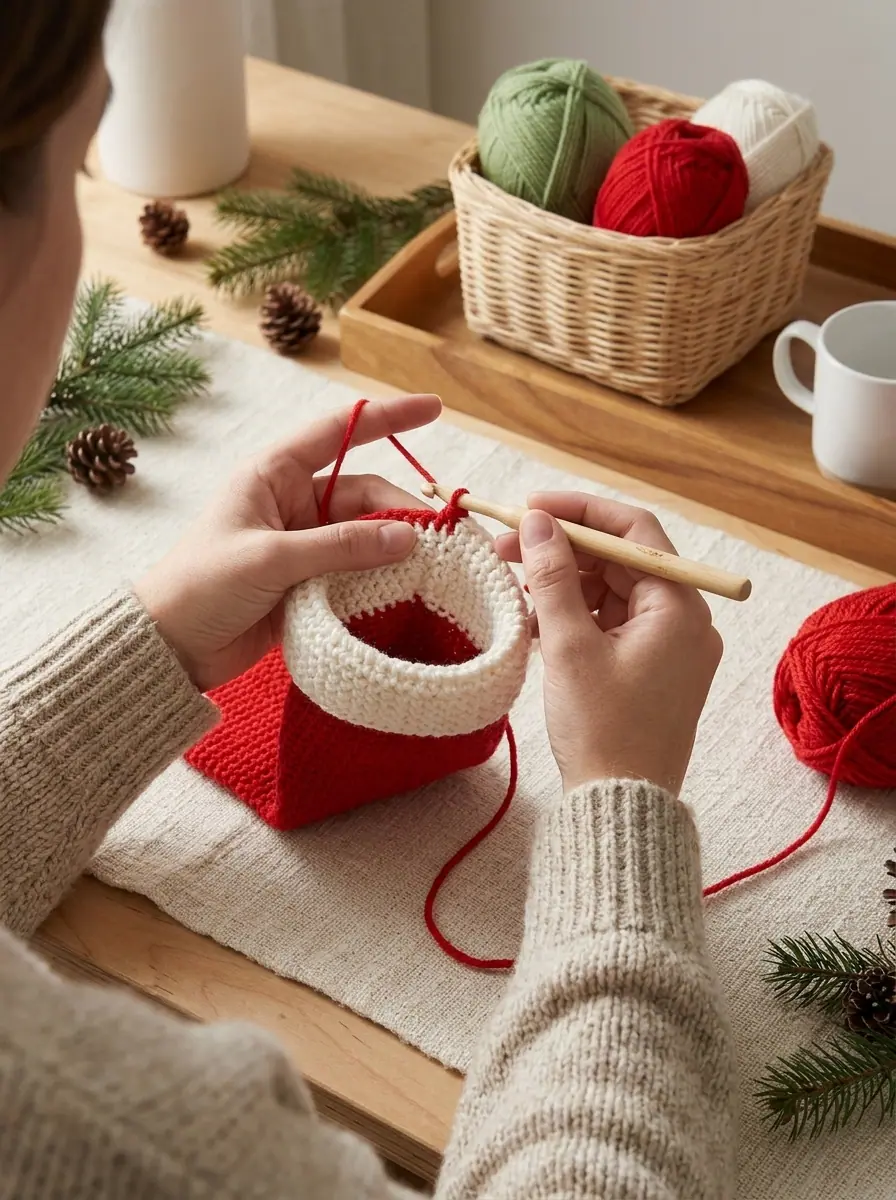
Ribbed Cuff (Worked with Contrast B)
With Contrast B and your 5.0 mm hook, ch 46. Join with a sl st to the first ch to form a ring, taking care not to twist the foundation chain.
Round 1 (Right Side): Ch 1. Work 1 sc in each ch around to the end of the chain. Join with a sl st to the first sc. Turn. (46 sc)
Round 2 (Wrong Side): Ch 1. Working in back loops only (BLO), work 1 sc in each sc around. Join with a sl st to the first sc. Turn. (46 BLO sc)
Rounds 3 & Up: Repeat Round 2—continuing to work in back loops only and turning at the end of every round to alternate RS and WS—until the cuff measures 5 inches (12.5 cm) from the beginning, ending after completing a Wrong Side round. Turn so the Right Side is facing you. Break Contrast B and join Contrast A.
Stocking Leg (Worked with Contrast A)
Round 1 (Right Side): With Contrast A, ch 1. Working through both loops (and no longer turning at the end of rounds), work 1 sc in each sc around. Join with a sl st to the first sc. (46 sc)
Remaining Leg Rounds: Repeat Round 1 (working in continuous unturned Right-Side rounds through both loops) until the leg measures 9 inches (23 cm) from the bottom edge of the cuff. Fasten off Contrast A.
Step 2: Shaping the Contrast Short-Row Heel
Next, you will work back and forth in rows across half of the leg stitches (23 stitches) using Contrast B to build the heel flap, then work 8 short rows with sc2tog decreases to cup the base of the heel without any bulky seams.
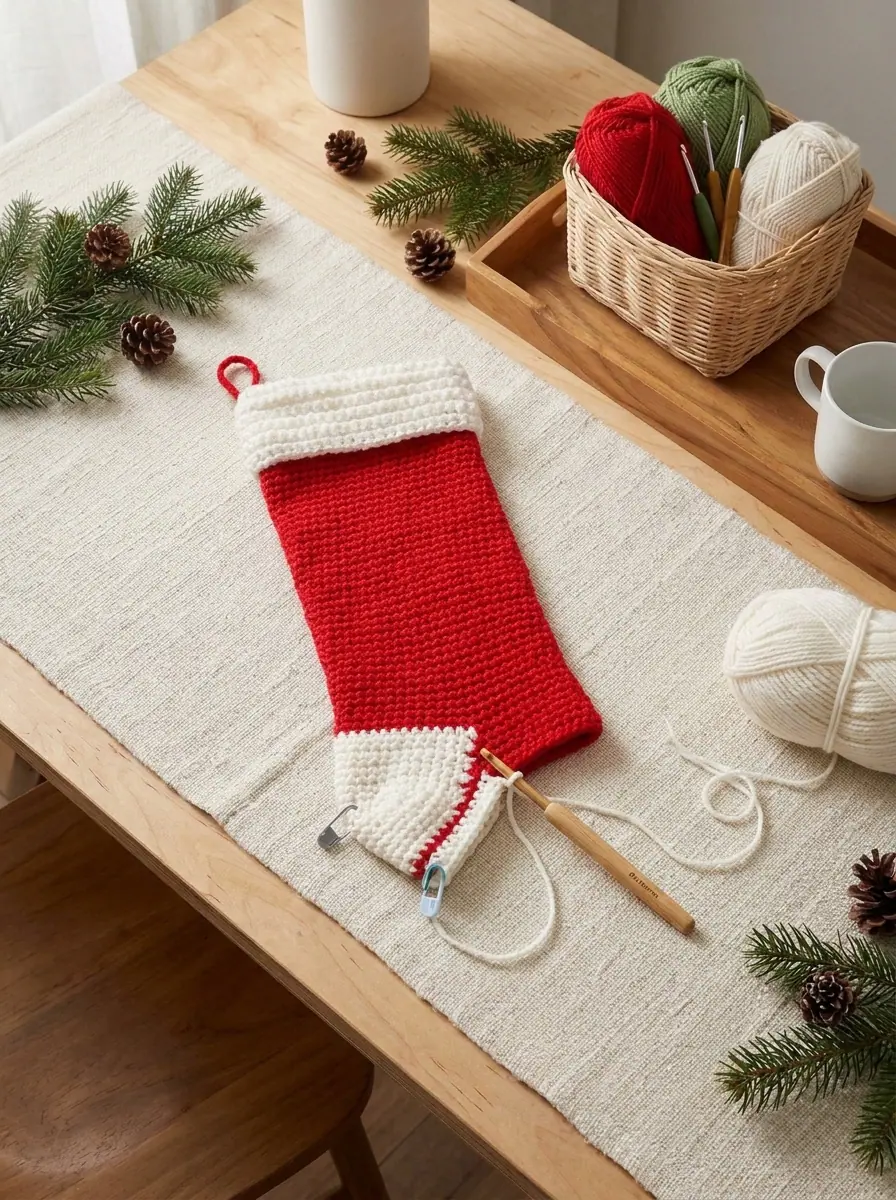
Heel Flap (Worked Flat in Rows with Contrast B)
With the Right Side of the leg facing you, join Contrast B with a sl st to the first sc of the round.
Row 1 (RS): Ch 1. Work 1 sc in the same space as the joining sl st, then work 1 sc in each of the next 22 sc. Turn, leaving the remaining 23 instep stitches unworked. (23 heel sts)
Row 2 (WS): Ch 1. Work 1 sc in each sc across to the end of the row. Turn. (23 sc)
Repeat Row 2 until the heel flap measures 2 inches (5 cm) from the start of the heel, ending after a Wrong Side row.
Shape Heel Cup (Short Rows)
Row 1 (RS): Ch 1. Work 1 sc in each of the next 15 sc, work sc2tog over the next 2 sts, work 1 sc in the next sc. Turn, leaving the remaining stitches unworked.
Row 2 (WS): Ch 1. Work 1 sc in each of the first 9 sts, work sc2tog, work 1 sc in the next sc. Turn.
Row 3 (RS): Ch 1. Work 1 sc in each of the first 10 sts, work sc2tog, work 1 sc in the next sc. Turn.
Row 4 (WS): Ch 1. Work 1 sc in each of the first 11 sts, work sc2tog, work 1 sc in the next sc. Turn.
Row 5 (RS): Ch 1. Work 1 sc in each of the first 12 sts, work sc2tog, work 1 sc in the next sc. Turn.
Row 6 (WS): Ch 1. Work 1 sc in each of the first 13 sts, work sc2tog, work 1 sc in the next sc. Turn.
Rows 7 & 8: Ch 1. Work 1 sc in each of the first 14 sts, work sc2tog over the last 2 sts. Turn. Fasten off Contrast B at the end of Row 8. (15 heel base sts remain).
Step 3: Joining Round, Foot Gusset, Tapered Toe & Twisted Cord Loop
Rejoin Contrast A to pick up stitches all the way around the unworked instep and the sides of the shaped heel, then work down the foot to the toe and finish with the twisted hanging cord.
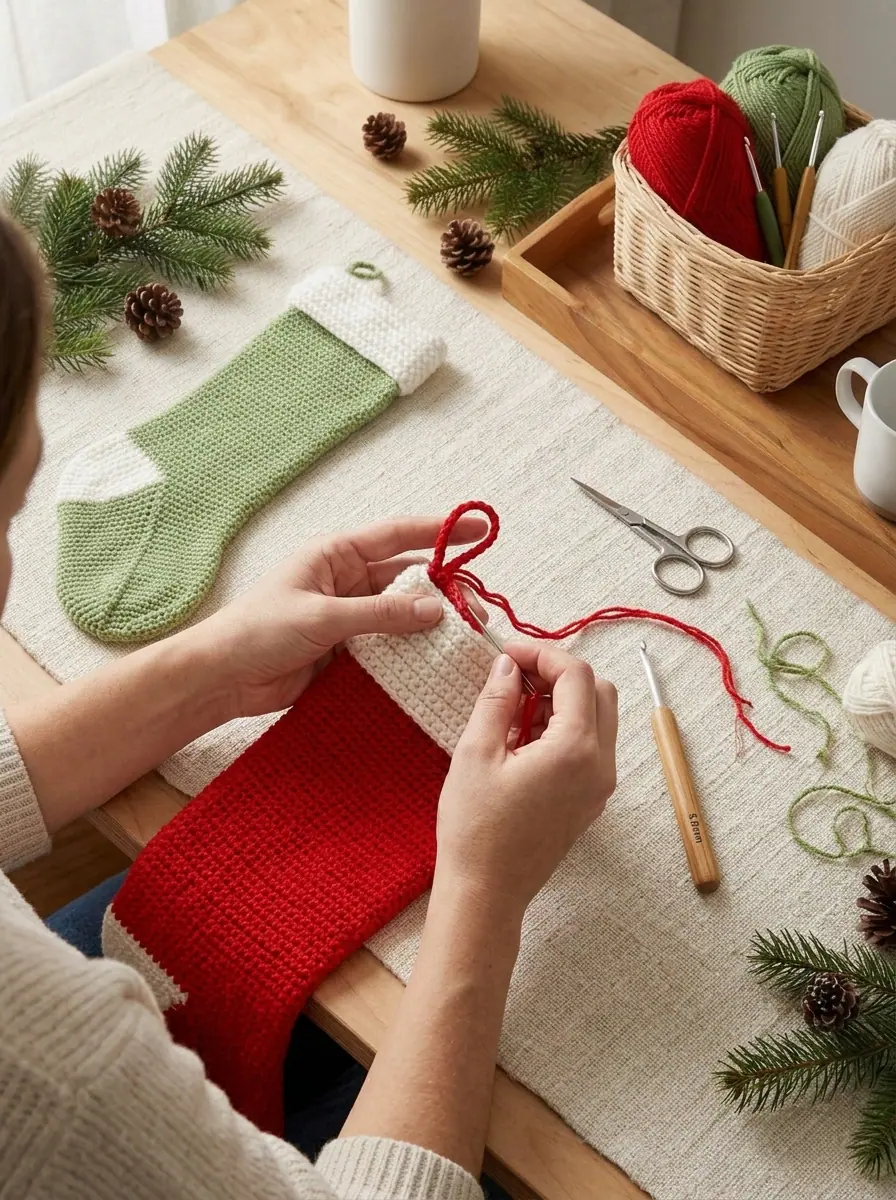
Foot & Gusset Shaping (Worked in Rounds with Contrast A)
Joining Round (RS): With the Right Side facing, join Contrast A with a sl st at the left side of the heel base. Ch 1, then work 1 sc in each of the 23 unworked instep stitches across the front of the stocking; place a stitch marker (PM) in the last instep stitch. Next, work 7 sc evenly up the right side edge of the heel flap, work 1 sc in each of the 15 sts across the shaped heel base, and work 7 sc evenly down the left side edge of the heel flap. Join with a sl st to the first sc. (52 sc total around)
Round 2 (Gusset Decrease Round): Ch 1. Work 1 sc in each sc up to the stitch marker, work sc2tog immediately after the marker, work 1 sc in each sc around to the last 2 sc of the round, and work sc2tog over the final 2 sc. Join with a sl st to the first sc. (2 sts decreased)
Repeat Round 2 on consecutive rounds until 44 stitches remain around the foot.
Even Foot Rounds: Ch 1. Work 1 sc in each sc around (44 sc). Join with a sl st to the first sc. Repeat this even round until the foot measures 5.5 inches (14 cm) from the heel-joining round.
Shape Tapered Toe
Toe Round 1: Ch 1. Work [1 sc in each of next 9 sc, sc2tog] 4 times around. Join with a sl st to first sc. (40 sc)
Toe Round 2: Ch 1. Work [1 sc in each of next 8 sc, sc2tog] 4 times around. Join with a sl st to first sc. (36 sc)
Remaining Toe Rounds: Continue in the same manner—working 1 fewer sc before each sc2tog to decrease 4 stitches on every round—until 12 stitches remain. Break yarn, leaving a long 10-inch tail. Thread the tail onto your tapestry needle, draw it tightly through the remaining 12 stitches to cinch the toe closed, and fasten securely on the inside.
Twisted Cord Hanging Loop
Cut 3 strands of Contrast B yarn, each measuring 16 inches (40.5 cm) long. Hold all 3 strands together and attach one end to a stationary hook (or have a helper hold it taut). Twist the strands tightly to the right until they begin to curl upon themselves. Fold the two ends together and tie them in a secure overhand knot—the folded cord will automatically ply and twist itself into a neat rope. Fold the top 5-inch cuff in half toward the Right Side, and sew the knotted ends of the twisted cord securely to the inside heel-side edge of the stocking cuff.
Personalization & Mantel Styling Ideas
- Surface Slip-Stitch Monograms: Because the main leg is worked in smooth, even single crochet rounds, it acts as a grid for surface crochet! Use your contrasting yarn to surface slip-stitch each family member’s initial on the folded 2.5-inch cuff.
- Pom-Pom & Jingle Bell Ties: Tie a pair of handmade yarn pom-poms or brass jingle bells right at the base of the twisted cord hanging loop for extra holiday movement.
- Lining for Heavy Stocking Stuffers: While tight single crochet at 13 stitches per 4 inches holds its shape wonderfully, you can slip a simple felt stocking insert inside if you plan to fill the toe with heavy jars or oranges.
Yarn Care & Seasonal Storage Instructions
- Washing: Machine wash warm on a gentle cycle (maximum 104°F / 40°C) with like colors (wash cherry red and white stockings in cool water on their first wash to keep the white cuff bright).
- Drying: Tumble dry low or reshape flat on a dry towel, smoothing out the folded BLO cuff.
- Ironing: Do not iron or press directly with a hot iron.
- Storage: Stuff the foot of each stocking lightly with acid-free tissue paper before storing in a lidded holiday bin so the heel and toe keep their rounded silhouette.
✨ PATTERN HELP & TIPS ✨
Got Questions?
Frequently Asked Questions (FAQ)
Click on any question below to reveal the answer
Why do we turn at the end of every round on the cuff, bit not on the leg?
Working single crochet in the back loop only while turning after every round creates reversible horizontal ridges on both sides of the fabric. When you fold the 5-inch cuff down over the outside of the leg, the turned fabric displays crisp, plush ribbing on the outside; once you switch to Contrast A for the leg, working in unturned Right-Side rounds through both loops gives you a smooth, uniform V-stitch exterior.
Why does the pattern leave stitches unworked during the heel rows?
That is the magic of short-row heel shaping! In Row 1 of the heel shaping, you work across the center of the 23 heel stitches, make a sc2tog decrease, work 1 sc, and turn immediately without finishing the row. Each subsequent row works across one additional stitch before the sc2tog decrease, gradually eating up the unworked side stitches and curving the flat flap into a 3D heel pocket with zero sewing required.
Can I make the toe in Contrast B to match the cuff and heel?
Absolutely! In the original pattern, the toe continues seamlessly in Contrast A from the foot tube, which gives the stocking a sleek, elongated look. If you prefer a three-part color-blocked stocking (cuff, heel, and toe all in Contrast B), simply fasten off Contrast A at the end of the 5.5-inch foot tube and join Contrast B right before starting Toe Round 1.
How many stockings can I make from three skeins of Super Saver yarn?
Three 364-yard skeins (one each in Cherry Red, Soft White, and Tea Leaf Green) provide 1,092 yards total—enough to crochet all four family color variations shown in the set with yarn left over for pom-poms and gift tags!
Save This Holiday Crochet Stocking Pattern on Pinterest
Getting ready to stitch a matching set of family Christmas stockings? Save either of the vertical Pinterest reference cards below to your Seasonal & Holiday Crochet board so you have the full short-row heel and ribbed cuff instructions handy.
PREVIOUS PATTERN
Striped Chevron Ripple Crochet Christmas Tree Garland
NEXT PATTERN
Textured Holly Green Crochet Christmas Wreath With Poinsettia Accents

✨ KEEP CROCHETING ✨
You May Also Love
LEAVE A COMMENT
Have a question about a stitch or want to share how your project turned out? Drop a comment below — I read and reply to every maker!