
 Crochet Blankets & Afghans
*This post may contain affiliate links to support the cost of this blog. At no cost to you, I may make a small commission if you purchase through these links. Read our Privacy Policy HERE
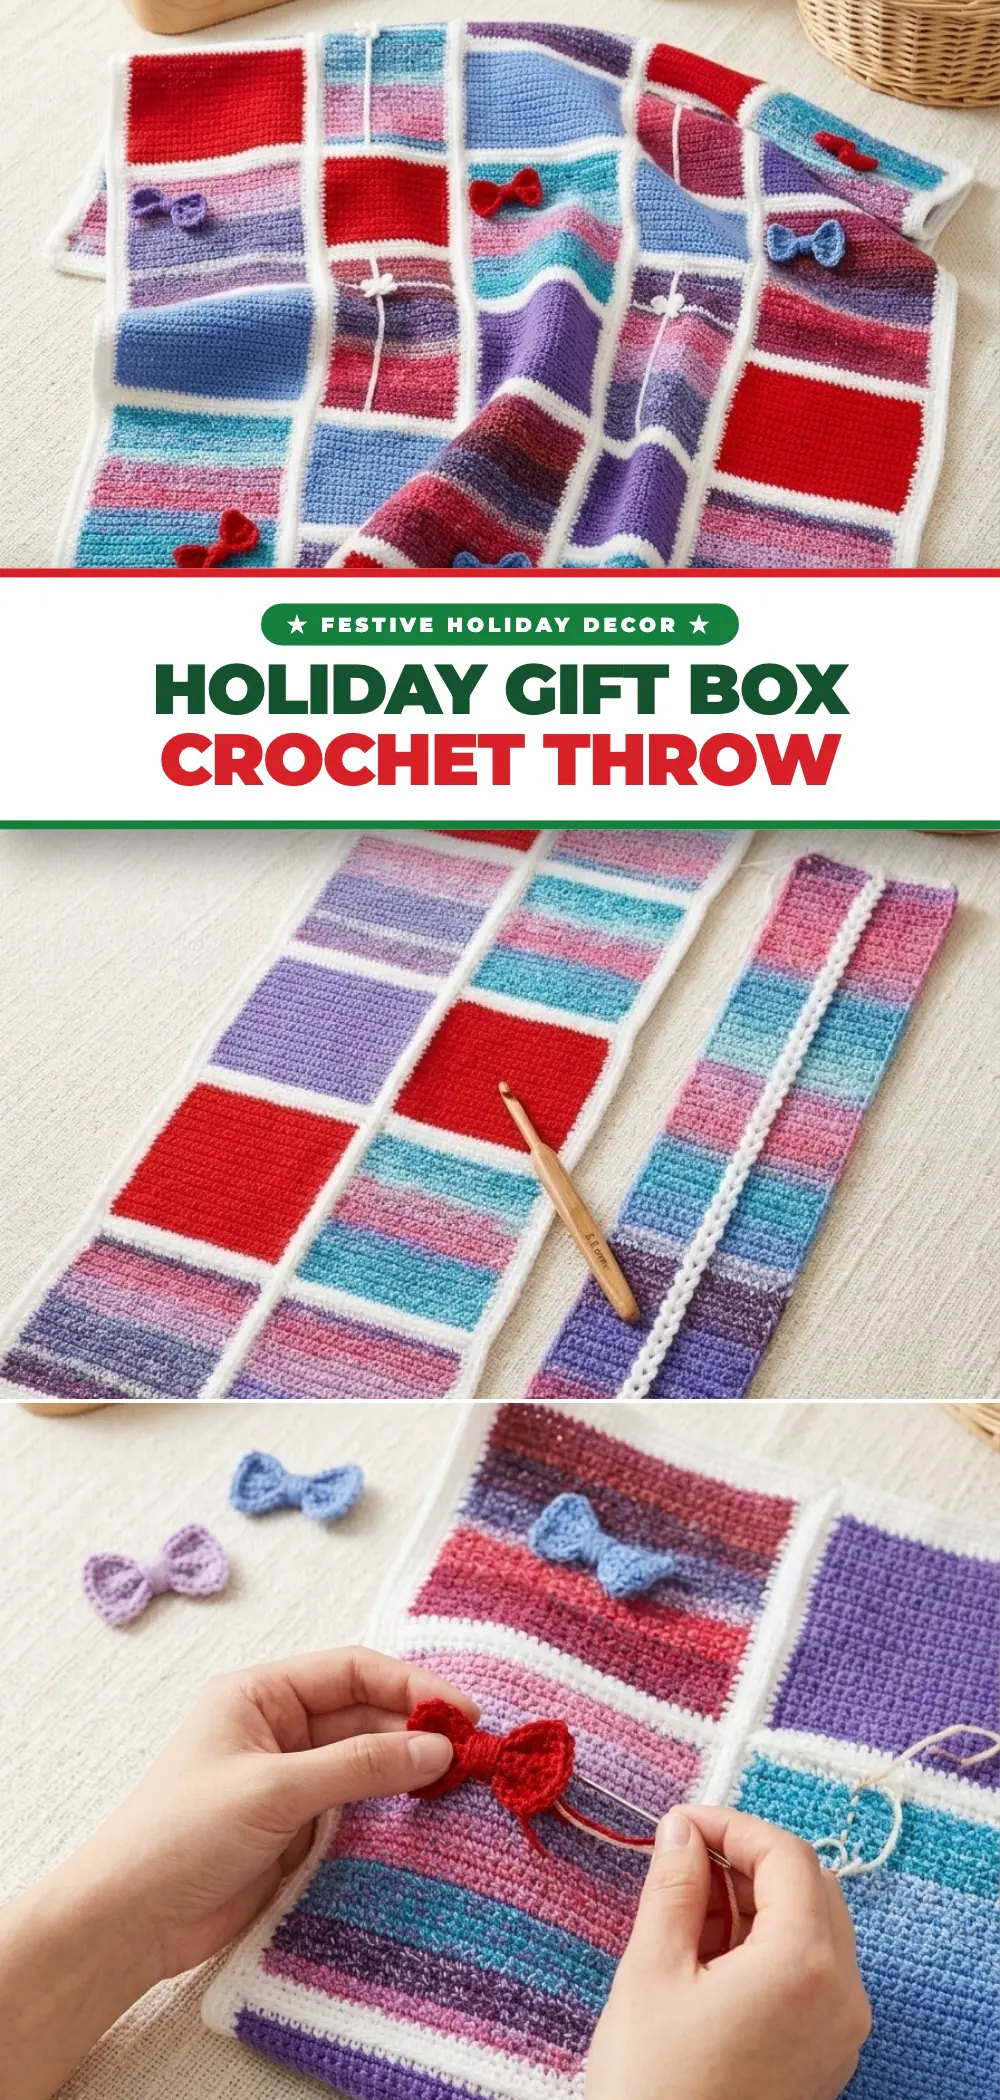
Some blankets are cozy, and some blankets make people smile the second they see them. The Red Heart Crochet Wrapped in Gifts Blanket does both. It looks like a pile of wrapped presents laid side by side: solid boxes in red, periwinkle and lavender, striped boxes in bright self-striping yarn, little white ribbons tied in bows, and chunky crocheted bows sitting on top. Underneath all that charm, it is an easy single crochet blanket made in five long panels. If you are hunting for a crochet Christmas blanket that feels festive without being covered in snowflakes, this is a lovely one to put on your hook.
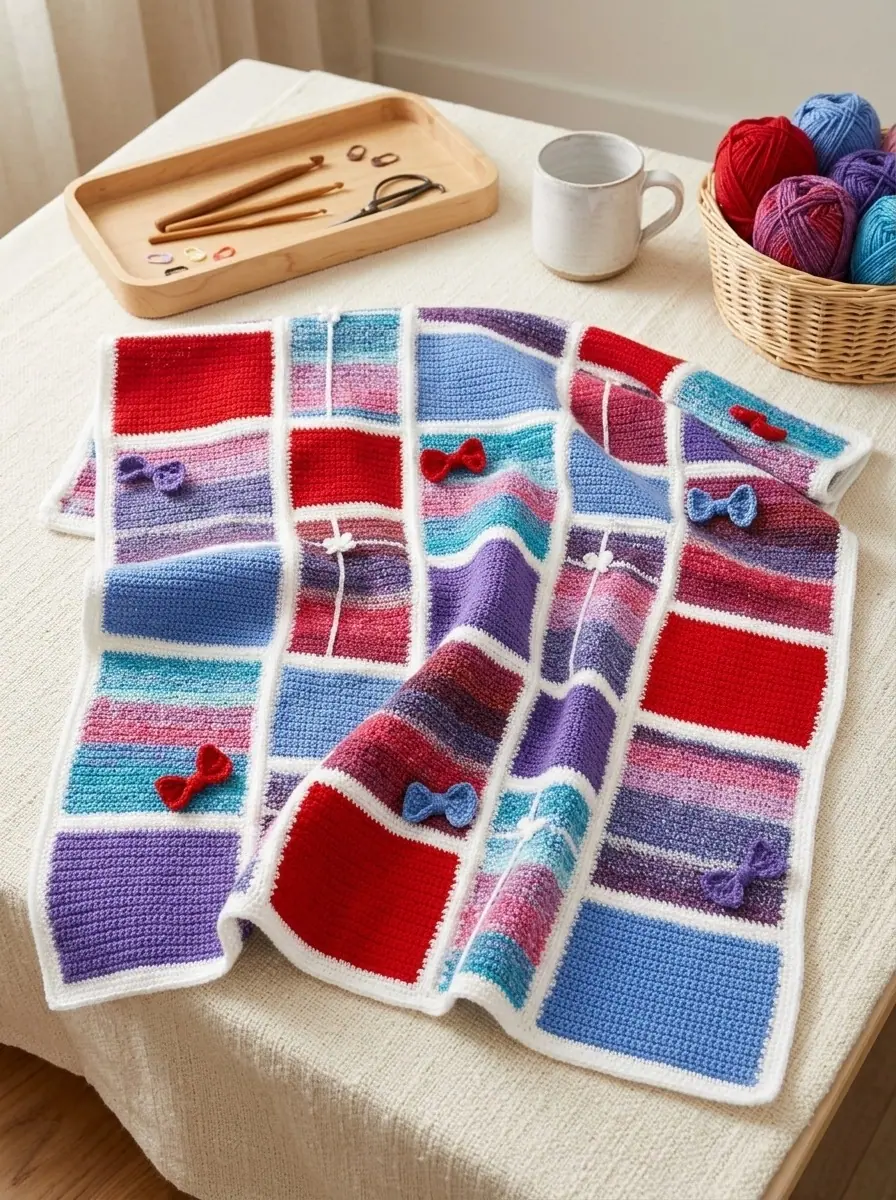
The whole design is built from one stitch. Every panel is plain single crochet worked in rows, and the “gift boxes” are simply blocks of color separated by four rows of white. The ribbon is a clever trick: a column of chain-1 spaces is left in the striped boxes of the thin panels, and later you work a line of surface chain stitches up through those spaces. Add one white row across, tie a little white bow where the lines cross, and the box suddenly looks wrapped.
Pattern Overview
- Pattern Name: Red Heart Crochet Wrapped in Gifts Blanket (Design Ref: RHC0502-38412M)
- Skill Level: Easy
- Finished Size: about 50″ x 60″ [127 x 152.5 cm]
- Yarn: Red Heart Super Saver (Medium #4) for the white and the solids, and Red Heart Bitty Stripes for the striped boxes
- Hook: U.S. I/9 (5.5 mm)
- Gauge: 12 sc and 15 rows = 4″ [10 cm]
- Construction: 3 wide panels and 2 thin panels, edged, joined with a flat slip stitch seam, then bordered and decorated with bows
Table of Contents
Why This Crochet Christmas Blanket Is Easier Than It Looks
When I first saw the photo, I assumed it was made from dozens of separate squares. It is not. There are only five pieces to make, and each one is a long strip worked from bottom to top. That means far fewer ends to weave in than a block blanket, and no joining as you go.
- One stitch for 95% of the work: single crochet rows, back and forth. Perfect for movie nights.
- The colors do the design: you simply change yarn at the row counts given in the stripe sequence. The boxes, the white “gaps” and the ribbons all come from color changes and one column of spaces.
- The bows are tiny projects: the wide bows are 5 rows each and the thin bows are a single row of slip stitches, so they are perfect to make while you relax.
- It works beyond December: red, periwinkle and lavender read as cheerful more than strictly “Christmas,” so it also suits birthdays, a child’s bedroom or a gift for a new baby.
Maker Tip: Make this blanket as a gift and you have an easy crochet gift that literally looks like presents. Fold it with one of the bow panels on top before you wrap it, and the recipient sees the “gifts” first.
Materials & Tools
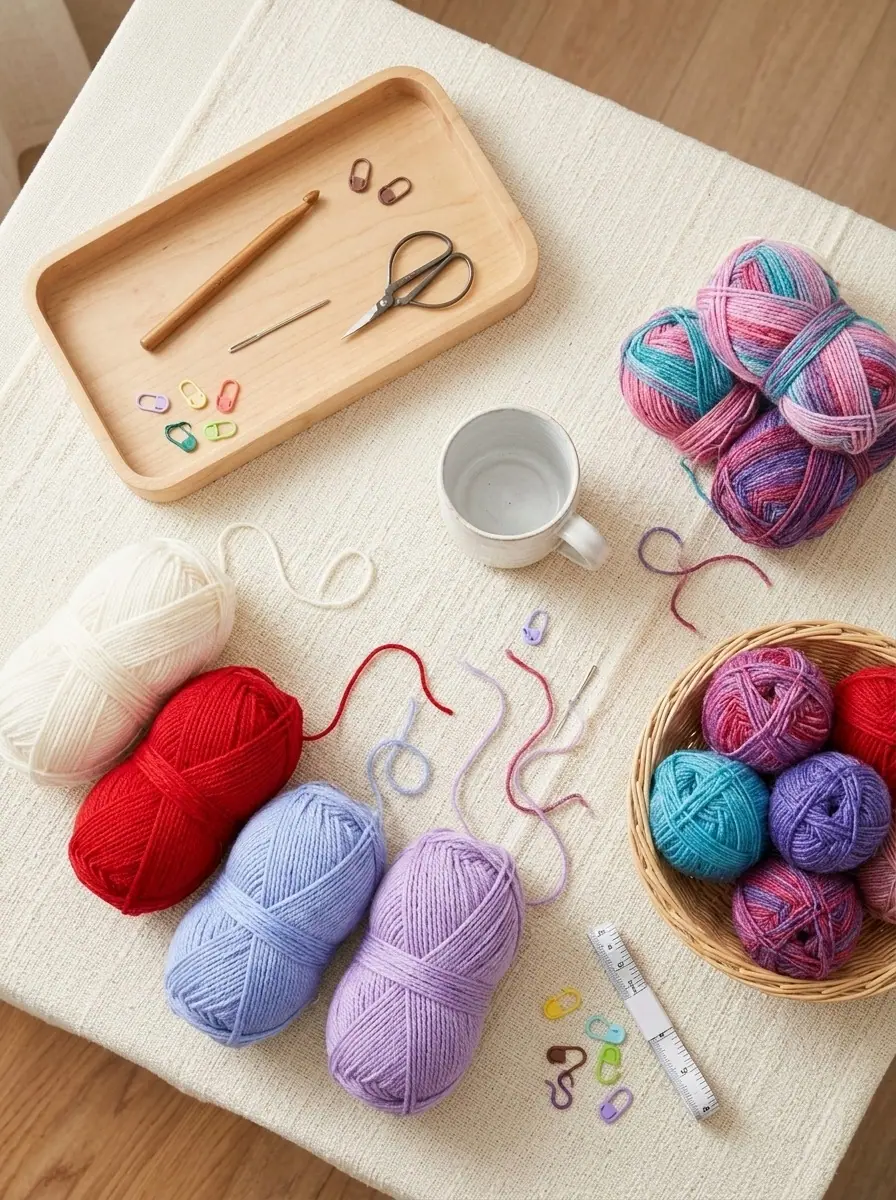
Red Heart Super Saver (7 oz/198 g; 364 yds/333 m):
- Main Color (MC) Soft White (0316): 2 balls or 695 yds/635 m
- Contrast A Light Periwinkle (0347): 1 ball or 262 yds/240 m
- Contrast B Lavender (0358): 1 ball or 262 yds/240 m
- Contrast C Cherry Red (0319): 1 ball or 262 yds/240 m
Red Heart Bitty Stripes (10 oz/283 g; 515 yds/471 m):
- Contrast D Lollies (0112): 1 ball or 367 yds/335 m
- Contrast E Grapey (0114): 1 ball or 367 yds/335 m
- Contrast F Love Bug (0106): 1 ball or 367 yds/335 m
Tools: U.S. I/9 (5.5 mm) crochet hook or the size needed for gauge, a yarn needle, and stitch markers.
Gauge and Measurements
With 218 rows per panel, gauge has a big effect on the final length. At 15 rows to 4 inches, each panel is close to 58 inches long before edging. If your rows are taller, your blanket grows longer and you may run short of white. Crochet a small single crochet swatch first and measure it flat.
| Piece | How Many | Starting Chain | Rows | After Edging |
|---|---|---|---|---|
| Wide Panel | 3 (Panels 1, 2, 3) | Ch 31 (30 sc) | 218 | 424 sc around |
| Thin Panel | 2 (Panels 4, 5) | Ch 22 (20 sc and 1 ch-1 sp) | 218 | 406 sc around |
| Wide Bow | 9 (3 each in A, B, C) | Ch 14 | 5 + center band | Sewn to wide panels |
| Thin Bow | 6 in MC | Ch 25 | 1 row of sl st | Tied at the ribbon crossings |
Abbreviations
- Ch: chain
- Hdc: half double crochet
- PM: place marker
- Rnd(s): round(s)
- RS / WS: right side / wrong side
- Sc: single crochet
- Sc2tog: draw up a loop in each of the next 2 stitches, yarn over and draw through all loops on the hook
- Sl st: slip stitch
- Sp(s): space(s)
✨ FREE CROCHET EBOOK ✨
Master Gauge & Blocking
Get Our Free Crochet Ebook!
Download The Ultimate Stitch, Gauge & Blocking Guide — packed with printable stitch charts, tension secrets, and step-by-step tutorials delivered straight to your inbox.
🔒 100% Free Instant PDF Download • Unsubscribe anytime
Step-by-Step Instructions
Step 1: The Wide Panels (make 3)
Each wide panel uses its own color order. Use this table to know which yarn is “Color 1” to “Color 6” for each panel:
| Stripe Pattern 1 | Panel 1 | Panel 2 | Panel 3 |
|---|---|---|---|
| Color 1 (26 rows) | B Lavender | C Cherry Red | A Light Periwinkle |
| Color 2 (40 rows) | D Lollies | F Love Bug | E Grapey |
| Color 3 (26 rows) | A Light Periwinkle | B Lavender | C Cherry Red |
| Color 4 (40 rows) | E Grapey | D Lollies | F Love Bug |
| Color 5 (26 rows) | C Cherry Red | A Light Periwinkle | B Lavender |
| Color 6 (40 rows) | F Love Bug | E Grapey | D Lollies |
Stripe Pattern 1 (218 rows): 26 rows Color 1, 4 rows MC, 40 rows Color 2, 4 rows MC, 26 rows Color 3, 4 rows MC, 40 rows Color 4, 4 rows MC, 26 rows Color 5, 4 rows MC, 40 rows Color 6.
- Start: With Color 1, ch 31.
- Row 1 (RS): 1 sc in the 2nd ch from the hook, 1 sc in each ch to the end. Turn. (30 sc)
- Row 2: Ch 1, 1 sc in each sc to the end. Turn.
- The first 2 rows of Stripe Pattern 1 are done. Repeat Row 2, changing colors as the stripe pattern says, until all 218 rows are complete. Fasten off.
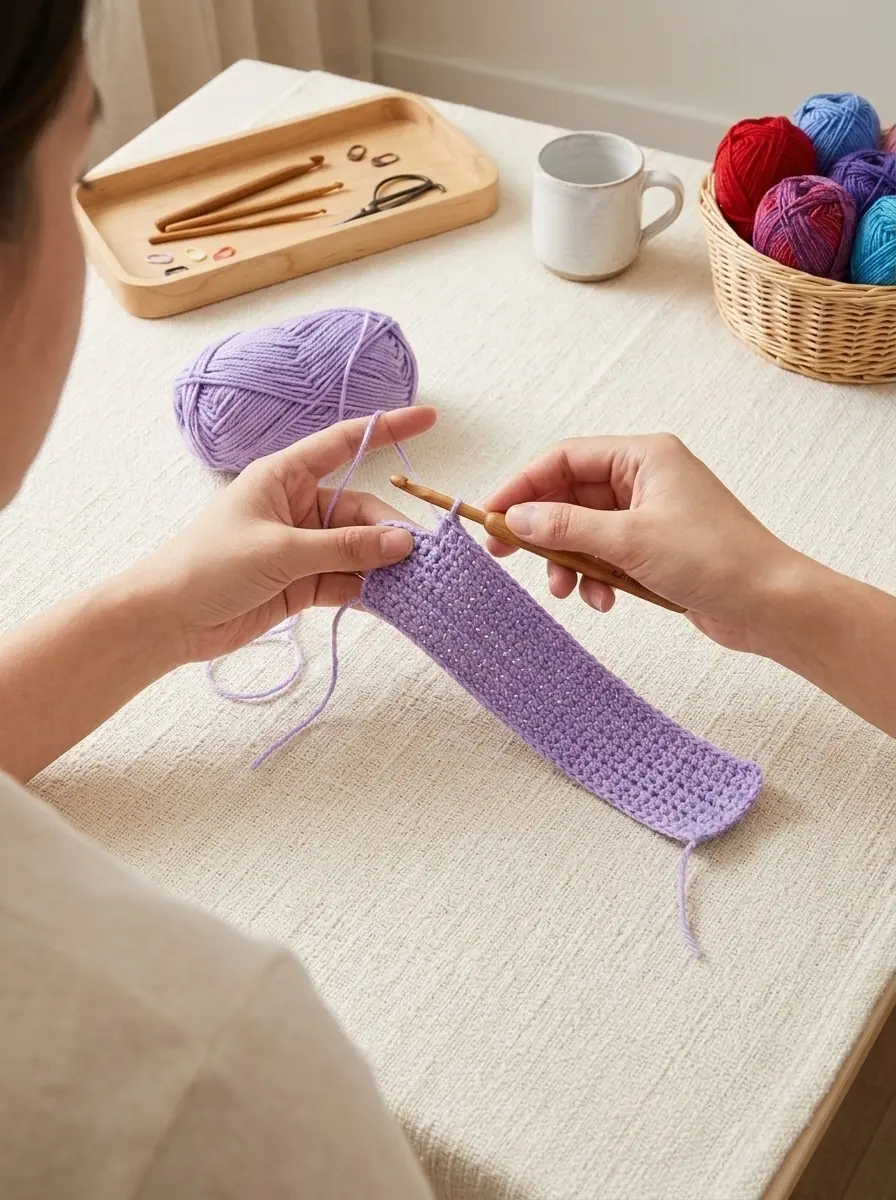
Wide Panel Edging: With RS facing, join MC with a sl st in the top right corner.
- Rnd 1: Ch 1, 2 sc in the same sp as the sl st, PM in the first sc. 1 sc in each of the next 28 sc. 3 sc in the next sc, PM in the center sc. Work 174 sc evenly down the side edge. Working in the remaining loops of the foundation ch, 3 sc in the next ch, PM in the center sc. 1 sc in each of the next 28 ch. 3 sc in the next ch, PM in the center sc. Work 174 sc evenly up the side. 1 sc in the same sp as the sl st. Join. (416 sc)
- Rnd 2: Ch 1, 2 sc in the first sc, PM in the first sc. [1 sc in each sc to the next marked sc, 3 sc in the marked st, move the marker to the center sc of the 3] 3 times. 1 sc in each sc to the end, 1 sc in the same sp as the first sc. Join. (424 sc) Fasten off.
Maker Tip: “174 sc evenly” along 218 rows means you skip roughly one row in every five. Fold the side edge into quarters and mark each quarter. Then aim for about 43 to 44 stitches per section, and both long sides will match.
Step 2: The Thin Panels with Ribbons (make 2)
| Stripe Pattern 2 | Panel 4 | Panel 5 |
|---|---|---|
| Color 1 | E Grapey | D Lollies |
| Color 2 | A Light Periwinkle | B Lavender |
| Color 3 | F Love Bug | E Grapey |
| Color 4 | C Cherry Red | A Light Periwinkle |
| Color 5 | D Lollies | F Love Bug |
| Color 6 | B Lavender | C Cherry Red |
Stripe Pattern 2 (218 rows): 33 rows Color 1, 1 row MC, 10 rows Color 1, 4 rows MC, 22 rows Color 2, 4 rows MC, 33 rows Color 3, 1 row MC, 10 rows Color 3, 4 rows MC, 22 rows Color 4, 4 rows MC, 33 rows Color 5, 1 row MC, 10 rows Color 5, 4 rows MC, 22 rows Color 6.
The single MC row inside each striped box becomes the horizontal ribbon. The vertical ribbon comes from a column of ch-1 spaces:
- Start: With Color 1, ch 22.
- Row 1 (RS): 1 sc in the 2nd ch from the hook, 1 sc in each of the next 12 ch. Ch 1, skip the next ch. 1 sc in each of the last 7 ch. Turn. (20 sc and 1 ch-1 sp)
- Row 2: Ch 1, 1 sc in each sc to the ch-1 sp, ch 1, skip the ch-1 sp, 1 sc in each sc to the end. Turn.
- Repeat Row 2, following the stripe pattern, until the first 44 rows are complete. A stitch marker on the ch-1 sp helps while you work the striped yarn.
- Row 45: With MC, ch 1, 1 sc in each sc to the ch-1 sp, 1 sc in the ch-1 sp, 1 sc in each sc to the end. Turn. (21 sc)
- Row 46: Ch 1, 1 sc in each sc to the end. Turn. Repeat Row 46 until 74 rows are complete.
- Row 75: Ch 1, 1 sc in each of the first 13 sc, ch 1, skip the next sc, 1 sc in each sc to the end. Turn.
- Rows 76 to 118: Ch 1, 1 sc in each sc to the ch-1 sp, ch 1, skip the ch-1 sp, 1 sc in each sc to the end. Turn.
- Row 119: Ch 1, 1 sc in each sc to the ch-1 sp, 1 sc in the ch-1 sp, 1 sc in each sc to the end. Turn.
- Rows 120 to 148: Ch 1, 1 sc in each sc to the end. Turn.
- Row 149: As Row 75. Rows 150 to 192: As Row 76. Row 193: As Row 119. Rows 194 to 218: As Row 120. Fasten off.
Surface chain ribbons: With RS facing, join MC with a sl st to the first ch-1 sp of the foundation row. Keep the loop at the height of one row. Working straight up, insert the hook in the ch-1 sp of the next row, yarn over and draw up a loop through the loop on the hook. Continue in chains up the first 44 rows, then fasten off. Repeat for the other two columns of ch-1 sps.
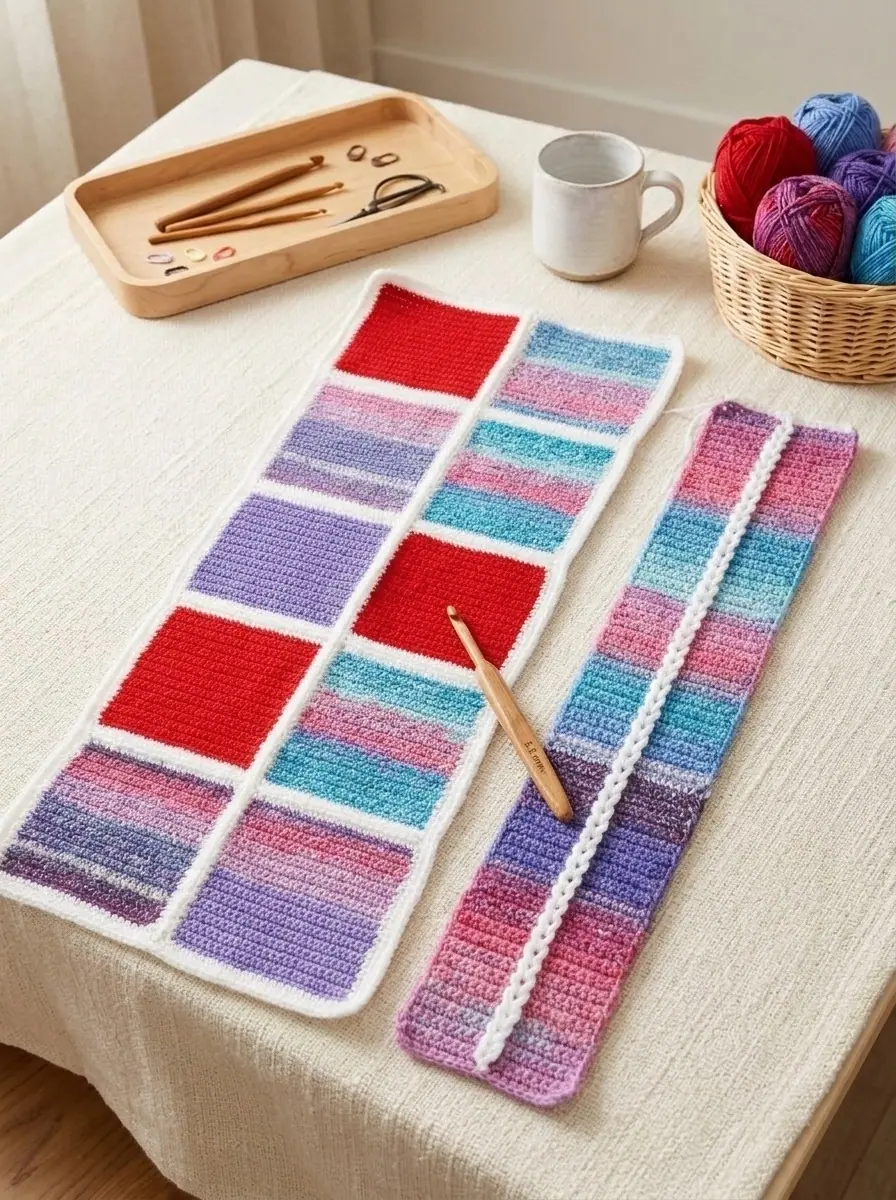
Thin Panel Edging: Work as for the wide panel, but with 19 sc across the top and the bottom instead of 28. Rnd 1 ends with 398 sc and Rnd 2 with 406 sc. Fasten off.
Would you like to save this pattern?
Enter your email and we will send you a link to the Wrapped in Gifts Blanket, so you can come back to the stripe tables and row counts anytime.
Step 3: Join the Panels and Add the Border
Flat slip stitch join: With RS facing and MC, slip stitch the panels together following the assembly diagram in the pattern, alternating wide and thin panels. Work through the back loops only and keep the working yarn on the WS, so only a flat chain of slip stitches shows on the front.
Border: With RS facing, join MC with a sl st to the marked stitch at the top right corner of the blanket (top right corner of Panel 3).
- Rnd 1: Ch 1, 2 sc in the same sp, PM in the first sc. [1 sc in each st to the next marked st, sc2tog over the next 2 marked sts] 4 times. [1 sc in each st to the next marked st, 3 sc in the next sc, PM in the center sc] twice. [1 sc in each st to the next marked st, sc2tog over the next 2 marked sts] 4 more times. 1 sc in each st to the next marked st, 3 sc in the next sc, PM in the center sc. 1 sc in each sc to the end, 1 sc in the same sp as the sl st. Join. (660 sts)
- Rnd 2: Ch 1, 2 sc in the first st, PM in the first sc. [1 sc in each st to the next marked st, 3 sc in the marked st] 3 times. 1 sc in each st to the end, 1 sc in the same sp as the first sc. Join. (668 sc) Fasten off.
The sc2tog in Rnd 1 sits exactly where two panel corners meet along the top and bottom edges. It stops the border from rippling at each seam.
Step 4: Make and Sew On the Bows
Thin Bow (make 6 in MC): Ch 25. Working into the back bumps of the chain, 1 sl st in the 2nd ch from the hook and in each ch to the end. Fasten off.
Wide Bow (make 9: 3 each in A, B and C): The ch 2 at the start of a row does not count as a stitch.
- Ch 14.
- Row 1: 1 hdc in the 3rd ch from the hook, 1 hdc in each of the next 2 ch, 1 sc in each of the next 6 ch, 1 hdc in each of the last 3 ch. Turn. (6 sc and 6 hdc)
- Rows 2 to 5: Ch 2, 1 hdc in each of the first 3 hdc, 1 sc in each of the next 6 sc, 1 hdc in each of the last 3 hdc. Turn. Fasten off after Row 5.
- Center band: Ch 6. Row 1: 1 sc in the 2nd ch from the hook and in each ch to the end. Turn. (5 sc) Rows 2 and 3: Ch 1, 1 sc in each sc. Turn. Fasten off, leaving a long tail.
- Turn the band so the rows run vertically, fold it around the middle of the wide bow, pinching the bow to fit, and sew the two ends of the band together. Keep the long tails for sewing the bow to the blanket.
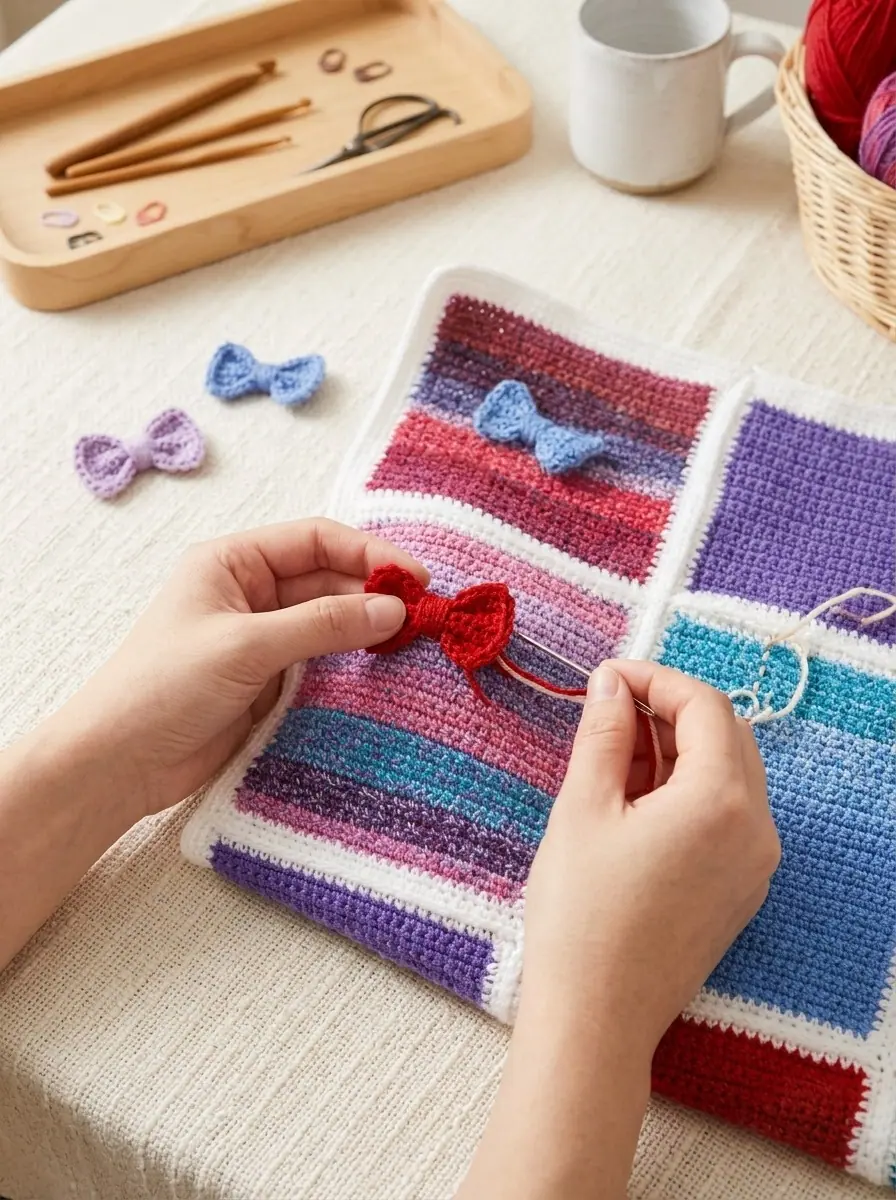
Finishing: Fold each thin bow into a bow shape as shown in the pattern diagram. With MC, sew the thin bows onto Panels 4 and 5 where the surface chain ribbon crosses the single MC row, wrapping around the bow where it overlaps to form a knot. Then sew the wide bows onto Panels 1, 2 and 3 with their long tails.
Yarn Care & Washing
The official care directions for this project’s yarn: machine wash in warm water on a gentle cycle, tumble dry on low, do not bleach and do not iron. The yarn can also be dry-cleaned.
Because the bows are sewn on, I like to turn the blanket inside out or put it in a large laundry bag before washing. This helps the bows keep their shape. Check that all the bows are still firmly attached before the blanket goes to a small child.
More Cozy Crochet Patterns to Try Next
- Red Heart Crochet Christmas Tree Duo: two stuffed button trees for your mantel.
- Red Heart Christmas at Granny’s Blanket: another festive throw for the holidays.
✨ PATTERN HELP & TIPS ✨
Got Questions?
Frequently Asked Questions
Click on any question below to reveal the answer
Can I make the blanket smaller, for a baby or a lap?
Yes. The easiest way is to make fewer boxes per panel: stop the stripe pattern after two or four boxes instead of six. Your edging stitch counts will change, so work the sides “evenly” instead of 174 stitches, keeping roughly 4 stitches for every 5 rows.
Do I have to use Bitty Stripes?
No, but it is what makes the striped boxes look like wrapping paper. Any worsted weight self-striping yarn with short color changes will give a similar effect. Check its yardage, because the pattern needs about 367 yards of each striping color.
How do I stop the edges of the panels from waving?
If the sides ruffle, you have too many stitches; if they pull in, you have too few. Use the quarter-marker tip above, and make sure both wide-panel sides end with exactly 174 stitches so the panels line up when you join them.
Pin This Crochet Christmas Blanket for Later!
Save one of the pins below to your holiday crochet board so you can find the stripe tables when you are ready to start:
PREVIOUS PATTERN
Layered Daisy Petal Round Cotton Crochet Kitchen Dishcloth
NEXT PATTERN
Corner-to-Corner Geometric Quilt Block Crochet Cushion Cover
✨ KEEP CROCHETING ✨
You May Also Love
LEAVE A COMMENT
Have a question about a stitch or want to share how your project turned out? Drop a comment below — I read and reply to every maker!