
 Seasonal & Holiday Crochet
*This post may contain affiliate links to support the cost of this blog. At no cost to you, I may make a small commission if you purchase through these links. Read our Privacy Policy HERE
When snow starts falling outside, nothing transforms a living room into a festive winter retreat quite like a statement handmade blanket draped across the sofa. This Two-Layer Overlay Motif Crochet Christmas Snowflake Throw Blanket reimagines the traditional holiday granny square by working twelve 8.5-inch motifs in two interlocking layers—floating a crisp Eggshell snow-white six-point snowflake right on top of rich Holly Berry crimson red, warm Pewter charcoal grey, and festive Hot Pink backgrounds without ever cutting the yarn between rounds. Framed by a 24-round striped border featuring four-double-crochet popcorn stitches and classic three-double-crochet granny clusters, the finished throw measures a generous 41 inches wide by 50 inches long (104 x 127 cm).
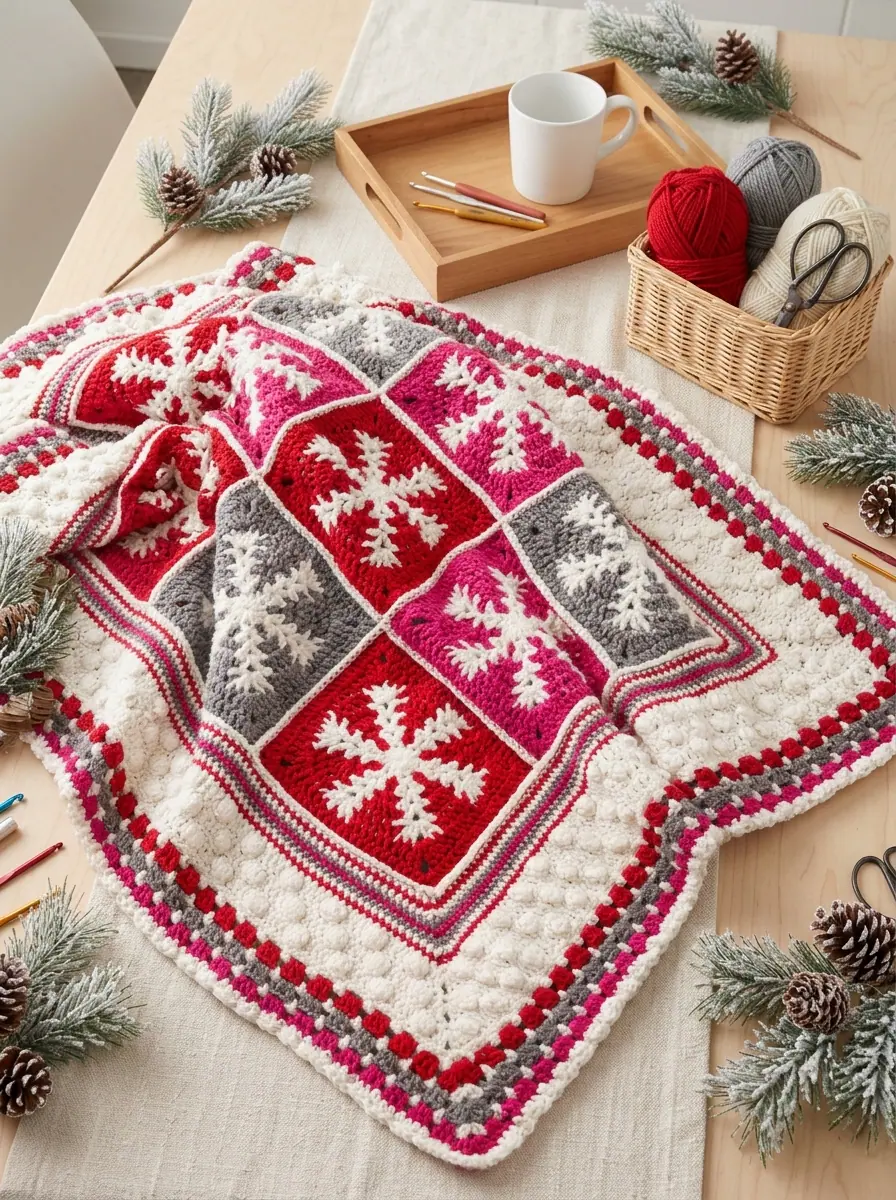
What makes this intermediate holiday throw so rewarding to crochet is the ingenious two-layer technique. Instead of weaving in dozens of color-change tails on every round, you simply drop the active working loop to the front (for the Eggshell snowflake top layer) or to the back (for the colored background bottom layer) and pick up the waiting loop of the opposite layer. By periodically working stitches over the chain spaces of the other layer, the snow-white motif and solid background lock together seamlessly before Round 10 squares off the circle into a crisp 23-stitch-per-side block.
Pattern Overview
- Skill Level: Intermediate (two-layer alternating round construction, working over chain spaces, and 4-dc popcorn border stitches)
- Finished Measurements: 41 inches wide x 50 inches long (104 x 127 cm)
- Motif Dimensions & Gauge: 1 finished square = 8.5 inches (21.5 cm); 12 sts and 7 rows = 4 inches (10 cm) in double crochet
- Construction Method: 12 two-layer circular-to-square motifs (6 of Square 1 + 6 of Square 2) joined in a 3 x 4 grid with BLO/FLO single crochet seams, finished with a 24-round textured border
- Recommended Hook: 6.0 mm (US J-10) crochet hook (or size needed to obtain gauge)
- Yarn Weight: Medium Worsted Weight (#4) Acrylic Yarn in 4 festive winter shades
Table of Contents
- Original Festive Snowflake Color Palette & Motif Breakdown
- Gauge, Square Count & Throw Dimensions Table
- Stitch Abbreviations, Special Stitches & Two-Layer Rules (US Terms)
- Step-by-Step Crochet Christmas Snowflake Throw Instructions
- Yarn Care & Blocking Tips for Overlay Motifs
- Frequently Asked Questions (FAQ)
- Save This Holiday Crochet Snowflake Throw Pattern on Pinterest
Original Festive Snowflake Color Palette & Motif Breakdown
The throw is assembled from 12 total squares arranged in 3 columns by 4 rows. There are two subtle snowflake center variations—Square 1 (featuring V-stitch spokes in Round 5) and Square 2 (featuring single double crochet spokes in Round 5)—and you will make 6 of each variation across the four original worsted-weight shades:
- Color A (Snowflake Top Layer & Border Base — Eggshell 1101): Used for the top snowflake layer on all 12 squares, plus the popcorn border rounds and eyelet mesh rounds.
- Color B (Square Background 1 — Holly Berry Red 1909): Used for the bottom layer of 4 squares (2 of Square 1 + 2 of Square 2) and accent stripes in the border.
- Color C (Square Background 2 — Pewter Charcoal Grey 1401): Used for the bottom layer of 4 squares (2 of Square 1 + 2 of Square 2) and border cluster rounds.
- Color D (Square Background 3 — Festive Hot Pink 1701): Used for the bottom layer of 4 squares (2 of Square 1 + 2 of Square 2) and outer border highlights.
Materials & Tools Needed
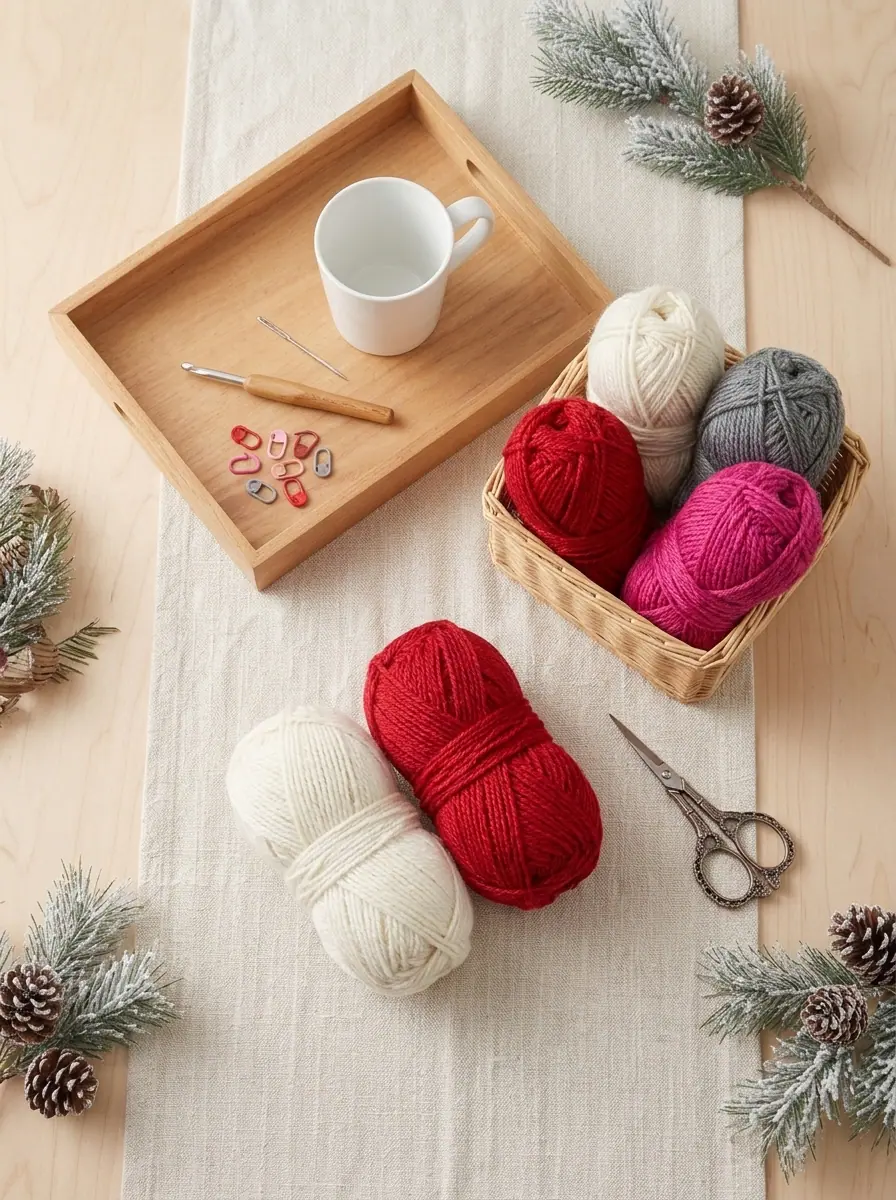
- Medium Worsted Weight (#4) 100% Acrylic Yarn (7 oz / 198 g, 370 yds / 338 m per solid skein):
- Color A (Eggshell 1101 — Creamy Snow White): 2 skeins (approx. 680 yds / 622 m)
- Color B (Holly Berry 1909 — Christmas Crimson Red): 1 skein (approx. 340 yds / 310 m)
- Color C (Pewter 1401 — Warm Winter Charcoal Grey): 1 skein (approx. 340 yds / 310 m)
- Color D (Hot Pink 1701 — Bright Berry Magenta): 1 skein (approx. 340 yds / 310 m)
- Crochet Hook: 6.0 mm (US J-10) ergonomic crochet hook
- Notions: Locking stitch markers (helpful for holding dropped loops between top and bottom layer rounds so they never unravel), blunt-tip yarn needle, tape measure, and sharp scissors
Gauge, Square Count & Throw Dimensions Table
Before crocheting all twelve motifs, work your first Square 1 through Round 11 and measure it flat. Blocking or adjusting hook size so each square measures exactly 8.5 inches (21.5 cm) guarantees your finished throw will reach the full 41 x 50 inch dimension.
| Throw Component | Stitch / Motif Count | Finished Measurement |
|---|---|---|
| Square 1 Motifs (V-Spoke Snowflake) | 6 squares (2 A+B, 2 A+C, 2 A+D) — 23 dc per side | 8.5 x 8.5 inches (21.5 x 21.5 cm) each |
| Square 2 Motifs (Single-Spoke Snowflake) | 6 squares (2 A+B, 2 A+C, 2 A+D) — 23 dc per side | 8.5 x 8.5 inches (21.5 x 21.5 cm) each |
| Joined 3 x 4 Motif Center Panel | 75 sc horizontal seams / 100 sc vertical seams | 25.5 x 34 inches (65 x 86.5 cm) before border |
| 24-Round Popcorn & Granny Cluster Border | Rounds 1–24 ending at 580 sc + picot-style edge | Adds approx. 7.75 inches (19.5 cm) on all 4 sides |
| Completed Snowflake Throw Blanket | 12 joined squares + 24 border rounds | 41 inches wide x 50 inches long (104 x 127 cm) |
Stitch Abbreviations, Special Stitches & Two-Layer Rules (US Terms)
All instructions are written in standard US crochet terminology:
- A, B, C, D: Color A (Eggshell), Color B (Holly Berry), Color C (Pewter), Color D (Hot Pink)
- ch: chain(s)
- dc: double crochet
- dc/hdctog: double crochet / half double crochet decrease (see Special Stitches below)
- hdc: half double crochet
- pop: 4-dc popcorn stitch (see Special Stitches below)
- sc: single crochet
- sl st: slip stitch
- sp(s): space(s)
- st(s): stitch(es)
- tr: treble (triple) crochet
- [ … ]: work directions inside brackets the number of times specified
- ( … ): work directions inside parentheses into the same stitch or space
Special Stitches & Essential Two-Layer Technique
Popcorn Stitch (pop): Work 4 dc in the indicated stitch, drop the active loop from your hook, insert your hook from front to back into the top of the first dc of that 4-dc group, place the dropped loop back on your hook, and draw it through to pop the cluster forward.
Double Crochet / Half Double Crochet Decrease (dc/hdctog): Yarn over, insert hook in next stitch, yarn over and pull up a loop (3 loops on hook), yarn over and draw through 2 loops; yarn over, insert hook in next stitch, yarn over and pull up a loop (4 loops on hook), yarn over and draw through all 4 loops on hook.
Standing Single Crochet Join (Join with sc): Place a slip knot on your hook, insert hook in the indicated stitch or space, yarn over and draw up a loop (2 loops on hook), yarn over and draw through both loops.
How the Two-Layer Overlay Construction Works: Each square consists of a Top Layer (Color A) and a Bottom Layer (Color B, C, or D), switching colors at the end of every round from Rounds 1 through 9. Never cut the yarn between rounds! Instead, pull up an enlarged loop at the end of the round (and clip a locking stitch marker onto it if desired). Always keep the dropped Color A loop on the front of the motif and the dropped 2nd-color loop on the back of the motif. Stitches of each layer are worked into the stitches of the previous round of the same color layer. When instructed to work “over” a ch-space in the other layer (which locks the two layers together):
• When working the Bottom Layer: Insert your hook through the corresponding ch-space of the Top Layer first, and then into the indicated stitch of the Bottom Layer.
• When working the Top Layer: Insert your hook into the indicated stitch of the Top Layer first, and then through the corresponding ch-space of the Bottom Layer.
Step-by-Step Crochet Christmas Snowflake Throw Instructions
General Ch-3 Rule: Throughout this pattern, the beginning ch 3 counts as the first double crochet unless otherwise noted.
Step 1: Crocheting Square 1 & Square 2 Two-Layer Snowflake Motifs
You will crochet 6 motifs of Square 1 (2 with A & B, 2 with A & C, and 2 with A & D) and 6 motifs of Square 2 (2 with A & B, 2 with A & C, and 2 with A & D).
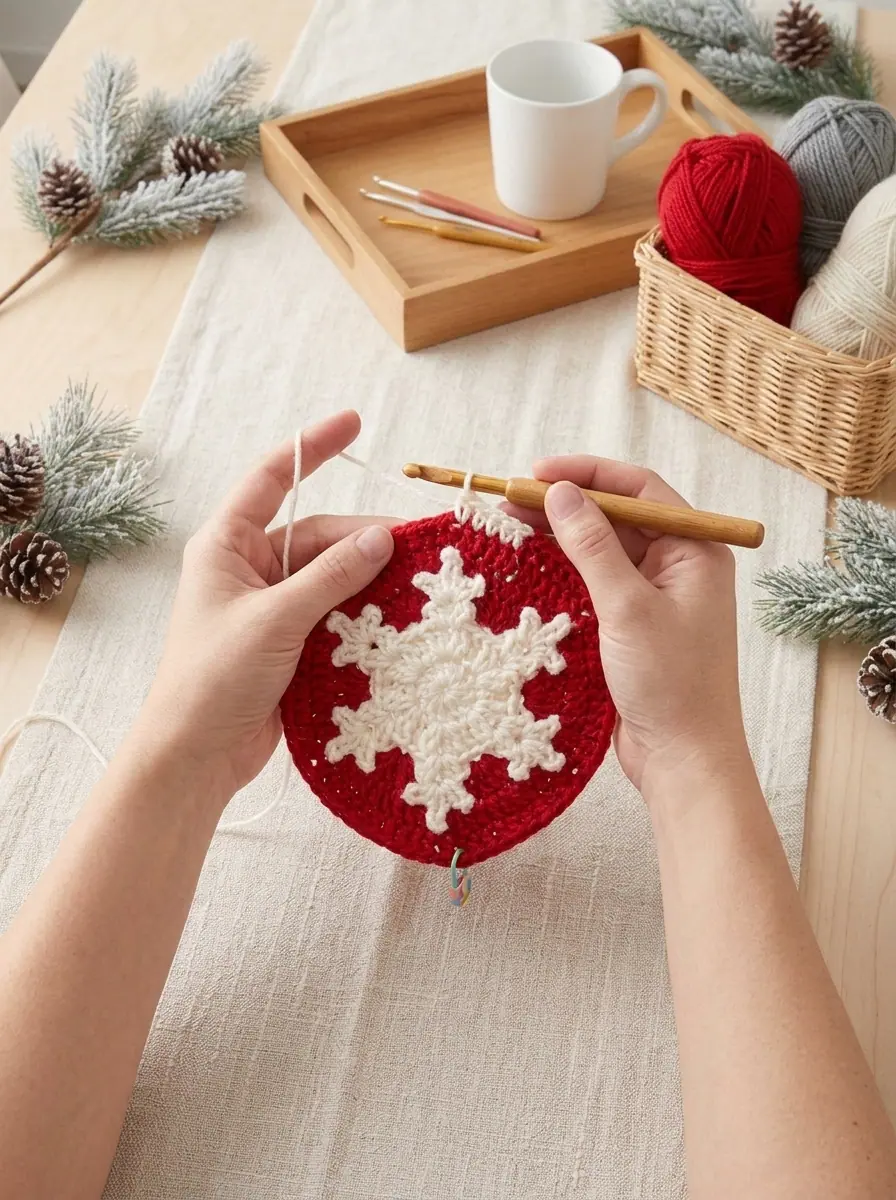
Square 1 Instructions (Make 6 — 2 each with A & B, A & C, and A & D)
With Color A, ch 4; join with a sl st in the first ch to form a ring.
Round 1 (Right Side — Top Layer, Color A): Ch 3 (counts as first dc here and throughout), work 11 dc in ring; join with a sl st in top of beginning ch-3. Remove loop from hook, enlarge it slightly (or place on a stitch marker), and keep dropped A loop in front of piece. (12 dc with A)
Round 2 (Bottom Layer, 2nd Color): Join 2nd color (B, C, or D) with a sl st in the next st of Round 1 (immediately following the join). Ch 3, work 2 dc in the same st, work [ch 1, skip next st, 3 dc in next st] 5 times, ch 1; join with a sl st in top of beginning ch-3. Remove loop from hook and keep dropped 2nd-color loop behind piece. (18 dc and 6 ch-1 spaces with 2nd color)
Round 3 (Top Layer, Color A): Return A loop to hook. Working in front of piece and into the skipped stitches of Round 1, ch 4 (counts as first dc + ch 1), dc in same st as join, work [ch 2, (dc, ch 1, dc) in next skipped st of Round 1] 5 times, ch 2; join with a sl st in 3rd ch of beginning ch-4. Drop A loop to front of piece. (12 dc, 6 ch-1 spaces, and 6 ch-2 spaces with A)
Round 4 (Bottom Layer, 2nd Color): Return 2nd-color loop to hook. Working behind piece and into Round 2 sts, ch 3; work [working over A ch-2 space, 2 dc in next dc; working behind A, dc in next dc, ch 2, dc in next dc] 5 times; working over A ch-2 space, work 2 dc in next dc; working behind A, dc in last dc, ch 2; join with a sl st in top of beginning ch-3. Drop 2nd-color loop to back. (24 dc and 6 ch-2 spaces with 2nd color)
Round 5 (Top Layer, Color A): Return A loop to hook. Working in front of piece and into Round 3 sts, and working over each ch-2 space of the 2nd color, work (sl st, ch 4, dc) in first ch-1 space, work [ch 4, (dc, ch 1, dc) in next ch-1 space] 5 times, ch 4; join with a sl st in 3rd ch of beginning ch-4. Drop A loop to front. (12 dc, 6 ch-1 spaces, and 6 ch-4 spaces with A)
Round 6 (Bottom Layer, 2nd Color): Return 2nd-color loop to hook. Working behind piece and into Round 4 sts, ch 3; work [working over A ch-4 space, 2 dc in each of next 2 dc; working behind A, dc in next dc, ch 2, dc in next dc] 5 times; working over A ch-4 space, work 2 dc in each of next 2 dc; working behind A, dc in last dc, ch 2; join with a sl st in top of beginning ch-3. Drop 2nd-color loop to back. (36 dc and 6 ch-2 spaces with 2nd color)
Round 7 (Top Layer, Color A): Return A loop to hook. Working in front of piece and into Round 5 sts, and working over each ch-2 space of the 2nd color, work (sl st, ch 4, dc) in first ch-1 space, work [ch 6, (dc, ch 1, dc) in next ch-1 space] 5 times, ch 6; join with a sl st in 3rd ch of beginning ch-4. Drop A loop to front. (12 dc, 6 ch-1 spaces, and 6 ch-6 spaces with A)
Round 8 (Bottom Layer, 2nd Color): Return 2nd-color loop to hook. Working behind piece and into Round 6 sts, ch 3; work [working over A ch-6 space, dc in each of next 4 dc; working behind A, dc in next dc, ch 5, dc in next dc] 5 times; working over A ch-6 space, dc in each of next 4 dc; working behind A, dc in last dc, ch 5; join with a sl st in top of beginning ch-3. Drop 2nd-color loop to back. (36 dc and 6 ch-5 spaces with 2nd color)
Round 9 (Top Layer, Color A): Return A loop to hook. Working in front of piece and into Round 7 sts, and working over each ch-5 space of the 2nd color, work (sl st, ch 3, dc, ch 1, 2 dc) in first ch-1 space, work [ch 6, (2 dc, ch 1, 2 dc) in next ch-1 space] 5 times, ch 6; join with a sl st in top of beginning ch-3. Fasten off Color A. (24 dc, 6 ch-1 spaces, and 6 ch-6 spaces with A)
Round 10 (Squaring Round — Bottom Layer, 2nd Color Only): Return 2nd-color loop to hook. Working over A ch-6 space and into sts of Round 8, sl st in same st as join, ch 3. Now work the 2-side repeat block twice around the circle:
[tr in next dc, 2 tr in next dc, ch 2, 2 tr in next dc (first corner made), tr in next dc, dc in next dc; working in A sts of Round 9, dc in next dc, hdc in next dc, hdc in next ch-1 space, sc in next 2 dc; working over A ch-6 space and into Round 8 sts, sc in next 3 dc, hdc in next 2 dc, dc in next dc; working in A sts of Round 9, dc in next dc, tr in next dc, (2 tr, ch 2, 2 tr) in next ch-1 space (second corner made), tr in next dc, dc in next dc; working over A ch-6 space and into Round 8 sts, dc in next dc, hdc in next 2 dc, sc in next 3 dc; working in A sts of Round 9, sc in next 2 dc, hdc in ch-1 space, hdc in next dc, dc in next dc]; on the first repeat only, work over A ch-6 space and into Round 8 sts to work 1 dc in next dc, then repeat the bracketed sequence from the beginning down to the last instruction; join with a sl st in top of beginning ch-3. (76 sts total — 19 sts on each of the 4 sides + 4 corner ch-2 spaces)
Round 11 (Outer Square Frame — 2nd Color): Ch 3, work [dc in each st across to next corner ch-2 space, (2 dc, ch 2, 2 dc) in corner ch-2 space] 4 times, dc in each remaining st to end of round; join with a sl st in top of beginning ch-3. Fasten off. (92 dc total — 23 dc on each side + 4 corner ch-2 spaces)
Square 2 Instructions (Make 6 — 2 each with A & B, A & C, and A & D)
Rounds 1–3: Work exactly the same as Rounds 1–3 of Square 1. (12 dc, 6 ch-1 spaces, and 6 ch-2 spaces with A)
Round 4 (Bottom Layer, 2nd Color): Return 2nd-color loop to hook. Working behind piece and into Round 2 sts, ch 3, dc in same st as join; work [working over A ch-2 space, 2 dc in next dc; working behind A, 2 dc in next dc, ch 1, 2 dc in next dc] 5 times; working over A ch-2 space, 2 dc in next dc; working behind A, 2 dc in last dc, ch 1; join with a sl st in top of beginning ch-3. Drop 2nd-color loop to back. (36 dc and 6 ch-1 spaces with 2nd color)
Round 5 (Top Layer, Color A): Return A loop to hook. Working in front of piece and into Round 3 sts, and working over each ch-1 space of 2nd color, sl st in first ch-1 space, ch 9 (counts as first dc + ch 6), dc in next ch-1 space, work [ch 6, dc in next ch-1 space] 4 times, ch 6; join with a sl st in 3rd ch of beginning ch-9. Drop A loop to front. (6 dc and 6 ch-6 spaces with A)
Round 6 (Bottom Layer, 2nd Color): Return 2nd-color loop to hook. Working behind piece and into Round 4 sts, sl st in next dc, ch 3; work [working over A ch-6 space, 2 dc in each of next 2 dc; working behind A, dc in next dc, ch 2, skip next 2 dc, dc in next dc] 5 times; working over A ch-6 space, 2 dc in each of next 2 dc; working behind A, dc in last dc, ch 2; join with a sl st in top of beginning ch-3. Drop 2nd-color loop to back. (36 dc and 6 ch-2 spaces with 2nd color)
Round 7 (Top Layer, Color A): Return A loop to hook. Working in front of piece and into Round 5 sts, and working over each ch-2 space of 2nd color, ch 4 (counts as dc + ch 1), dc in same st as join, work [ch 6, (dc, ch 1, dc) in next dc] 5 times, ch 6; join with a sl st in 3rd ch of beginning ch-4. Drop A loop to front. (12 dc, 6 ch-1 spaces, and 6 ch-6 spaces with A)
Rounds 8–11: Work exactly the same as Rounds 8–11 of Square 1. Fasten off at the end of Round 11.
Step 2: 3 x 4 Grid Assembly & Ridge-Free Single Crochet Seaming
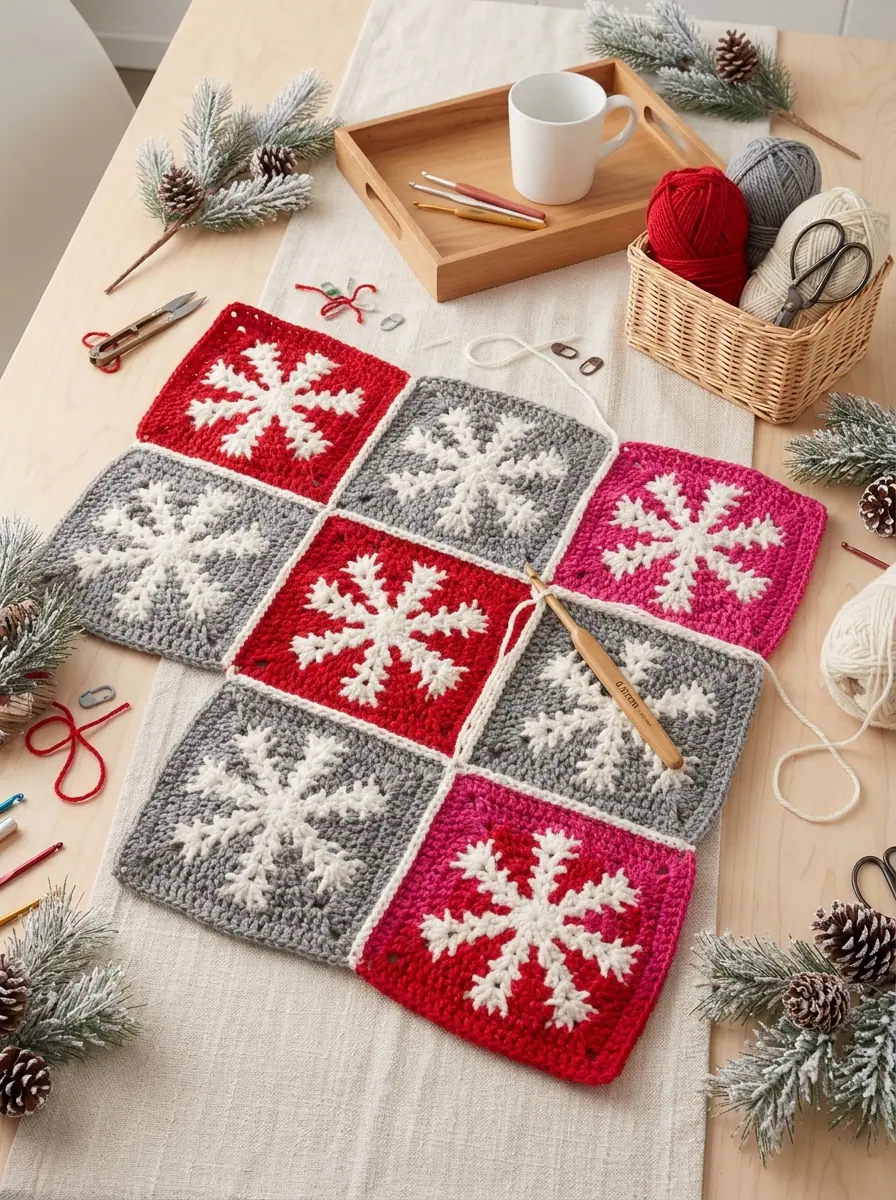
Once all 12 motifs are complete, lay them out with Right Sides facing up in 3 columns by 4 rows, alternating Square 1 and Square 2 and distributing the Holly Berry (A+B), Pewter (A+C), and Hot Pink (A+D) backgrounds diagonally across the grid.
Horizontal & Vertical Grid Joining
Horizontal Seams (3 Seams of 75 sc): Hold two adjacent rows of 3 squares with Wrong Sides together. Working through the back loop only (BLO) of the stitch on the front square and the front loop only (FLO) of the stitch on the back square (including each corner ch-2 space), work 75 sc evenly across the horizontal edge joining the two strips of 3 squares. Repeat twice more to join all 4 horizontal rows.
Vertical Seams (2 Seams of 100 sc): Holding Wrong Sides together and working through the BLO of the front piece and FLO of the back piece (and working cleanly over the horizontal seam intersections), work 100 sc evenly down the vertical edge between the first two columns of 4 squares. Repeat once more to join the third column of 4 squares.
Step 3: Crocheting the 24-Round Popcorn & Granny Cluster Holiday Border
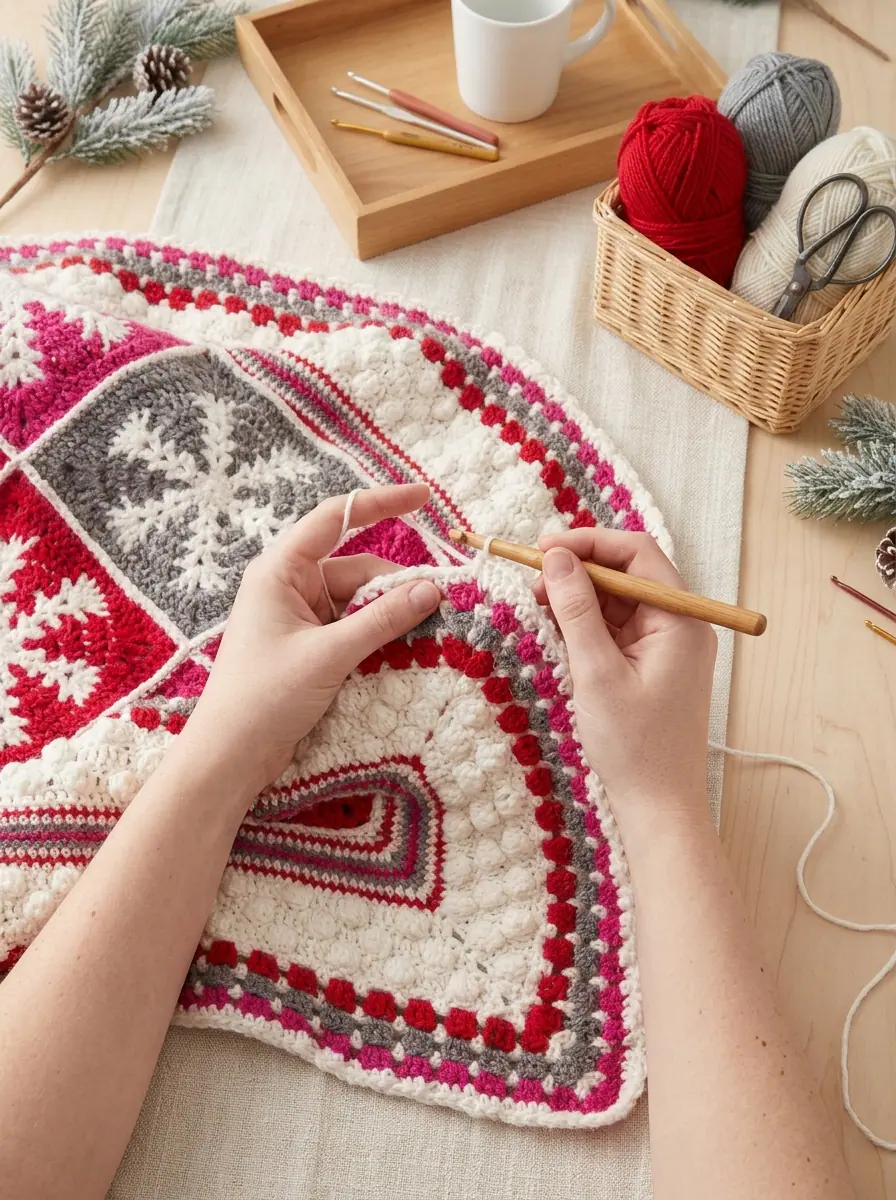
With all 12 squares joined, every border round is worked with the Right Side of the throw facing you. In Rounds 1 and 2, do not work into the seam stitches between squares; work into the remaining unworked chain on each side of the seams.
Part A: Striped Single Crochet Frame (Rounds 1–10)
Round 1 (Right Side — Color A in FLO): Working in front loops only (FLO) around the outer edge of the throw, join A with sc in the 2nd ch of any outer corner ch-2 space, work 1 sc in same ch, sc in each st and ch across to next corner ch-2 space, work [2 sc in first ch of corner ch-2 space, ch 1, 2 sc in next ch, sc in each st and ch across to next corner ch-2 space] 3 times, work 2 sc in first ch of beginning corner ch-2 space, ch 1; join with a sl st in first sc. Fasten off. (358 sc total — 77 sc on each short edge, 102 sc on each long edge + 4 corner ch-1 spaces)
Round 2 (Color A in BLO of Original Edge): Working in the remaining back loops only (BLO) of the outer square edges behind Round 1, join A with sc in the 2nd ch of the top-right corner ch-2 space, work 2 sc in same ch, sc in each st and ch across top short edge to next corner ch-2 space; work [2 sc in first ch of corner ch-2 space, ch 2, 2 sc in next ch, sc in each st and ch across long side edge to next corner ch-2 space, 2 sc in first ch of corner ch-2 space, ch 2], then work 3 sc in next ch, sc in each st and ch across bottom short edge to next ch-2 space, and repeat the bracketed side sequence once more; join with a sl st in first sc. Fasten off. (360 sc total — 78 sc per short edge, 102 sc per long edge + 4 corner ch-2 spaces)
Round 3 (Color B): Working through both loops of Round 2, join B with sc in any corner ch-2 space, ch 2, sc in same space, sc in each st across to next corner ch-2 space, work [(sc, ch 2, sc) in corner ch-2 space, sc in each st across to next ch-2 space] 3 times; join with a sl st in first sc. Fasten off. (368 sc + 4 ch-2 corners)
Rounds 4–10 (Striped Sequence): Repeat Round 3 seven more times, changing colors in this exact order: Round 4 with A, Round 5 with C, Round 6 with D, Round 7 with C, Round 8 with A, Round 9 with B, and Round 10 with A. Do not fasten off A at the end of Round 10. (424 sc total at end of Round 10 — 94 sc per short edge, 118 sc per long edge + 4 ch-2 corners)
Part B: Textured Snowball Popcorn Band (Rounds 11–16 in Color A)
Round 11 (Popcorn Row 1): Continuing with A, sl st into first corner ch-2 space, ch 3, work (dc, ch 2, dc) in same corner space; work [dc in next 2 sts, pop in next st, repeat (dc in next 5 sts, pop in next st) across to last st before next corner ch-2 space, dc in last st, (2 dc, ch 2, dc) in corner ch-2 space] around all 4 sides (omitting final corner group on last side); join with a sl st in top of beginning ch-3. (436 sts — 97 per short edge, 121 per long edge)
Round 12: Sl st in corner ch-2 space, ch 1, work (sc, ch 2, sc) in same space, sc in each st across to next ch-2 space, work [(sc, ch 2, sc) in corner ch-2 space, sc in each st across to next ch-2 space] 3 times; join with a sl st in first sc. (444 sc)
Round 13 (Popcorn Row 2): Sl st in corner ch-2 space, ch 3, work (dc, ch 2, dc) in same space; work [dc in next st, pop in next st, repeat (dc in next 5 sts, pop in next st) across to last st before next corner ch-2 space, dc in last st, (2 dc, ch 2, dc) in corner ch-2 space] around all 4 sides; join with a sl st in top of beginning ch-3. (460 sts)
Rounds 14 & 15: Repeat Rounds 12 and 13 once more. (484 sts at end of Round 15 — 109 per short edge, 133 per long edge)
Round 16: Repeat Round 12 once more. Do not fasten off A. (492 sc — 111 sc per short edge, 135 sc per long edge)
Part C: Granny Cluster Stripes & Scalloped Edging (Rounds 17–24)
Round 17 (Color A Ch-3 Arches): Sl st in corner ch-2 space, ch 1, sc in same space (corner sc made), ch 3, skip next st, sc in next st; work [repeat (ch 3, skip next 3 sts, sc in next st) across to last st before corner ch-2 space, ch 3, skip last st, sc in corner ch-2 space, ch 3, skip next st, sc in next st] around, finishing the fourth side with ch 3, skip last st and joining with a sl st in first corner sc. Fasten off A. (128 ch-3 spaces — 29 per short edge, 35 per long edge + 4 corner sc)
Round 18 (Color B Granny Clusters): Join B with a sl st in first ch-3 space of any edge, ch 3, 2 dc in same space, work (ch 1, 3 dc) in each ch-3 space across to next corner sc; work [ch 2, skip corner sc, 3 dc in next ch-3 space, (ch 1, 3 dc) in each ch-3 space to next corner sc] 3 times, ch 2; join with a sl st in top of beginning ch-3. Fasten off B. (384 dc — 29 3-dc groups per short edge, 35 3-dc groups per long edge)
Round 19 (Color A Arch Mesh): Join A with sc in any corner ch-2 space, work [ch 2, sc] twice in same space (double-loop corner made), work (ch 3, sc) in each ch-1 space across to next corner ch-2 space; work [ch 3, (sc, ch 2, sc, ch 2, sc) in corner ch-2 space, (ch 3, sc) in each ch-1 space across] 3 times, ch 3; join with a sl st in first sc. Fasten off A. (128 ch-3 spaces + 8 corner ch-2 spaces)
Round 20 (Color C Granny Clusters): Join C with a sl st in first ch-2 space of any corner, ch 3, 2 dc in same ch-2 space, ch 2, 3 dc in next corner ch-2 space, work (ch 1, 3 dc) in each ch-3 space across to next corner; work [ch 1, 3 dc in first corner ch-2 space, ch 2, 3 dc in second corner ch-2 space, (ch 1, 3 dc) in each ch-3 space across] 3 times; join with a sl st in top of beginning ch-3. Fasten off C. (408 dc)
Round 21 (Color A Arch Mesh): With A, repeat Round 19. Fasten off A. (136 ch-3 spaces + 8 corner ch-2 spaces)
Round 22 (Color D Granny Clusters): With D, repeat Round 20. Fasten off D. (432 dc — 33 3-dc groups per short edge, 39 3-dc groups per long edge)
Round 23 (Color A Single Crochet Base): Join A with sc in any corner ch-2 space, ch 2, sc in same space, work 1 sc in each dc and 1 sc in each ch-1 space across to next corner ch-2 space, working (sc, ch 2, sc) in each remaining corner ch-2 space around; join with a sl st in first sc and turn. (580 sc — 133 sc per short edge, 157 sc per long edge + 4 ch-2 spaces)
Round 24 (Wrong Side — Color A Textured Picot-Cluster Edge): Working into each corner ch-2 space as if it were 3 stitches, ch 2, dc in next st, sl st in next st; repeat [dc/hdctog over next 2 sts, sl st in next st] all the way around the perimeter; join with a sl st in top of beginning ch-2. Fasten off and weave in all yarn tails.
Yarn Care & Blocking Tips for Overlay Motifs
- Steam or Wet Blocking Before Joining: Lightly pinning each finished 8.5-inch square to a foam blocking mat and misting with water (or hovering a garment steamer 2 inches above the acrylic fibers) relaxes the two-layer snowflake spokes so every corner sits at a crisp 90-degree angle before seaming.
- Washing Instructions: Machine wash warm on a gentle cycle (maximum 104°F / 40°C) using mild liquid detergent. Wash on a cold rinse during the first wash to preserve the high contrast between the Eggshell white snowflakes and Holly Berry red squares.
- Drying: Tumble dry on low heat and remove promptly, or lay flat to air dry. Never iron or press acrylic popcorn stitches directly, as heat will flatten their 3D texture.
✨ PATTERN HELP & TIPS ✨
Got Questions?
Frequently Asked Questions (FAQ)
Click on any question below to reveal the answer
Why do we keep the Color A loop in front and the 2nd color loop in back?
Keeping the Eggshell white (Color A) loop on the Right Side (front) and the colored background loop on the Wrong Side (back) prevents the two yarn strands from twisting around each other at the end of each round. That way, the white snowflake floats cleanly on top of the solid background square without any vertical color blips showing through.
What is the visual difference between Square 1 and Square 2?
In Square 1, Round 5 works V-stitches (dc, ch 1, dc) into each spoke, creating a fuller, branched snowflake center. In Square 2, Round 5 works single double crochet posts separated by ch 6 arches over a denser 36-dc Round 4 circle, giving the snowflake center a star-like geometric look. Combining 6 of each square gives the throw subtle movement across all 12 blocks.
Why are Border Rounds 1 and 2 worked in FLO and BLO of the same edge?
Round 1 works in the front loops only of the outer square edges, and Round 2 goes back and works in the unworked back loops directly behind Round 1. When you join Color B in Round 3 through both loops of Round 2, the Round 1 Eggshell stitches remain free on the surface as a crisp raised white piping frame around the 12-square grid!
Can I make this throw larger for a queen bed?
Yes! Because each motif measures 8.5 inches square, adding one extra column and one extra row (a 4 x 5 grid of 20 squares) increases the finished throw size to roughly 50 x 58.5 inches. Simply add 25 sc for each extra square when seaming and adjust the border stitch counts by multiples of 6 for the popcorn rounds.
Save This Holiday Crochet Snowflake Throw Pattern on Pinterest
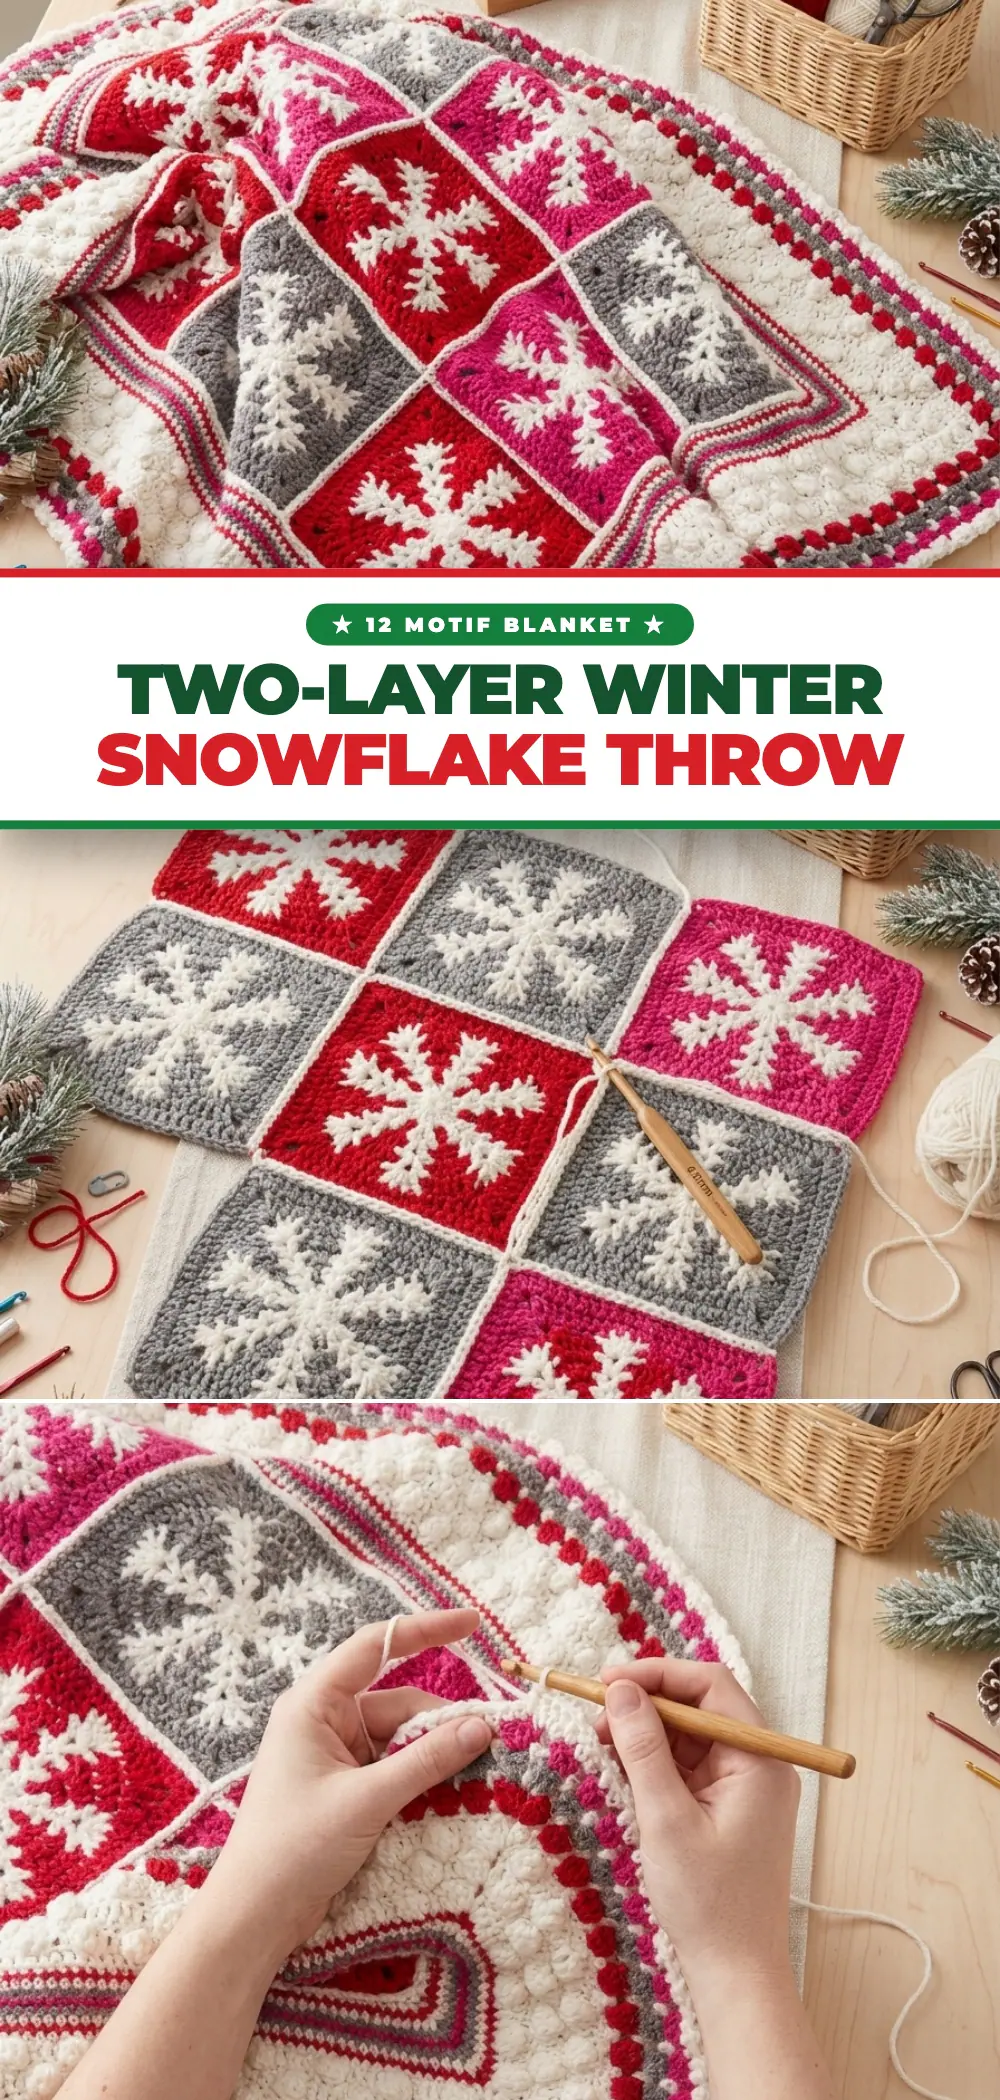
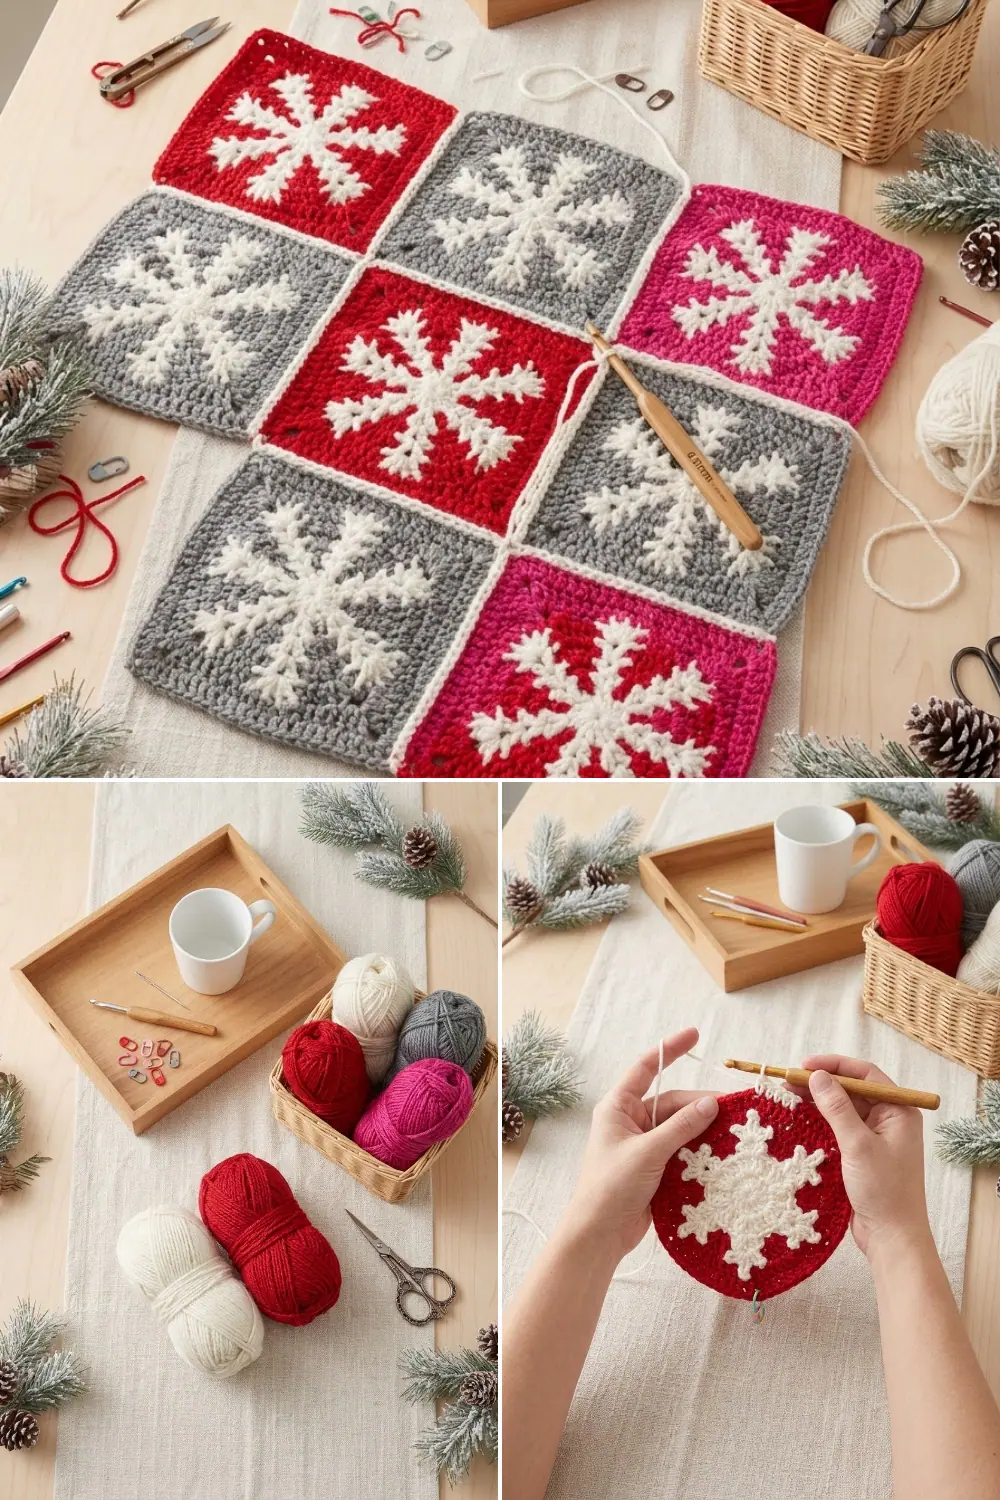
Planning your winter holiday blanket project? Pin either of the vertical reference cards below to your Seasonal & Holiday Crochet board so you can come back to the two-layer snowflake square instructions and 24-round popcorn border anytime.
PREVIOUS PATTERN
Textured Holly Green Crochet Christmas Wreath With Poinsettia Accents
NEXT PATTERN
Classic Single Crochet Christmas Santa Hat With Puffy Pom Ball

✨ KEEP CROCHETING ✨
You May Also Love
LEAVE A COMMENT
Have a question about a stitch or want to share how your project turned out? Drop a comment below — I read and reply to every maker!