
 Seasonal & Holiday Crochet
*This post may contain affiliate links to support the cost of this blog. At no cost to you, I may make a small commission if you purchase through these links. Read our Privacy Policy HERE
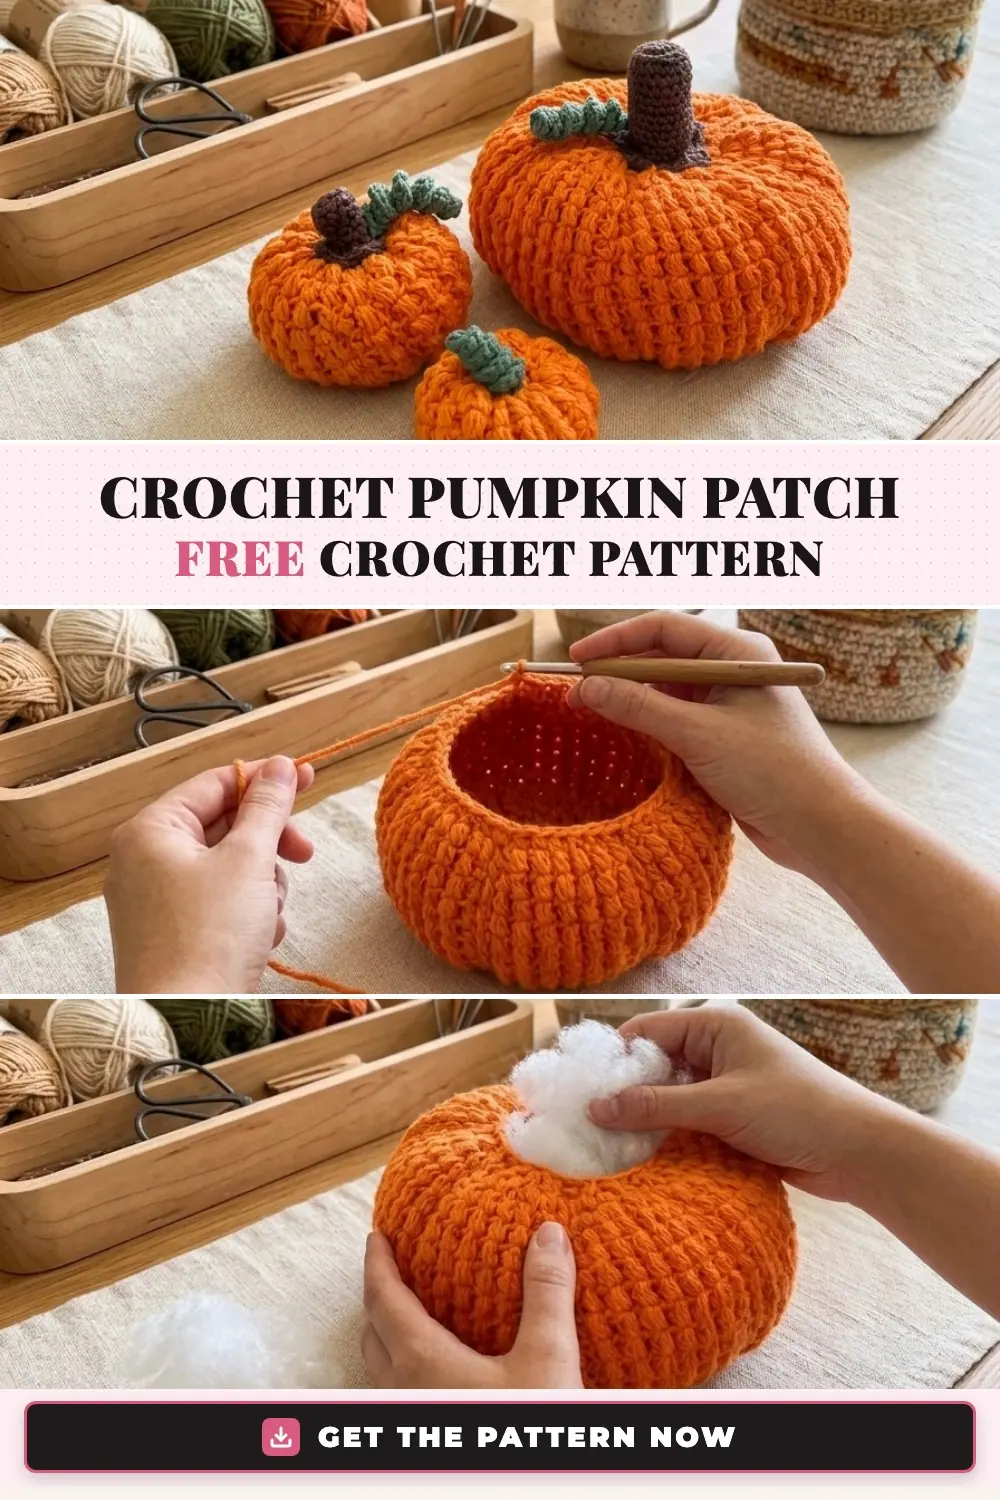
When autumn air starts to crisp and the porch begs for a touch of harvest warmth, nothing beats a trio of handmade textured pumpkins that you can bring out year after year. This Crochet Pumpkin Patch Pumpkins Pattern pairs plump, lofty puff stitches with recessed single crochet columns that naturally form realistic pumpkin ribs right as you work in the round—meaning you do not have to wrestle with wrapping tight cinching strings around the outside when you finish.
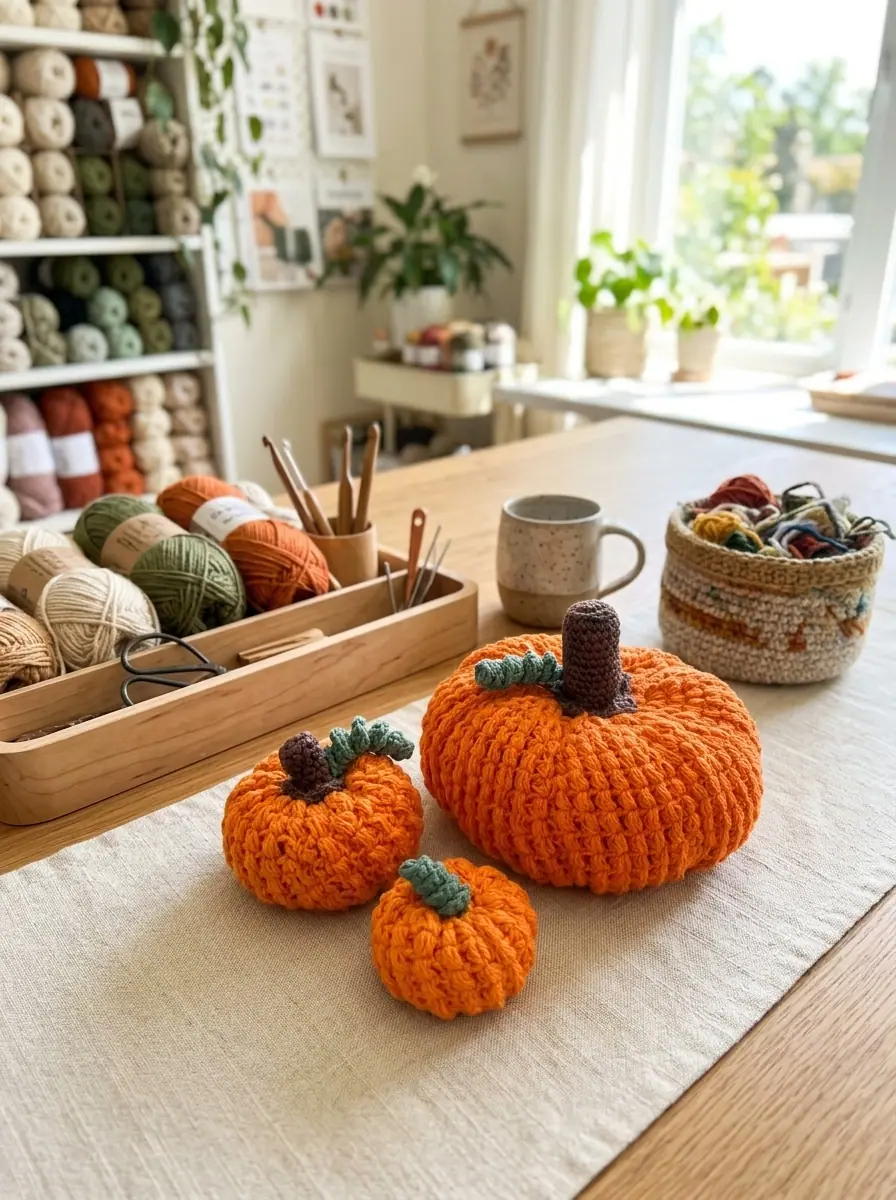
Designed for 100% worsted cotton yarn, the set includes three distinct silhouettes to give your centerpiece or mantel genuine pumpkin-patch variety: one statement Big Pumpkin (8″ wide by 6″ tall), a sweet low-profile Mini Pumpkin 1 topped with a coiled green vine, and a slightly taller Mini Pumpkin 2 crowned with its own sculpted stem. Once you get into the rhythm of the 8-section puff stitch repeat, the bodies work up quickly and hold their plump shape beautifully when stuffed with fiberfill.
Pattern Overview
- Skill Level: Easy (Worked in joined rounds using puff stitches, single crochet, and half double crochet)
- Finished Measurements:
- Big Pumpkin: Approx. 8″ [20.5 cm] diameter x 6″ [15 cm] tall, including Stem
- Mini Pumpkin 1: Approx. 4″ [10 cm] diameter x 3″ [7.5 cm] tall, including Curly-Q
- Mini Pumpkin 2: Approx. 4″ [10 cm] diameter x 3½” [9 cm] tall, including Stem
- Yarn Weight: Medium #4 (100% Worsted Weight Cotton)
- Recommended Hook: Size U.S. G/6 (4 mm) crochet hook, or size needed to obtain gauge
- Gauge: 14 single crochet (sc) and 15 rows = 4″ [10 cm]
- Pattern Yield: 2 balls of Main Color (Bright Orange) + 1 ball of Contrast A (Dark Taupe) + 1 ball of Contrast B (Rosemary) — 4 balls total — makes the complete 3-pumpkin patch set (1 Big Pumpkin + Mini Pumpkin 1 + Mini Pumpkin 2).
Table of Contents
- Yarn and Materials Needed
- Crochet Stitches, Abbreviations, and Special Stitches (US Terms)
- Part 1: Crocheting the Big Pumpkin Body (Rounds 1–26)
- Frequently Asked Questions
- Part 2: Crocheting Mini Pumpkin 1 and Mini Pumpkin 2
- Part 3: Stems, Curly-Q Tendrils, and Assembly
- Official Yarn Care Instructions
- Save This Crochet Pattern to Pinterest
Yarn and Materials Needed
Worsted weight 100% cotton yarn is an ideal match for 3D home decor pumpkins because cotton has very little elastic stretch compared to soft acrylics. When you pack the pumpkin body with polyester fiberfill, the cotton stitches keep their crisp puff definition without over-stretching, and the vertical single crochet valleys stay neatly tucked in to create eight distinct pumpkin segments.
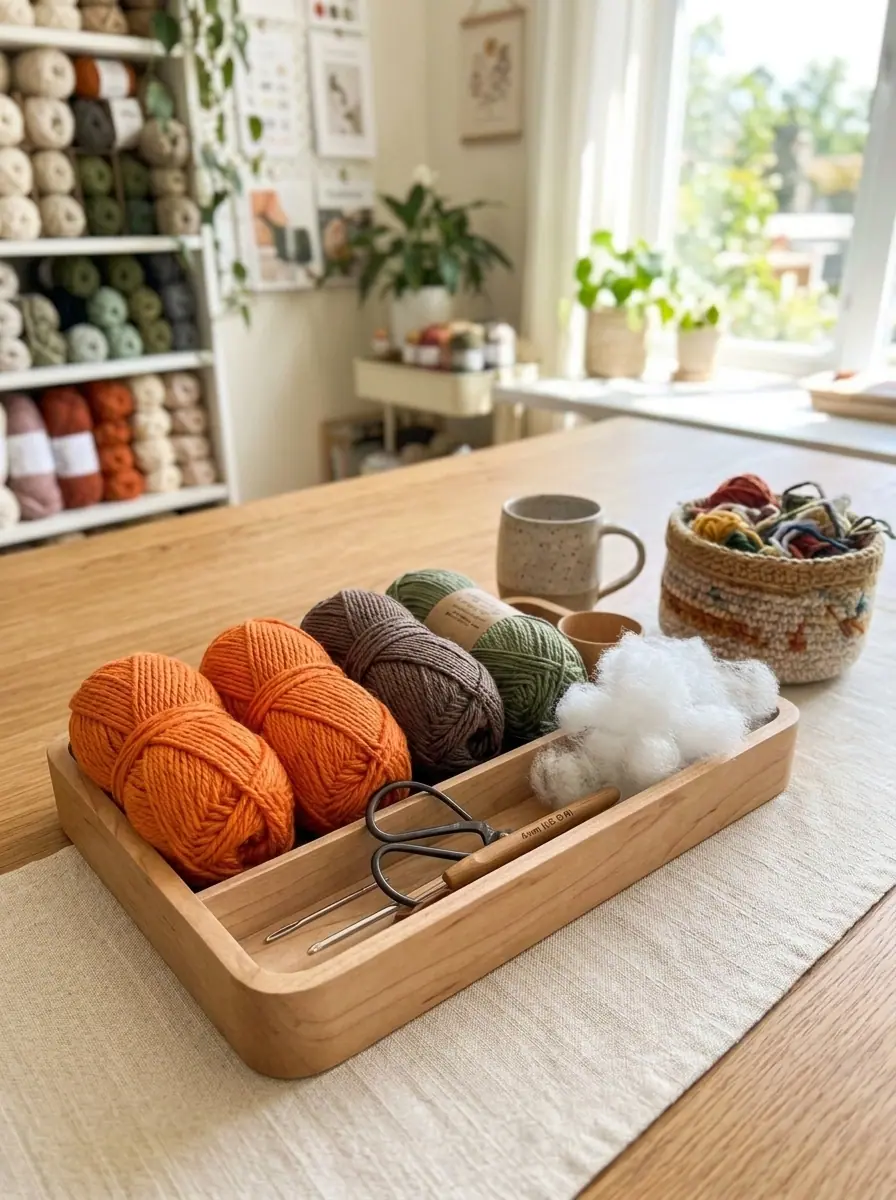
Yarn: Peaches & Crème™ (100% Worsted Cotton; 2.5 oz / 70.9 g; 120 yds / 109 m per ball):
Main Color (MC — Pumpkin Bodies): Bright Orange (11628) — 2 balls.
Contrast A (Big & Mini Pumpkin Stems): Dark Taupe (11013) — 1 ball.
Contrast B (Curly-Q Tendrils): Rosemary (11085) — 1 ball.
Crochet Hook: Size U.S. G/6 (4 mm) Susan Bates® Silvalume® crochet hook, or size needed to obtain gauge.
Notions: Blunt-tipped Susan Bates® yarn needle (for cinching the bottom opening closed and sewing stems/vines in place), polyester fiberfill for stuffing, and small crafting scissors.
Crochet Stitches, Abbreviations, and Special Stitches (US Terms)
This pattern follows standard US crochet terminology. Pay special attention to the Puff Stitch (Puff st) definition below, which includes a closing chain-1 (Ch 1 to close stitch) as part of completing each puff:
| Abbreviation / Stitch | Meaning & Step-by-Step Definition |
|---|---|
| Approx / Beg / Rem / Rep | Approximate(ly) / Beginning / Remaining / Repeat |
| Ch | Chain(s) |
| Rnd(s) / RS | Round(s) / Right side |
| Sl st / Sp(s) / St(s) | Slip stitch / Space(s) / Stitch(es) |
| Sc / Hdc / Dc / Tr | Single crochet / Half double crochet / Double crochet / Treble crochet |
| Tog / Yoh | Together / Yarn over hook |
| Puff st (Puff Stitch) | (Yoh and draw up a loop) 3 times in next stitch. Yoh and draw through all loops on hook. Ch 1 to close stitch. |
| Hdc2tog | Yoh and draw up a loop in next 2 stitches. Yoh and draw through all loops on hook. |
| Sc2tog | Draw up a loop in next 2 sc. Yoh and draw through all 3 loops on hook. |
✨ FREE CROCHET EBOOK ✨
Master Gauge & Blocking
Get Our Free Crochet Ebook!
Download The Ultimate Stitch, Gauge & Blocking Guide — packed with printable stitch charts, tension secrets, and step-by-step tutorials delivered straight to your inbox.
🔒 100% Free Instant PDF Download • Unsubscribe anytime
Part 1: Crocheting the Big Pumpkin Body (Rounds 1–26)
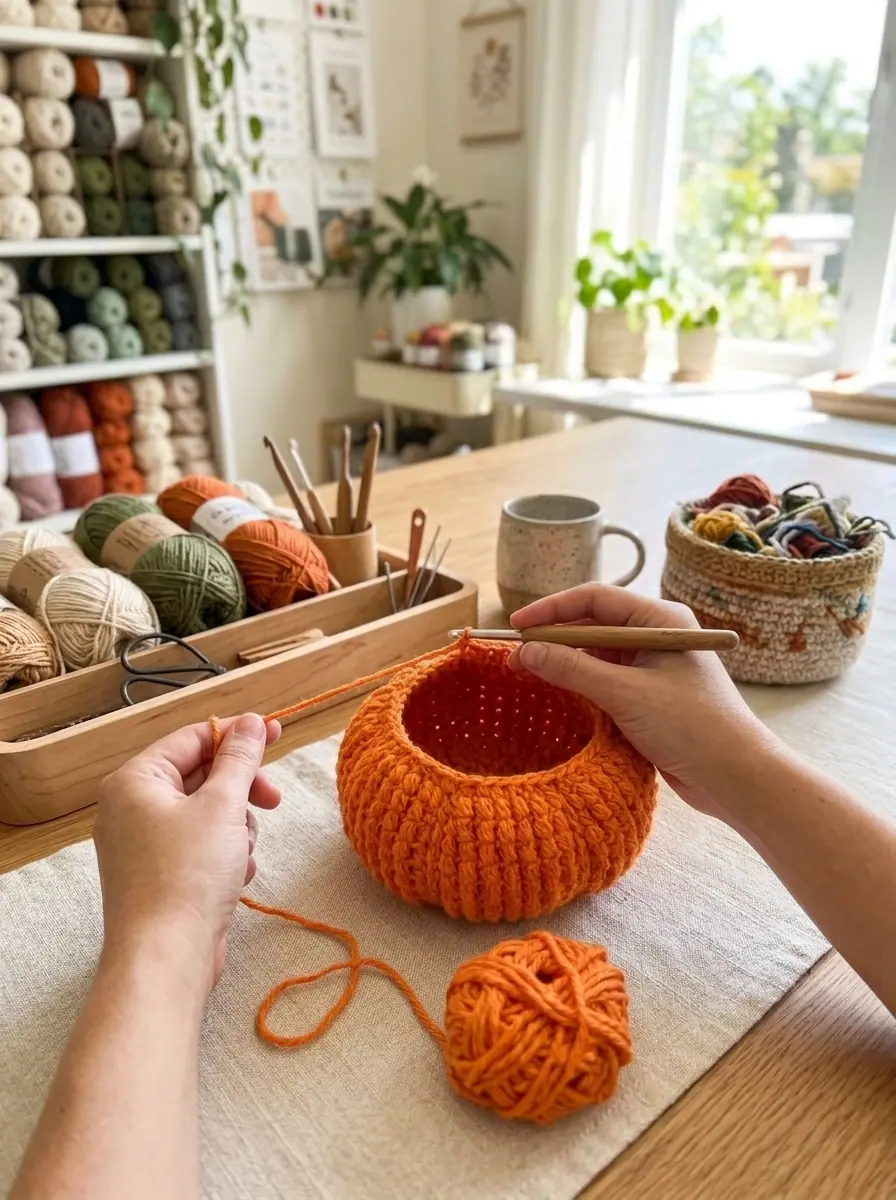
The Big Pumpkin starts at the top center with a 4-chain ring and expands outward into eight puff-stitch wedges separated by single half-double crochet (and later single crochet) stitches. Those single stitches between the puff sections sit lower than the tall puff stitches, creating built-in vertical grooves down the sides of the pumpkin.
Maker Tip for Consistent Puff Stitches: Always remember that the beginning
Ch 2 does not count as a stitch at the start of any round. When working each Puff st, pull your three yarn-over loops up to the even height of a half double crochet before drawing through all loops and chaining 1 to lock the puff. In Rounds 19 through 23, you will decrease each wedge smoothly by working your puff stitches into the spaces between the puff stitches of the previous round and skipping the last puff stitch before the single crochet rib.
Pattern Note: Ch 2 does not count as hdc at beg of rnd.
Foundation Ring: With MC (Bright Orange), ch 4. Join with sl st to first ch to form a ring.
1st rnd: Ch 2. 8 hdc in ring. Join with sl st to first hdc. (8 hdc)
2nd rnd: Ch 2. 2 hdc in first hdc. 2 hdc in each hdc around. Join with sl st to first hdc. (16 hdc)
3rd rnd: Ch 2. [Puff st. 1 hdc in next hdc] — repeat […] around. Join with sl st to top of first puff st. (8 puff sts)
4th rnd: Ch 2. [2 puff sts in next puff st. 1 hdc in next hdc] — repeat […] around. Join with sl st to top of first puff st. (16 puff sts)
5th rnd: Ch 2. [1 puff st in next puff st. 1 puff st between 2 puff sts. 1 puff st in next puff st. 1 hdc in next hdc] — repeat […] around. Join with sl st to top of first puff st. (24 puff sts)
6th rnd: Ch 2. [1 puff st in next puff st. 2 puff sts in next puff st. 1 puff st in next puff st. 1 sc in next hdc] — repeat […] around. Join with sl st to top of first puff st. (32 puff sts)
7th rnd: Ch 2. [(1 puff st in next puff st. 1 puff st between 2 puff sts) 3 times. 1 puff st in next puff st. 1 sc in next sc] — repeat […] around. Join with sl st to top of first puff st. (56 puff sts)
8th rnd: Ch 2. [1 puff st in each of next 7 puff sts. 1 sc in next sc] — repeat […] around. Join with sl st to top of first puff st. (56 puff sts)
9th to 18th rnds: Rep last rnd (8th rnd) 10 times more for a total of 11 even side rounds. (56 puff sts per rnd)
✨ PATTERN HELP & TIPS ✨
Got Questions?
Frequently Asked Questions
Click on any question below to reveal the answer
How do I keep the puff stitch rows from slanting diagonally?
Because the pumpkin tube is worked in joined rounds, always work your first puff stitch into the exact same stitch as the joining slip stitch, and count 28 puff stitches on every round.
How much stuffing should I put inside each crochet pumpkin?
Stuff firmly enough that the puff stitch ridges expand outward in a plump cylinder, leaving the top 1/2 inch slightly softer so the opening cinches completely shut without gaps.
Can I use cinnamon sticks or wooden dowels for the stem instead?
Absolutely! Simply cinch the top closed, dab hot glue onto a real cinnamon stick or driftwood piece, and press it into the center indentation.
Would you like to save this pattern?
Enter your email below and we will send this free crochet pattern directly to your inbox so you never lose it!
Your privacy is protected. Unsubscribe with 1-click anytime.
Shaping the Bottom and Stuffing the Big Pumpkin (Rounds 19–26)
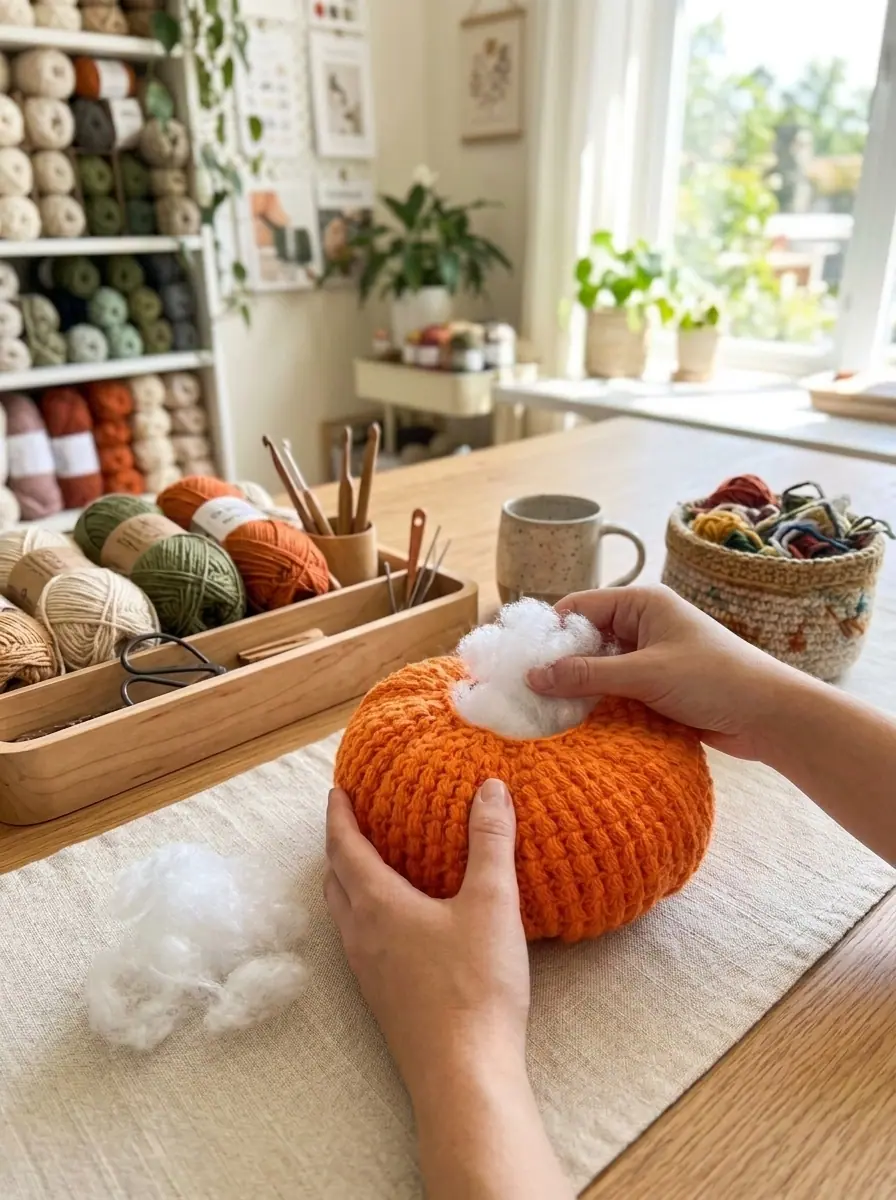
Beginning on the 19th round, taper the lower half of the pumpkin inward by working into the spaces between puff stitches. Pause right after completing the 22nd round (when 24 puff stitches remain) to pack the pumpkin generously with fiberfill before closing the base.
19th rnd (Next rnd): Ch 2. [(Puff st in sp between next 2 puff sts) 6 times. Skip next puff st. 1 sc in next sc] — repeat […] around. Join with sl st to top of first puff st. (48 puff sts)
20th rnd (Next rnd): Ch 2. [(Puff st in sp between next 2 puff sts) 5 times. Skip next puff st. 1 sc in next sc] — repeat […] around. Join with sl st to top of first puff st. (40 puff sts)
21st rnd (Next rnd): Ch 2. [(Puff st in sp between next 2 puff sts) 4 times. Skip next puff st. 1 sc in next sc] — repeat […] around. Join with sl st to top of first puff st. (32 puff sts)
22nd rnd (Next rnd): Ch 2. [(Puff st in sp between next 2 puff sts) 3 times. Skip next puff st. 1 sc in next sc] — repeat […] around. Join with sl st to top of first puff st. (24 puff sts)
Stuff Pumpkin: Pack the pumpkin body firmly and evenly with polyester fiberfill, pushing small handfuls outward into the eight puff-stitch segments so the ribs stand out clearly.
23rd rnd (Next rnd): Ch 2. [(Puff st in sp between next 2 puff sts) twice. Skip next puff st. 1 sc in next sc] — repeat […] around. Join with sl st to top of first puff st. (16 puff sts)
24th rnd (Next rnd): Ch 2. 1 hdc in each st around. Join with sl st to first hdc. (24 hdc)
25th rnd (Next rnd): Ch 2. [1 hdc in next hdc. Hdc2tog] — repeat […] around. Join with sl st to first hdc. (16 sts)
26th rnd (Next rnd): Ch 2. (Hdc2tog) 8 times. Join with sl st to first st. Fasten off. (8 sts)
Close Base: Break yarn, leaving a long end. Thread end onto your yarn needle, weave through the remaining sts, pull tightly to close the opening, and fasten securely.
Part 2: Crocheting Mini Pumpkin 1 and Mini Pumpkin 2
Both Mini Pumpkins measure approx. 4″ [10 cm] in diameter and share the exact same top increase rounds (Rounds 1–5) and bottom closing rounds. The only structural difference in their bodies is height: Mini Pumpkin 1 repeats the 5th round 4 times more (for a shorter, squat 3″ silhouette), while Mini Pumpkin 2 repeats the 5th round 6 times more (for a slightly taller 3½” silhouette).
Mini Pumpkin 1 Body (Rounds 1–14)
Pattern Note: Ch 2 does not count as hdc at beg of rnd. With MC (Bright Orange), ch 4. Join with sl st to first ch to form a ring.
1st rnd: Ch 2. 8 hdc in ring. Join with sl st to first hdc. (8 hdc)
2nd rnd: Ch 2. 2 hdc in first hdc. 2 hdc in each hdc around. Join with sl st to first hdc. (16 hdc)
3rd rnd: Ch 2. [Puff st. 1 sc in next hdc] — repeat […] around. Join with sl st to top of first puff st. (8 puff sts)
4th rnd: Ch 2. [2 puff sts in next puff st. 1 sc in next sc] — repeat […] around. Join with sl st to top of first puff st. (16 puff sts)
5th rnd: Ch 2. [1 puff st in each of next 2 puff sts. 1 sc in next sc] — repeat […] around. Join with sl st to top of first puff st. (16 puff sts)
6th to 9th rnds: Rep last rnd (5th rnd) 4 times more. (16 puff sts per rnd)
10th rnd (Next rnd): Ch 2. [1 puff st between 2 puff sts. 1 sc in next sc] — repeat […] around. Join with sl st to top of first puff st. (8 puff sts)
11th rnd (Next rnd): Ch 2. [1 sc in next puff st. 1 sc in next sc] — repeat […] around. Join with sl st to first sc. (16 sc)
Stuff Pumpkin: Pack Mini Pumpkin 1 firmly with polyester fiberfill.
12th rnd (Next rnd): Ch 1. [1 sc in each of next 2 sc. Sc2tog] — repeat […] around. Join with sl st to first sc. (12 sts)
13th rnd (Next rnd): Ch 1. [1 sc in next sc. Sc2tog] — repeat […] around. Join with sl st to first sc. (8 sts)
14th rnd (Next rnd): Ch 1. [Sc2tog] around. Join with sl st to first sc. (4 sts) Fasten off, leaving a long end. Thread end through rem sts. Pull tightly and fasten securely.
Mini Pumpkin 2 Body (Rounds 1–16)
Pattern Note: Ch 2 does not count as hdc at beg of rnd. With MC (Bright Orange), ch 4. Join with sl st to first ch to form a ring.
1st to 5th rnds: Work Rounds 1 to 5 exactly as given above for Mini Pumpkin 1. (16 puff sts at end of 5th rnd)
6th to 11th rnds: Rep 5th rnd 6 times more (two extra even rounds compared to Mini Pumpkin 1). (16 puff sts per rnd)
12th rnd (Next rnd): Ch 2. [1 puff st between 2 puff sts. 1 sc in next sc] — repeat […] around. Join with sl st to top of first puff st. (8 puff sts)
13th rnd (Next rnd): Ch 2. [1 sc in next puff st. 1 sc in next sc] — repeat […] around. Join with sl st to first sc. (16 sc)
Stuff Pumpkin: Pack Mini Pumpkin 2 firmly with polyester fiberfill.
14th rnd (Next rnd): Ch 1. [1 sc in each of next 2 sc. Sc2tog] — repeat […] around. Join with sl st to first sc. (12 sts)
15th rnd (Next rnd): Ch 1. [1 sc in next sc. Sc2tog] — repeat […] around. Join with sl st to first sc. (8 sts)
16th rnd (Next rnd): Ch 1. [Sc2tog] around. Join with sl st to first sc. (4 sts) Fasten off, leaving a long end. Thread end through rem sts. Pull tightly and fasten securely.
Part 3: Stems, Curly-Q Tendrils, and Assembly
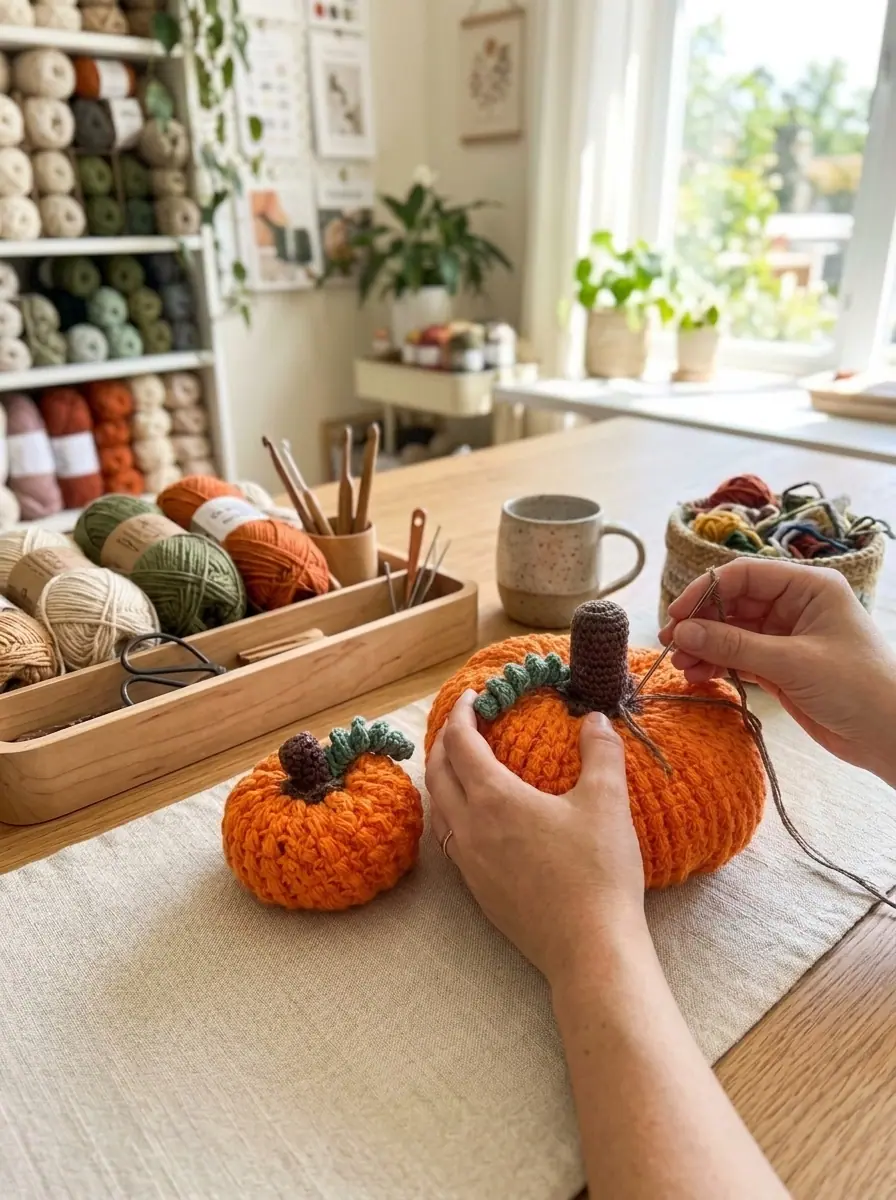
To finish your pumpkin patch, crochet the sculpted stems in Contrast A (Dark Taupe) and the spiraled vine in Contrast B (Rosemary). Working Round 3 of the Big Stem (and Round 2 of the Mini Stem) in the back loops only creates a crisp 90-degree ridge so the stem cylinder stands upright, while the final scalloped petal round flares outward to sit neatly against the top of the pumpkin.
Big Pumpkin Stem (Make 1)
Foundation: With A (Dark Taupe), ch 2.
1st rnd: 8 sc in 2nd ch from hook. Join with sl st to first sc. (8 sc)
2nd rnd: Ch 1. 2 sc in first sc. 2 sc in each sc around. Join with sl st to first sc. (16 sc)
3rd rnd: Ch 1. Working in back loops only, 1 sc in each sc around. Join with sl st to first sc. (16 sc)
4th rnd: Working in both loops, Ch 1. 1 sc in each sc around. Join with sl st to first sc. (16 sc)
5th to 13th rnds: Rep last rnd (4th rnd) 9 times more.
14th rnd (Next rnd — Scalloped Base): Ch 1. [(1 hdc. 1 dc. 1 tr. 1 dc. 1 hdc) in next sc. 1 sc in each of next 3 sc] — repeat […] 3 times more. Join with sl st to first sc. Fasten off. (4 scalloped points around base)
Assembly: Stuff Stem firmly with fiberfill. Center the flared base over the top of the Big Pumpkin and sew in place around the scalloped edge.
Mini Pumpkin Stem (Make 1 for Mini Pumpkin 2)
Foundation: With A (Dark Taupe), ch 2.
1st rnd: 9 sc in 2nd ch from hook. Join with sl st to first sc. (9 sc)
2nd rnd: Ch 1. Working in back loops only, 1 sc in each sc around. Join with sl st to first sc. (9 sc)
3rd rnd: Ch 1. Working in both loops, 1 sc in each sc around. Join with sl st to first sc. (9 sc)
4th to 8th rnds: Rep last rnd (3rd rnd) 5 times more.
9th rnd (Next rnd — Scalloped Base): Ch 1. [(1 hdc. 1 dc. 1 hdc) in next sc. 1 sc in each of next 2 sc] — repeat […] twice more. Join with sl st to first sc. Fasten off. (3 scalloped points around base)
Assembly: Stuff Mini Stem lightly and sew to the top center of Mini Pumpkin 2.
Curly-Q Vine (Make 1 — Or Extra for Optional Variation)
The original pattern specifies Curly-Q (make 1), which crowns the top of Mini Pumpkin 1 (whose measurements are listed as 3″ tall including Curly-Q). (Optional Variation: Because you have a full ball of Contrast B [Rosemary] with plenty of yardage to spare, you can easily crochet 1 or 2 additional Curly-Q tendrils to sew alongside the bases of the Big Pumpkin and Mini Pumpkin 2 stems as shown in seasonal styling photos.)
Foundation: With B (Rosemary), ch 20.
1st row: (RS). 3 sc in 2nd ch from hook. [3 sc in next ch] — repeat […] to end of chain. Fasten off.
Finishing the Vine: Twist the strip clockwise with your fingers so the 3-sc increases coil tightly into a springy Curly-Q tendril. Sew securely to the top of Mini Pumpkin 1 (or at the base of the stem).
Official Yarn Care Instructions
According to the official Peaches & Crème™ yarn care guidelines from Yarnspirations, keep these rules in mind when caring for your cotton pumpkins:
- Wash Colors Separately: Deep shades like Bright Orange, Dark Taupe, and Rosemary may run initially; wash colors separately in lukewarm water not exceeding 86°F [30°C] on a delicate setting.
- Spot-Cleaning Stuffed Pumpkins: Because these 3D pumpkins are tightly packed with polyester fiberfill, spot-cleaning the exterior with a damp cloth and mild soap—then air-drying thoroughly—is the easiest way to keep the stuffing lofty.
- No Bleach: Do not bleach.
- Drying & No Ironing: Tumble dry on low heat at a delicate setting (or air-dry flat), and do not iron or press.
Save This Crochet Pattern to Pinterest
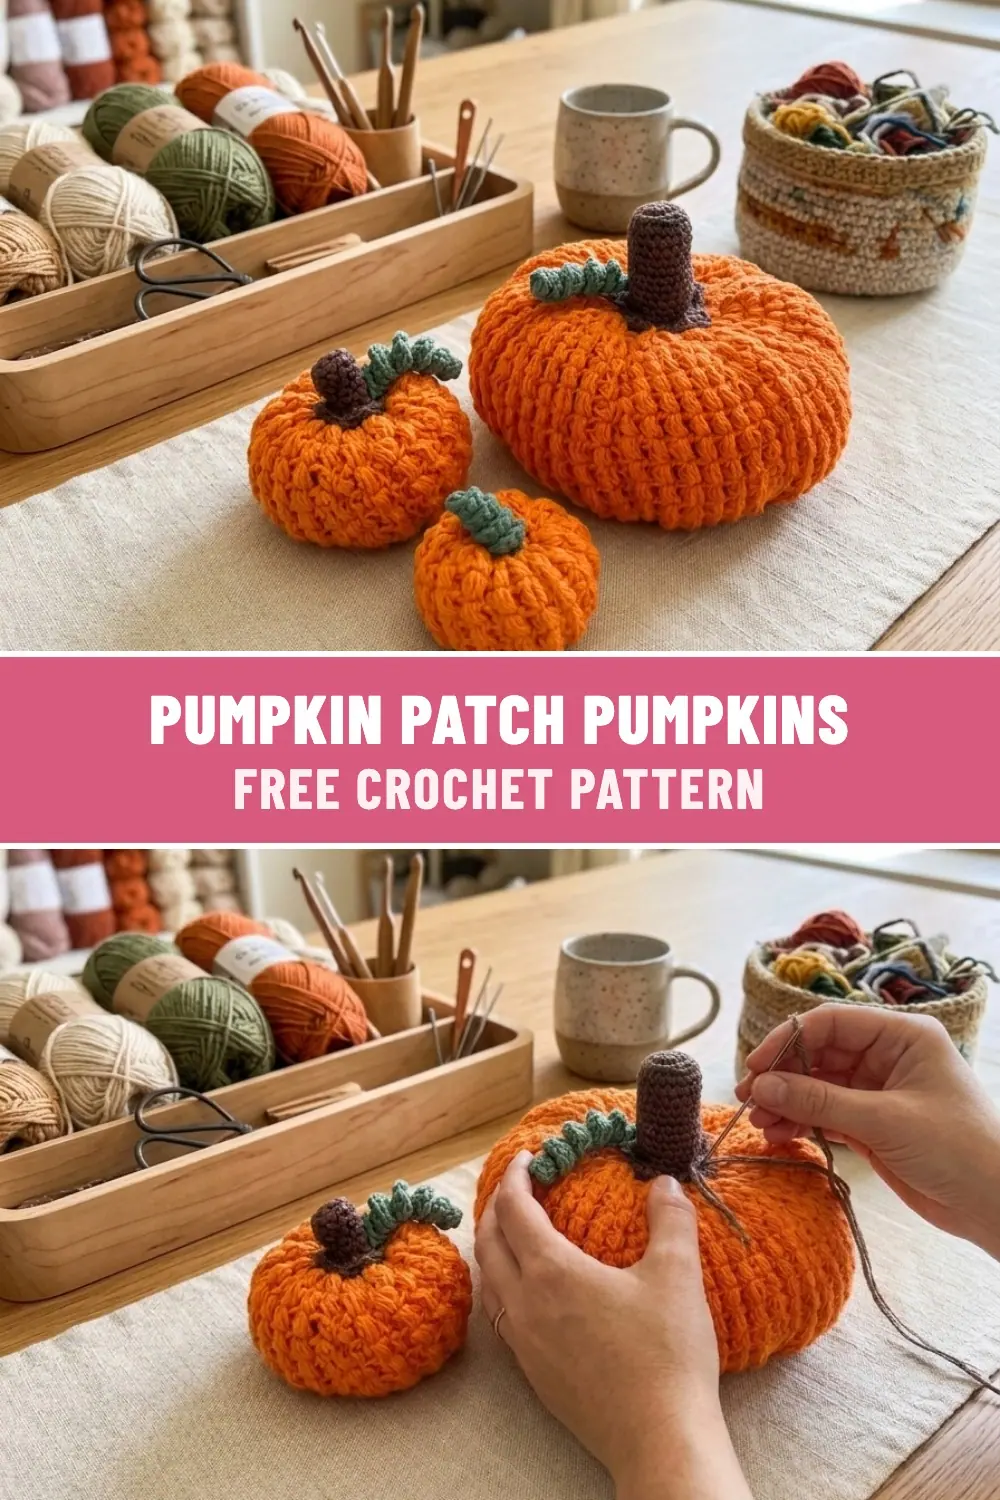
Love this autumn pumpkin patch project? Pin one of the images below to your favorite crochet board on Pinterest so you can easily find this free step-by-step pattern anytime you are ready to pick up your hook!
PREVIOUS PATTERN
Bright Citrus Slice Round Cotton Crochet Drink Coasters
NEXT PATTERN
Ribbed Twist-Front Crochet Ear Warmer and Winter Headband
✨ KEEP CROCHETING ✨
You May Also Love
LEAVE A COMMENT
Have a question about a stitch or want to share how your project turned out? Drop a comment below — I read and reply to every maker!