
 Crochet Bags & Accessories
*This post may contain affiliate links to support the cost of this blog. At no cost to you, I may make a small commission if you purchase through these links. Read our Privacy Policy HERE
When you want a handmade handbag that combines rich architectural ribbing, polished wooden hardware, and a showstopping 3D floral accent, this crochet purse pattern is a joy to stitch from the first foundation chain to the final button closure. The Dimensional Flower Motif Crochet Crossbody Purse (also loved as a round-handle hobo bag) measures a generous Approx 17" [43 cm] wide x 9.5" [24 cm] tall before the handles, offering plenty of interior volume for your daily essentials or even a work-in-progress yarn project.
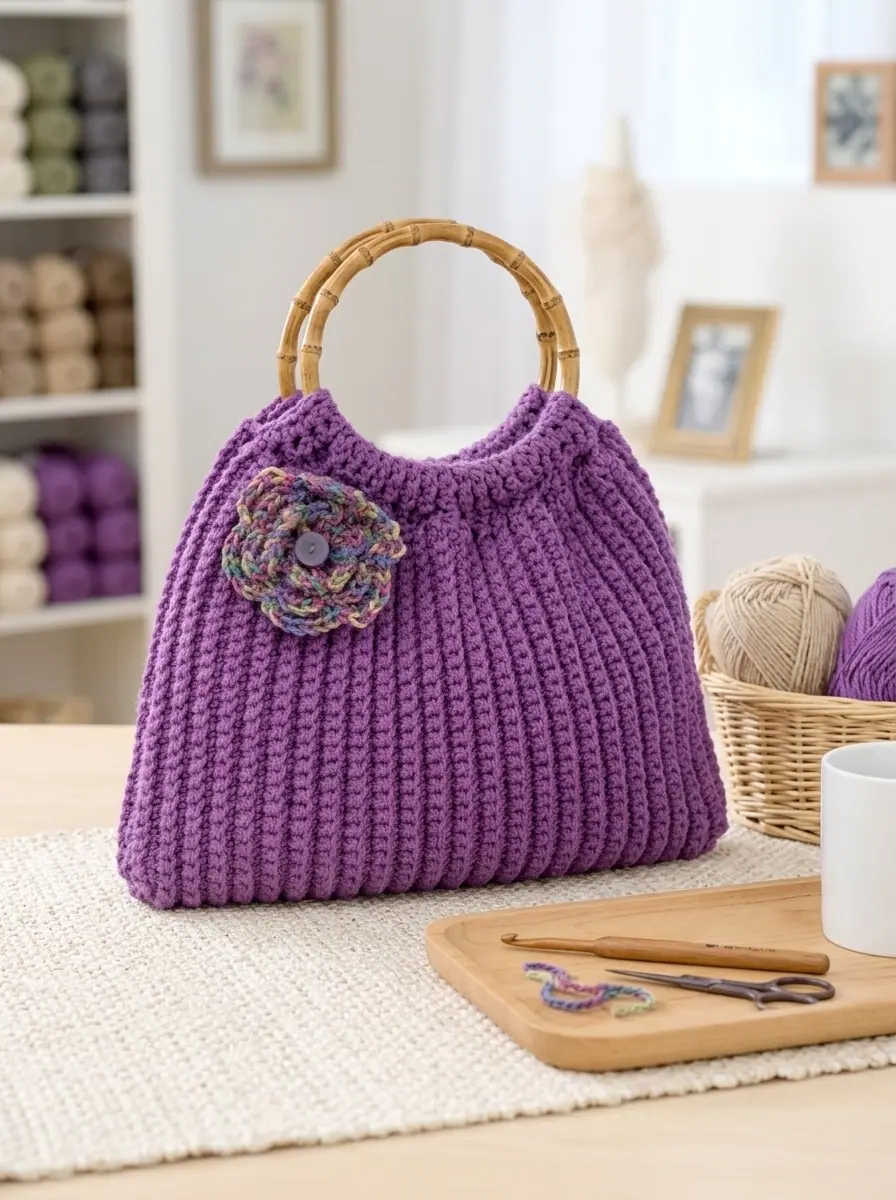
Designed by renowned crochet author Edie Eckman, this clever one-piece purse begins as a simple flat rectangle worked in back-loop single crochet (scbl) with worsted-weight yarn and a U.S. K/10.5 (6.5 mm) crochet hook. Once the 60-row ribbed rectangle is complete, you rotate the work 90 degrees and crochet tapered handle flaps directly onto both short ends—gathering the ribbed fabric automatically from 31 stitches down to 14 stitches so it wraps around a pair of 6-inch round bamboo handles without bulky pleats. Two quick perpendicular corner gusset seams at the bottom transform the folded rectangle into a standalone three-dimensional handbag crowned with a six-round layered flower motif.
Pattern Overview
- Project Name: Dimensional Flower Motif Crochet Crossbody Purse (Design Ref: RHC0103-023012M)
- Primary Keyword Focus: Crochet Purse Pattern
- Skill Level: Intermediate (or Adventurous Beginner comfortable with back-loop stitches and simple decreases)
- Finished Measurements: Approx 17" [43 cm] wide x 9.5" [24 cm] tall (excluding the 6-inch round handles)
- Recommended Yarn: Worsted Weight #4 Acrylic or Cotton-Blend Yarn (such as Red Heart Super Saver; Solids: 7 oz / 198 g, 364 yds / 333 m per skein; Prints/Multis: 5 oz / 141 g, 244 yds / 223 m per skein)
- Yardage & Colors Required: 1 skein Color A (Medium Purple 0528 — Approx 290 yds / 265 m used for purse body) and 1 skein Color B (Artist Print 0315 — Approx 45 yds / 41 m used for 3-tier flower)
- Crochet Hook: Size U.S. K/10.5 (6.5 mm) crochet hook (or size needed to obtain gauge)
- Official Gauge: 12 single crochet and 14 rows = 4" [10 cm] worked in back-loop single crochet pattern
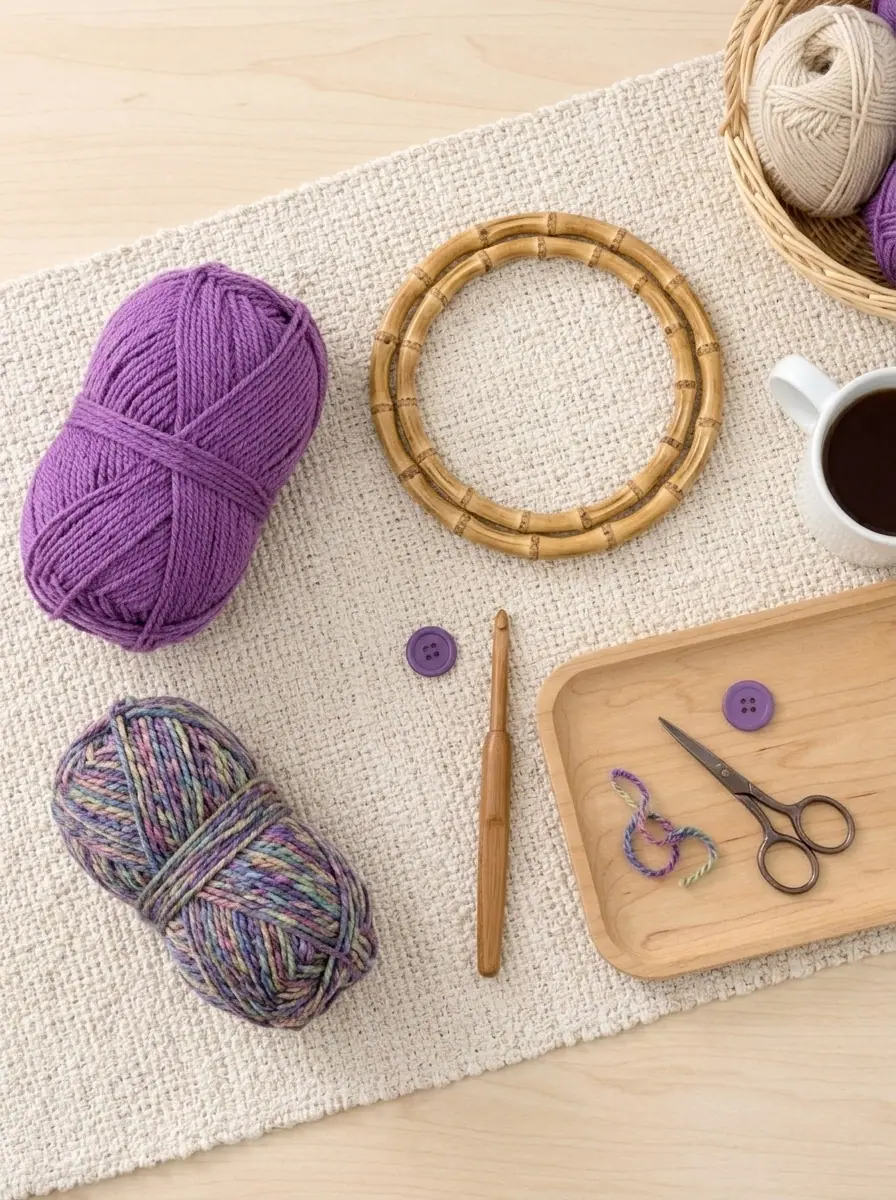
- Hardware & Notions: One pair of 6" [15 cm] diameter round bamboo (or wooden) purse handles, one 3/4" [19 mm] coordinating button for the flower center, blunt steel yarn needle, locking stitch markers, scissors
Table of Contents
Why Crocheters Adore This Ribbed Bamboo-Handle Purse
Many crochet handbag patterns require juggling separate front, back, side, and bottom panels that can twist out of alignment during assembly. Here is why this one-piece pleated construction is a favorite among accessories makers:
- Zero-Seam Bottom & Built-In Handle Flaps: The entire purse body and both handle tabs are worked in one continuous piece. You simply fold the finished piece in half, seam the lower side edges, and pinch the two bottom corners into boxed gussets.
- Plush Accordion Ribbing: Working Rows 2 through 59 in the back loop only of each single crochet creates deep vertical ribs when the piece is rotated 90 degrees. Those vertical ridges allow the bag to expand gracefully when full and spring back into a sleek pleated profile when light.
- Instant Gathering via Tapered Decreases: Working sc2tog across Row 2 and Row 3 of the side handle flaps narrows the top of the bag from 31 stitches down to 14 stitches, producing a tailored designer pleat right below the bamboo rings.
- Three-Tier 3D Posey Brooch: The six-round flower is worked in variegated print yarn by folding completed petal layers forward and anchoring hidden chain loops behind them, building three lush concentric tiers of petals around a classic button center.
Maker Tip: When working Row 1 of the Handle Flap, you need to place 31 single crochet stitches evenly along the 60-row short side edge of the purse body. That works out to roughly 1 single crochet in every other row-end ridge (plus 1 extra stitch at the center)—place a stitch marker halfway across the edge (at Row 30) so you distribute 15 stitches on the first half and 16 stitches on the second half evenly!
Materials & Hardware Checklist
Color A (Main Purse Body & Flaps): 1 skein Medium #4 Worsted Yarn (7 oz / 198 g; 364 yds / 333 m) in Medium Purple (0528), or your favorite rich solid shade such as Espresso, Navy, Burgundy, or Charcoal.
Color B (3-Layer Flower Rosette): 1 skein Medium #4 Multi-Color Print Yarn (5 oz / 141 g; 244 yds / 223 m) in Artist Print (0315), or any coordinating variegated scrap yarn (only 45 yards needed).
Crochet Hook: Size U.S. K/10.5 (6.5 mm) crochet hook.
Purse Handles: One pair of 6" [15 cm] diameter round bamboo handles (or circular wooden/acrylic tortoise rings).
Center Accent Button: One 3/4" [19 mm] two-hole or four-hole button in matching purple, wood, or mother-of-pearl.
Tapestry Needle & Markers: Blunt steel yarn needle for sewing handle flaps and boxed corner gussets, plus 4 locking stitch markers.
Gauge & Tension Guidelines
Because the purse rectangle is rotated 90 degrees so the rows run vertically from side to side, row gauge determines the width of the bag while stitch gauge determines the height:
- Official Gauge: 12 sc = 4" [10 cm]; 14 rows = 4" [10 cm] worked in back-loop single crochet with a 6.5 mm (U.S. K/10.5) hook.
- Target Flat Rectangle Size (Before Handle Flaps): At 58 stitches by 60 rows, your ungathered rectangle will measure approximately 19.25" [49 cm] along the stitches by 17" [43 cm] across the 60 rows before folding in half.
Stitches, Special Abbreviations & Techniques (US Terms)
- A / B: Color A (Main Body) / Color B (Flower Motif)
- BLO (Back Loop Only): Insert hook under the back loop only of the stitch (the loop farthest away from you), leaving the front loop unworked to form a horizontal ridge
- ch: Chain(s)
- dc: Double crochet
- hdc: Half double crochet (yarn over, insert hook into stitch/space, yarn over and pull up a loop, yarn over and draw through all 3 loops on hook)
- mm: Millimeters
- sc: Single crochet
- sc2tog (Single Crochet 2 Together — 1 Stitch Decreased): [Insert hook into next stitch, yarn over and draw up a loop] twice (3 loops on hook), yarn over and draw through all 3 loops on hook
- sl st: Slip stitch
- sp(s): Space(s)
- st(s): Stitch(es)
- yo: Yarn over
- [ … ] / ( … ): Work the stitches enclosed inside brackets or parentheses as directed
Step-by-Step Crochet Instructions
Part 1: Crocheting the Ribbed Purse Body
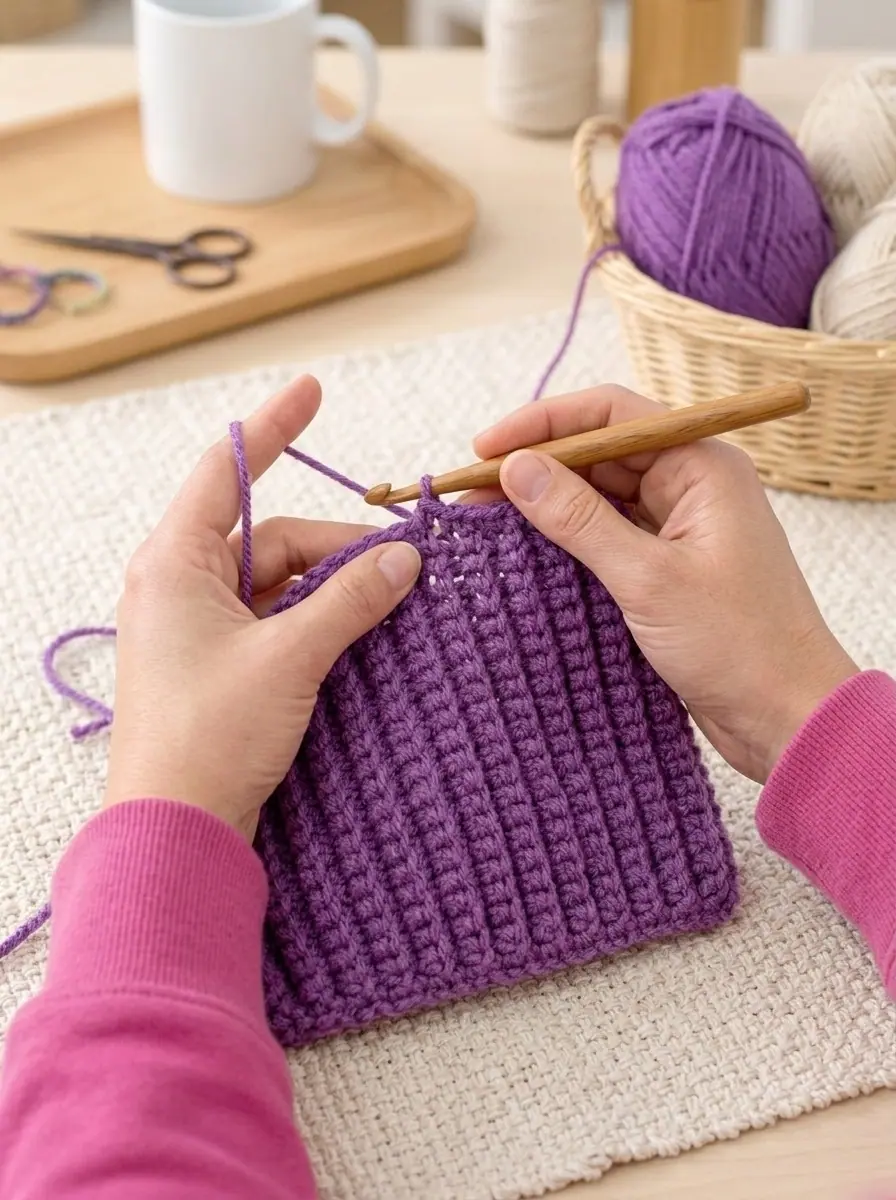
The main purse body is crocheted flat in back-loop single crochet rows, creating a supple, deeply ribbed fabric:
Foundation Chain: With Color A (Medium Purple) and your 6.5 mm hook, ch 59.
Row 1 (Base Row): Work 1 sc in the 2nd ch from hook and 1 sc in each remaining ch across. Turn. (58 sc)
Rows 2 to 59 (Back-Loop Ribbing Rows — 58 Rows): Ch 1 (does not count as a stitch here and throughout). Working in the back loop only (BLO) of each stitch, work 1 sc in each sc across to the end of the row. Turn. (58 sc per row; 29 raised horizontal ridges visible on each side)
Row 60 (Stabilizing Final Row): Ch 1. Working through both loops of each stitch for a firm edge, work 1 sc in each st across to the end of the row. Do not turn and do not fasten off at the end of Row 60—you will pivot directly to work the first Handle Flap along the row ends. (58 sc)
Part 2: Shaping the First & Second Handle Flaps
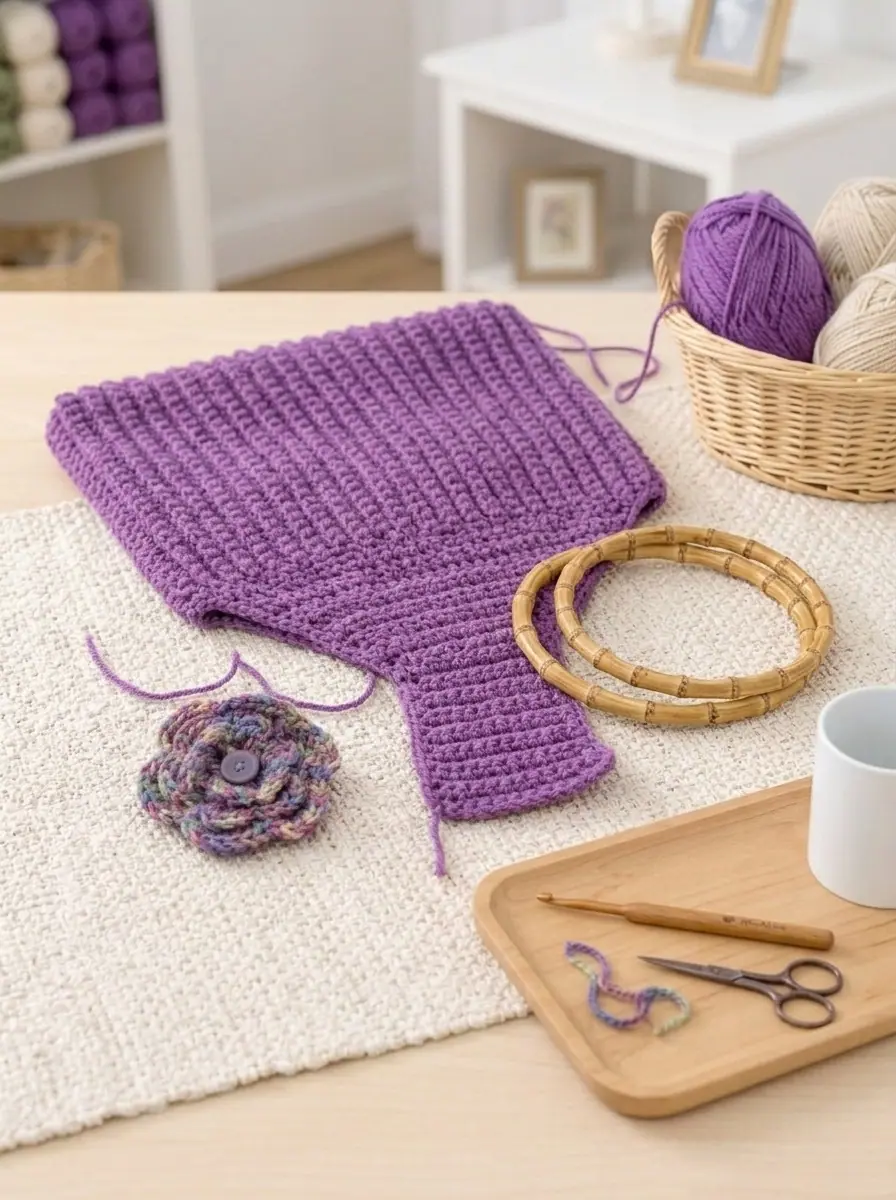
With the 60-row rectangle complete, you now work across the 60 row-ends along the short edge to gather the top opening and form the tab that wraps around the bamboo ring:
First Handle Flap — Row 1 (Gathering Setup Row): Rotate the purse body 90 degrees so you are working across the short side edge (across the ends of Rows 60 down to 1). Ch 1, and work 31 sc evenly spaced along the short row-end edge. Turn. (31 sc)
Row 2 (First Decrease Row): Ch 1. Work [sc2tog] 15 times across the next 30 sts, then work 1 sc in the last st. Turn. (16 sc)
Row 3 (Second Decrease Row): Ch 1. Work 1 sc2tog over the first 2 sts, work 1 sc in each of the next 12 sts (to the last 2 sts), then work 1 sc2tog over the last 2 sts. Turn. (14 sc)
Rows 4 to 7 (Straight Tab Rows — 4 Rows): Ch 1. Work 1 sc in each st across. Turn. (14 sc per row)
At the end of Row 7, fasten off Color A, leaving a long 12" [30.5 cm] yarn tail for sewing the flap around the bamboo handle.
Second Handle Flap (Opposite Short Edge): With the Right Side of the purse body facing you, join Color A with a sl st at the right-hand corner of the opposite short row-end edge. Repeat Rows 1 through 7 of the Handle Flap exactly as written above, and fasten off leaving a 12" [30.5 cm] sewing tail.
Part 3: Crocheting the 3-Tier Dimensional Flower Rosette
The signature posey embellishment is crocheted in the round with Color B (Artist Print), building three concentric rings of 6 petals each (18 petals total):
Foundation Ring: With Color B and your 6.5 mm hook, ch 5. Join with a sl st to the first ch to form a center ring.
Round 1 (Inner Spoke Base): Ch 4 (counts as first dc plus ch-1 space). Work [1 dc in ring, ch 1] 5 times. Join with a sl st into the 3rd ch of the beginning ch-4. (6 dc spokes and 6 ch-1 spaces)
Round 2 (First Tier — 6 Inner Petals): Ch 1. In each of the 6 ch-1 spaces around, work [(1 sc, 3 dc, 1 sc) all in next ch-1 sp] 6 times. Join with a sl st to the first sc. (6 inner petals completed)
Round 3 (Middle Tier Chain Arches Behind Petals): Fold and hold the 6 petals of Round 2 forward toward you. Working behind the petals, work [1 sl st around the post/top of the next dc from Round 1, ch 3] 6 times around. Join with a sl st to the first sl st. (6 ch-3 loops formed behind the inner petals)
Round 4 (Second Tier — 6 Middle Petals): Ch 1. Working into the ch-3 spaces from Round 3, work [(1 sc, 1 hdc, 3 dc, 1 hdc, 1 sc) all in next ch-3 sp] 6 times around. Join with a sl st to the first sc. (6 middle petals completed)
Round 5 (Outer Tier Chain Arches Behind Petals): Ch 1, and work 1 sc in the same stitch as the join (between the first and last petals). Holding the Round 4 petals forward toward you, work [ch 4, 1 sc in the space between the next 2 petals of Round 4] 5 times, then ch 4 and join with a sl st to the first sc. (6 ch-4 loops formed behind the middle petals)
Round 6 (Third Tier — 6 Outer Petals): Ch 1. Working into the ch-4 spaces from Round 5, work [(1 sc, 1 hdc, 5 dc, 1 hdc, 1 sc) all in next ch-4 sp] 6 times around. Join with a sl st to the first sc. Fasten off Color B, leaving a 14" [35 cm] tail for sewing the flower onto the purse.
Part 4: Attaching the Bamboo Handles, Side Seams & Boxed Corner Gussets
Follow these four finishing steps to assemble your purse into a structured 3D silhouette:
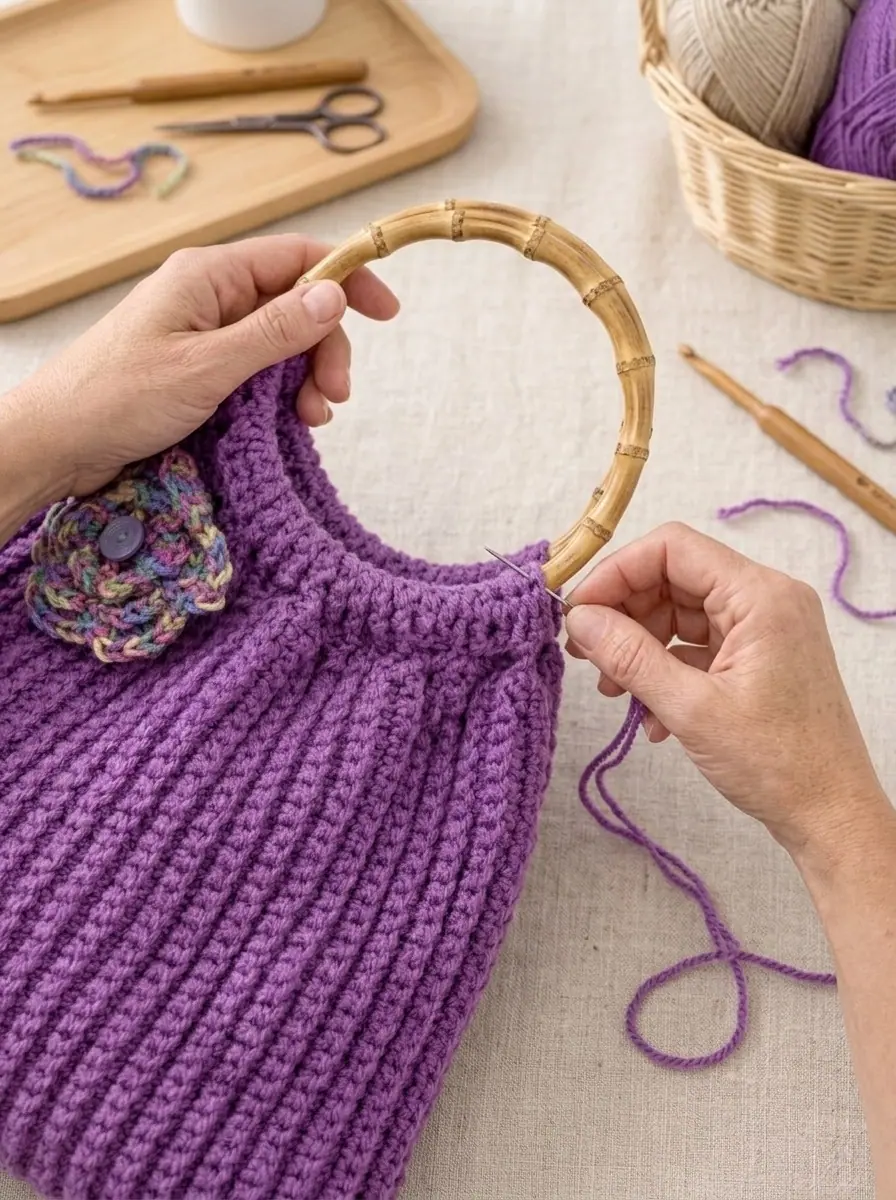
- Attach the Bamboo Handles: Slip one 6-inch round bamboo handle against the Wrong Side of the first Handle Flap. Fold the flap over the wooden ring so that Row 7 of the Flap meets Row 1 of the Flap on the inside of the bag. Using your tapestry needle and the 12-inch tail, whipstitch Row 7 securely to the base of Row 1 all the way across all 14 stitches. Repeat for the second Handle Flap and second bamboo handle.
- Single-Crochet the Side Seams: Fold the entire bag in half with Right Sides together (Wrong Side facing out) so the two bamboo handles sit aligned at the top. Leaving a 3" [7.5 cm] unseamed opening directly below the handles at the upper side edges, join Color A through both layers 3 inches below the handle on one side, ch 1, and work 1 row of sc evenly through both layers down to the bottom fold to close the side seam. Fasten off. Repeat on the second side edge, starting 3 inches below the handle and seaming down to the bottom fold.
- Sew the 2-Inch Boxed Corner Gussets: With Right Sides still together inside-out, pinch one bottom corner so the side seam lies centered directly on top of the bottom fold, forming a flat triangle at the lower corner. Using your tapestry needle and doubled Color A yarn, sew a straight horizontal seam approximately 2" [5 cm] long perpendicular to the side seam across the triangle tip. Repeat on the second bottom corner.
- Turn Right-Side Out & Mount the Flower Brooch: Turn the entire bag Right Side out and push out the boxed bottom gussets so the purse stands wide and plump. Position the 3-tier Flower Rosette on the upper right front of the bag just below the handle pleat, sew the base of the flower securely to the ribbed fabric, and stitch your 3/4" [19 mm] button right into the center ring of the flower. Weave in all ends.
Care Instructions for Bamboo-Handle Crochet Bags
- Spot Cleaning & Hand Washing: Because the purse features natural round bamboo handles sewn into the crochet flaps, spot-clean the crochet body with a damp cloth and mild wool/delicate wash, or hand wash the fabric portion in cool water while keeping the wooden rings out of prolonged soaking.
- Drying & Reshaping: Gently squeeze out excess moisture in a clean towel (never wring or twist), stuff the interior lightly with tissue paper or a dry hand towel to maintain the pleated hobo shape, and allow to air-dry flat away from direct heat. Do not machine dry, do not bleach, and do not iron acrylic yarn.
✨ PATTERN HELP & TIPS ✨
Got Questions?
Frequently Asked Questions
Click on any question below to reveal the answer
Can I attach D-rings and a long crossbody strap to this purse?
Yes! When sewing the two 14-stitch Handle Flaps around the bamboo handles, you can slip a 1-inch metal D-ring onto each side edge (or clip swivel clasps directly onto the bamboo rings) and attach a crocheted or leather crossbody strap for hands-free wear.
Why does the purse seem loosely gauged with a 6.5 mm hook on worsted yarn?
Working medium #4 yarn on a 6.5 mm (K/10.5) hook exclusively in the back loops creates a lofty, springy accordion rib that gathers effortlessly when reduced from 31 stitches down to 14 stitches at the handle flap. If you prefer an ultra-firm bag body, you can work the rectangle with a 5.5 mm (I/9) hook and add 6 extra rows to maintain the 17-inch width.
How do I keep the 3-tier flower petals from curling inward over time?
Before sewing the flower onto the bag, pin the 6 outer petals open on a foam mat, mist lightly with water, and let dry—or tack the hidden back of three outer petals to the purse body with a tiny invisible stitch so the rosette always sits flat and blooming.
PREVIOUS PATTERN
Granny Square Motif Crochet Shoulder Tote Bag
NEXT PATTERN
Textured Bobble and Fringe Square Crochet Throw Pillow
✨ KEEP CROCHETING ✨
You May Also Love
LEAVE A COMMENT
Have a question about a stitch or want to share how your project turned out? Drop a comment below — I read and reply to every maker!