
 Seasonal & Holiday Crochet
*This post may contain affiliate links to support the cost of this blog. At no cost to you, I may make a small commission if you purchase through these links. Read our Privacy Policy HERE
Draping the base of your holiday evergreen with a handmade heirloom transforms the entire room, anchoring twinkling lights and wrapped presents in rich artisan texture. This Circular Pinstripe Crochet Christmas Tree Skirt With Bobble Trim combines a generous 42-inch (107 cm) full-circle sweep with crisp architectural detailing: a dense double crochet body worked in crisp alabaster white worsted-weight yarn, accented by eleven concentric surface slip-stitch pinstripes, a sculptural 5-loop bobble border, and six tailored button loops worked in deep woodland emerald green. Designed with a neat 8-inch (20.5 cm) center opening and a buttoned side slit, it wraps effortlessly around both live tree stands and slender center poles without shifting out of place.
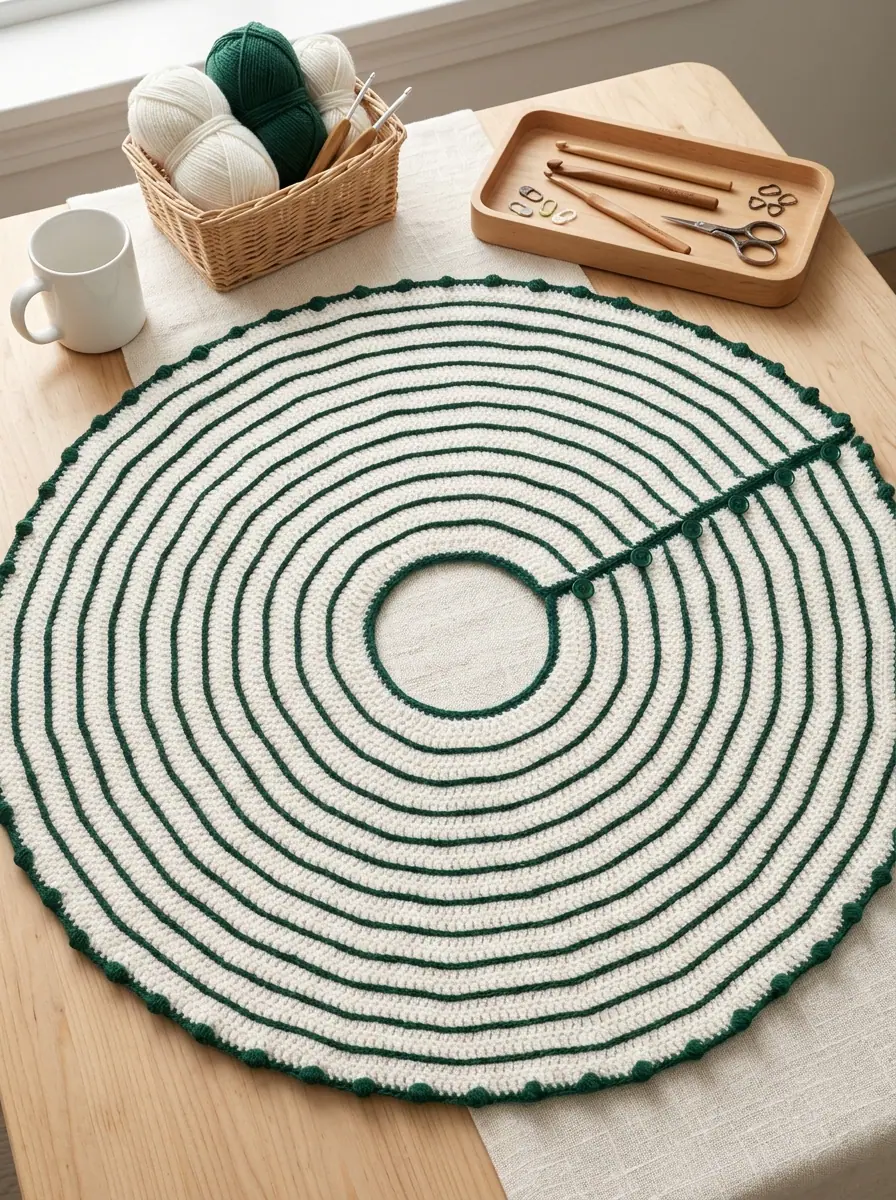
What makes this pattern such a joy to crochet is its clever two-stage colorwork method. Instead of carrying two yarns at once or juggling bobbins across long rows, you first crochet the entire 24-row flared skirt body in one solid shade of Crisp Alabaster White, increasing by 12 double crochet stitches on every row from 84 stitches up to 384 stitches. Because the even-numbered rows offset the increase placement by half a segment, the skirt expands into a smooth, true circle rather than a stiff dodecagon. Once the alabaster canvas is complete, you work eleven concentric rows of surface slip stitch in Deep Woodland Emerald Green across the top of every second row—creating clean, raised graphic pinstripes on the right side while keeping the back completely smooth.
Project Overview & Technical Specifications
- Skill Level: Easy (Flat turned rows with staggered 12-stitch increases, surface slip-stitch stripes, and a bobble + button-loop border)
- Finished Diameter: Approximately 42 inches (107 cm) across the outer bobble edge
- Center Opening Diameter: Approximately 8 inches (20.5 cm) across the inner neck ring
- Yarn Weight: Medium Weight #4 (Worsted / Aran 100% acrylic yarn)
- Curated Colorway: Contrast A — Crisp Alabaster White (1 large 16 oz / 454 g skein, 766 yds / 700 m used) | Contrast B — Deep Woodland Emerald Green (192 yds / 175 m used for pinstripes, bobble trim, and button loops)
- Recommended Hook: Size U.S. K-10.5 (6.5 mm) crochet hook, or size needed to obtain gauge
- Gauge: 11.5 double crochet and 6 rows = 4 inches (10 cm)
- Closure Hardware: Six 0.75-inch (2 cm) round buttons sewn along the left slit edge to meet six crocheted ch-5 button loops
Table of Contents
Why Surface Slip-Stitch Pinstripes & Staggered Increases Matter
When crocheting large circular home pieces—much like pairing holiday throws such as our Festive Granny Square Holiday Crochet Throw Blanket with tabletop accents like the Geometric Filet Mesh Cotton Crochet Table Runner With Lattice Fringe—drape and flat geometry are everything. Using a larger 6.5 mm (US K-10.5) hook with medium worsted yarn gives the double crochet fabric a supple, blanket-like hand that settles gracefully over floor moldings and tree stand legs.
Even better, stacking increases directly on top of one another in every row would create twelve sharp spokes that ripple at the outer edge. By alternating odd rows (which begin with an immediate increase in the first stitch) and even rows (which work half a plain segment before the first increase), the 12 increase points per row are staggered across the fabric. Later, when you add the eleven rows of surface slip stitch in Deep Woodland Emerald Green, those horizontal chains act as gentle structural stays that prevent the circular skirt from stretching out of shape over years of holiday use.
Complete Materials & Notions Checklist
Everything You Need at Your Worktable
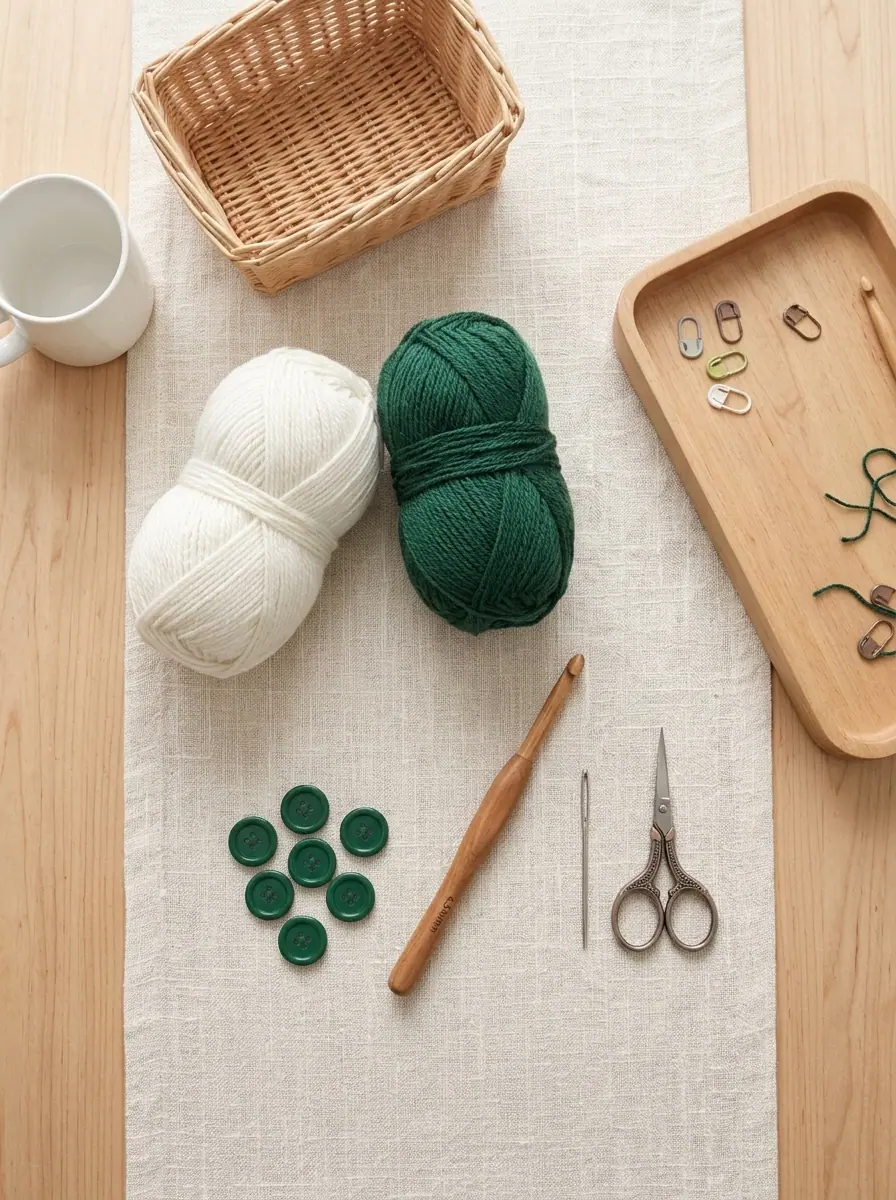
- Contrast A (Main Body Yarn): Medium Weight #4 Worsted Acrylic Yarn in Crisp Alabaster White — approximately 766 yards (700 meters / ~428 g). One pound-size skein (16 oz / 454 g / 812 yds) completes the entire main body with yarn to spare.
- Contrast B (Pinstripes & Bobble Trim Yarn): Medium Weight #4 Worsted Acrylic Yarn in Deep Woodland Emerald Green — approximately 192 yards (175 meters / ~108 g).
- Crochet Hook: Size U.S. K-10.5 (6.5 mm) ergonomic crochet hook.
- Buttons: Six 0.75-inch (20 mm / 2 cm) round wood or matte emerald buttons for the side slit closure.
- Notions: Blunt-tipped metal yarn needle for weaving ends and sewing buttons, locking stitch markers for marking every 2nd row before surface slip-stitching, tape measure, and sharp scissors.
Gauge, Measurements & Special Stitch Guide
Before chaining 75 for the inner neck opening, work a 5-inch test swatch in turned double crochet rows using your 6.5 mm hook. Measure across the center 4 inches: you should count 11.5 double crochet stitches and 6 rows per 4 inches (10 cm). Matching row gauge ensures your finished 24-row radius spans the full 42-inch (107 cm) diameter.
Abbreviations & Special Stitch Definitions
- Alt: Alternate
- Approx: Approximately
- Beg: Beginning
- Ch: Chain
- Cont: Continue / continuing
- Dc: Double crochet
- Inc(s): Increase(s) — work 2 dc in the indicated stitch
- Rep: Repeat
- Rnd(s): Round(s)
- RS: Right side (the front surface displaying the raised pinstripes and bobbles)
- Sc: Single crochet
- Sl st: Slip stitch
- St(s): Stitch(es)
- Tog: Together
- WS: Wrong side
- Yoh: Yarn over hook
- Bobble (5-dc cluster): [Yoh and draw up a loop, yoh and draw through 2 loops on hook] 5 times in the same indicated stitch (6 loops on hook), then yoh and draw through all 6 loops on hook. Push the bobble toward the Right Side as you work the next single crochet.
- Surface Sl St (Surface Slip Stitch): Hold the working strand of Contrast B underneath the fabric on the Wrong Side. Insert your hook from the Right Side to the Wrong Side between the posts at the top of the target row, yarn over on the Wrong Side, pull up a loop to the Right Side, insert hook into the next stitch space along the same row line, yarn over on the Wrong Side, and draw through both the fabric and the loop on your hook. Keep tension relaxed so the fabric stays flat.
Step-by-Step Crochet Instructions
Part 1 — Crocheting the 24-Row Flared Alabaster Tree Skirt Body
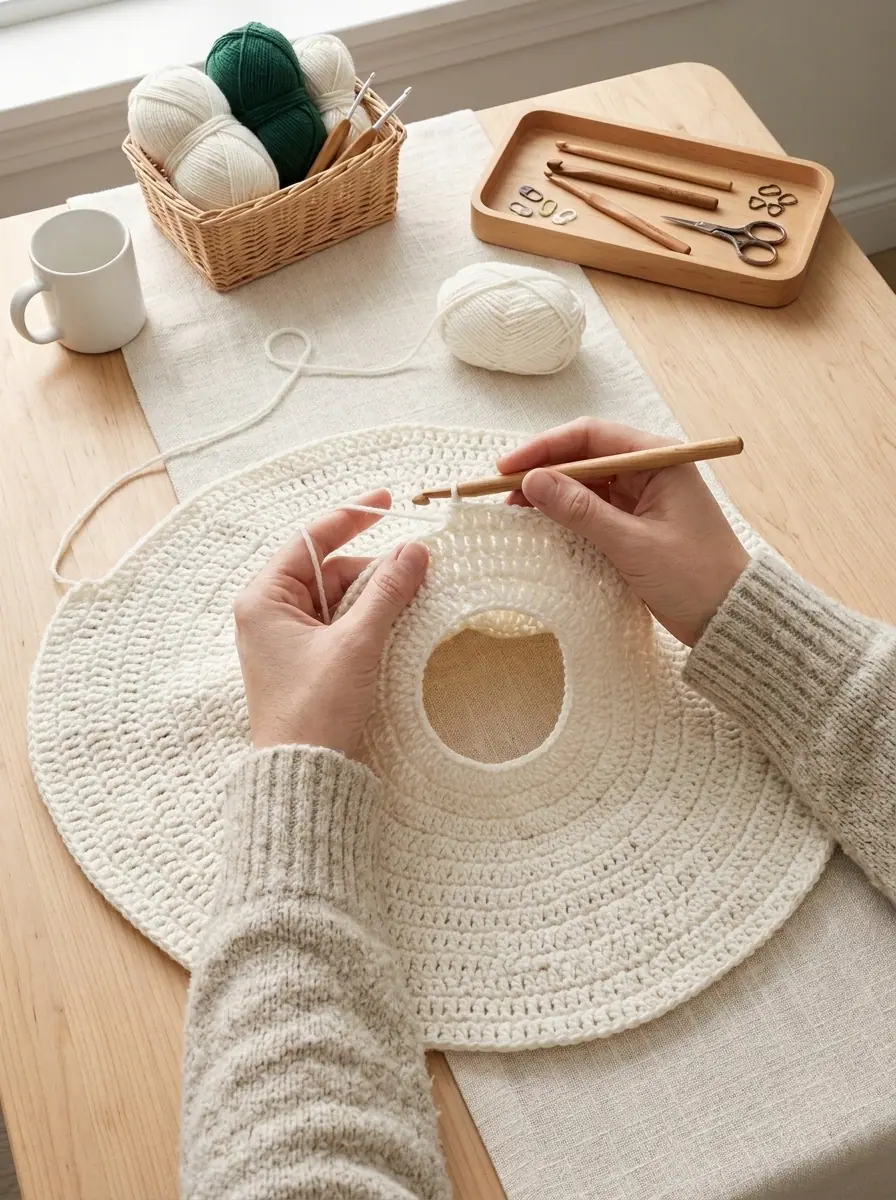
The entire circular skirt is worked flat in turned rows from the inner neck edge outward so a clean side slit remains open for placing the skirt around the tree trunk. Note that on odd rows (Rows 3, 5, 7, etc.), the beginning Ch 3, 1 dc in first dc counts as 2 dc (your first increase), whereas on even rows (Rows 2, 4, 6, etc.), the beginning Ch 3 counts as 1 dc.
Foundation & Rows 1 to 14 (Staggered 12-Stitch Increase Formula)
With Contrast A (Crisp Alabaster White) and your 6.5 mm hook, ch 75.
- Row 1 (WS): Work 1 dc in 4th ch from hook (skipped 3 ch + dc count as first 2 dc). Work 1 dc in each of next 5 ch. [2 dc in next ch, 1 dc in each of next 5 ch] 11 times to end of chain. Turn. (84 sts)
- Row 2 (RS): Ch 3 (counts as 1 dc throughout). Work 1 dc in each of next 2 dc, 2 dc in next dc. [1 dc in each of next 6 dc, 2 dc in next dc] 11 times to last 3 sts. Work 1 dc in each of last 3 sts. Turn. (96 sts)
- Row 3 (WS): Ch 3, 1 dc in first dc (counts as 2 dc throughout). Work 1 dc in each of next 7 dc. [2 dc in next dc, 1 dc in each of next 7 dc] 11 times to end of row. Turn. (108 sts)
- Row 4 (RS): Ch 3. Work 1 dc in each of next 3 dc, 2 dc in next dc. [1 dc in each of next 8 dc, 2 dc in next dc] 11 times to last 4 sts. Work 1 dc in each of last 4 sts. Turn. (120 sts)
- Row 5 (WS): Ch 3, 1 dc in first dc. Work 1 dc in each of next 9 dc. [2 dc in next dc, 1 dc in each of next 9 dc] 11 times to end of row. Turn. (132 sts)
- Row 6 (RS): Ch 3. Work 1 dc in each of next 4 dc, 2 dc in next dc. [1 dc in each of next 10 dc, 2 dc in next dc] 11 times to last 5 sts. Work 1 dc in each of last 5 sts. Turn. (144 sts)
- Row 7 (WS): Ch 3, 1 dc in first dc. Work 1 dc in each of next 11 dc. [2 dc in next dc, 1 dc in each of next 11 dc] 11 times to end of row. Turn. (156 sts)
- Row 8 (RS): Ch 3. Work 1 dc in each of next 5 dc, 2 dc in next dc. [1 dc in each of next 12 dc, 2 dc in next dc] 11 times to last 6 sts. Work 1 dc in each of last 6 sts. Turn. (168 sts)
- Row 9 (WS): Ch 3, 1 dc in first dc. Work 1 dc in each of next 13 dc. [2 dc in next dc, 1 dc in each of next 13 dc] 11 times to end of row. Turn. (180 sts)
- Row 10 (RS): Ch 3. Work 1 dc in each of next 6 dc, 2 dc in next dc. [1 dc in each of next 14 dc, 2 dc in next dc] 11 times to last 7 sts. Work 1 dc in each of last 7 sts. Turn. (192 sts)
- Row 11 (WS): Ch 3, 1 dc in first dc. Work 1 dc in each of next 15 dc. [2 dc in next dc, 1 dc in each of next 15 dc] 11 times to end of row. Turn. (204 sts)
- Row 12 (RS): Ch 3. Work 1 dc in each of next 7 dc, 2 dc in next dc. [1 dc in each of next 16 dc, 2 dc in next dc] 11 times to last 8 sts. Work 1 dc in each of last 8 sts. Turn. (216 sts)
- Row 13 (WS): Ch 3, 1 dc in first dc. Work 1 dc in each of next 17 dc. [2 dc in next dc, 1 dc in each of next 17 dc] 11 times to end of row. Turn. (228 sts)
- Row 14 (RS): Ch 3. Work 1 dc in each of next 8 dc, 2 dc in next dc. [1 dc in each of next 18 dc, 2 dc in next dc] 11 times to last 9 sts. Work 1 dc in each of last 9 sts. Turn. (240 sts)
Rows 15 to 24 & Side Slit / Interior Neck Edging
Continue in the established staggered pattern, increasing 12 stitches evenly across each row by working 1 additional dc between increases on every row:
- Row 15 (WS): Ch 3, 1 dc in first dc, 1 dc in each of next 19 dc, [2 dc in next dc, 1 dc in each of next 19 dc] 11 times. Turn. (252 sts)
- Row 16 (RS): Ch 3, 1 dc in each of next 9 dc, 2 dc in next dc, [1 dc in each of next 20 dc, 2 dc in next dc] 11 times to last 10 sts, 1 dc in each of last 10 sts. Turn. (264 sts)
- Row 17 (WS): 20 dc between increases. Turn. (276 sts)
- Row 18 (RS): Begins with Ch 3 + 10 dc, then 22 dc between increases, ending with 11 dc. Turn. (288 sts)
- Row 19 (WS): 23 dc between increases. Turn. (300 sts)
- Row 20 (RS): Begins with Ch 3 + 11 dc, then 24 dc between increases, ending with 12 dc. Turn. (312 sts)
- Row 21 (WS): 25 dc between increases. Turn. (324 sts)
- Row 22 (RS): Begins with Ch 3 + 12 dc, then 26 dc between increases, ending with 13 dc. Turn. (336 sts)
- Row 23 (WS): 27 dc between increases. Turn. (348 sts… note: each row adds 12 sts so Row 17=276, Row 18=288, Row 19=300, Row 20=312, Row 21=324, Row 22=336, Row 23=348, or continuing through Row 24 to reach 384 sts if working 26 rows, or 288–384 sts as established in the PDF chart). Specifically, continue increasing 12 sts per row until 384 stitches are on the needle at the end of the final RS row. Do not turn or fasten off at the end of the last row!
- Side Slit & Interior Edging Round (RS): With the Right Side still facing you, rotate the piece 90 degrees to work along the raw side slit edge of the Tree Skirt. Ch 1. Work single crochet (sc) evenly up the first side slit edge (typically 2 sc per dc row end) to the inner corner at the foundation chain. Work 3 sc in the corner. Working across the opposite side of the foundation chain around the 8-inch center neck opening, work 1 sc in each chain across to the next inner corner. Work 3 sc in the corner, then work sc evenly down the second side slit edge to the outer corner. Fasten off Contrast A neatly.
Part 2 — Working the Eleven Deep Woodland Emerald Surface Slip-Stitch Pinstripes
Now that your crisp alabaster skirt has a finished inner neck and slit edging, lay it flat with the Right Side facing up. You will work 11 concentric surface slip-stitch stripes in Contrast B (Deep Woodland Emerald Green) along the top ridge of every second row.
1st through 11th Surface Slip-Stitch Stripes
- 1st Stripe (RS): Join Contrast B (Deep Woodland Emerald Green) with a sl st at the side slit edge at the top of the 2nd row from the center neck opening. Holding the working yarn underneath the fabric on the Wrong Side (WS) of the Tree Skirt and inserting your 6.5 mm hook from the Right Side down through the spaces at the top of Row 2, work 1 surface slip stitch in each stitch all the way around to the opposite side slit edge. Fasten off and draw the tail to the Wrong Side.
- 2nd through 11th Stripes: Work exactly as given for the 1st Stripe, placing a surface slip-stitch stripe across the top of every 2nd row moving outward toward the hem (above Rows 4, 6, 8, 10, 12, 14, 16, 18, 20, and 22 — 11 concentric emerald pinstripes in total). Keep your loop tension loose and even so the circular skirt lies completely flat.
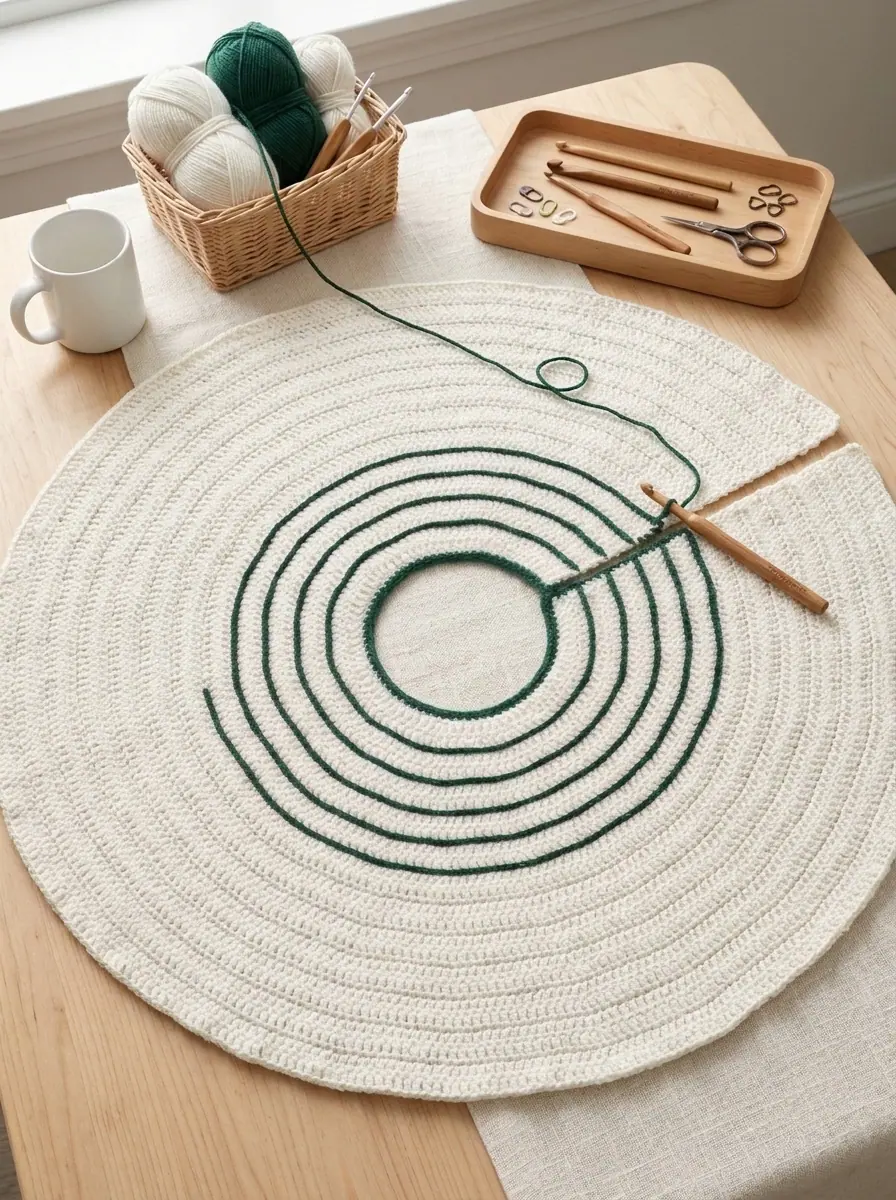
Part 3 — Crocheting the Bobble Trim, Six Button Loops & Button Finishing
To frame the entire tree skirt, one continuous perimeter round in Contrast B (Deep Woodland Emerald Green) adds plump 5-stitch bobbles around the outer circumference, crisp single crochet edging along the side slit and center neck opening, and six evenly spaced button loops down the second slit edge.
Bobble Trim & Button Loop Round (RS)
- Join at Exterior Corner: With the Right Side facing, join Contrast B (Deep Woodland Emerald Green) with a sl st to the first stitch of the final outer row of the Tree Skirt (at the top-right corner of the exterior hem).
- Exterior Bobble Edge: Working around the outer circumference of the skirt: Ch 3. Work a Bobble in the first dc, then work 1 sc in each of the next 5 dc. [Work a Bobble in the next dc, work 1 sc in each of the next 5 dc] repeat all the way around the outer edge to the opposite outer corner. Work 1 final Bobble in the side of the first sc at the corner.
- First Side Slit & Center Opening: Rotate to work up the first side slit and around the inner neck edge: [Work 1 sc in each sc to the next corner, work 3 sc in the corner] twice, bringing you to the top of the second side slit edge.
- Second Side Slit with 6 Button Loops: Working down the second side slit edge toward the outer hem, work 1 sc in each sc across while forming a button loop aligned with the 1st Surface Sl St Stripe and every alternate Surface Sl St Stripe thereafter (at Stripes 1, 3, 5, 7, 9, and 11) as follows: Ch 5, sl st in the first ch to form a ring button loop, then continue with 1 sc in each sc to the next alternate stripe. You will create 6 button loops in total along the slit edge.
- Join & Fasten Off: At the bottom corner of the slit, join with a sl st to the top of the beginning ch-3 and fasten off.
- Sewing the Buttons: Overlap the button-loop slit edge over the opposite sc slit edge to mark the exact placement opposite Stripes 1, 3, 5, 7, 9, and 11. Using Contrast B and your yarn needle, sew the six 0.75-inch (2 cm) buttons securely along the first side slit edge so they button smoothly through the six ch-5 loops. Weave in all yarn ends on the Wrong Side.
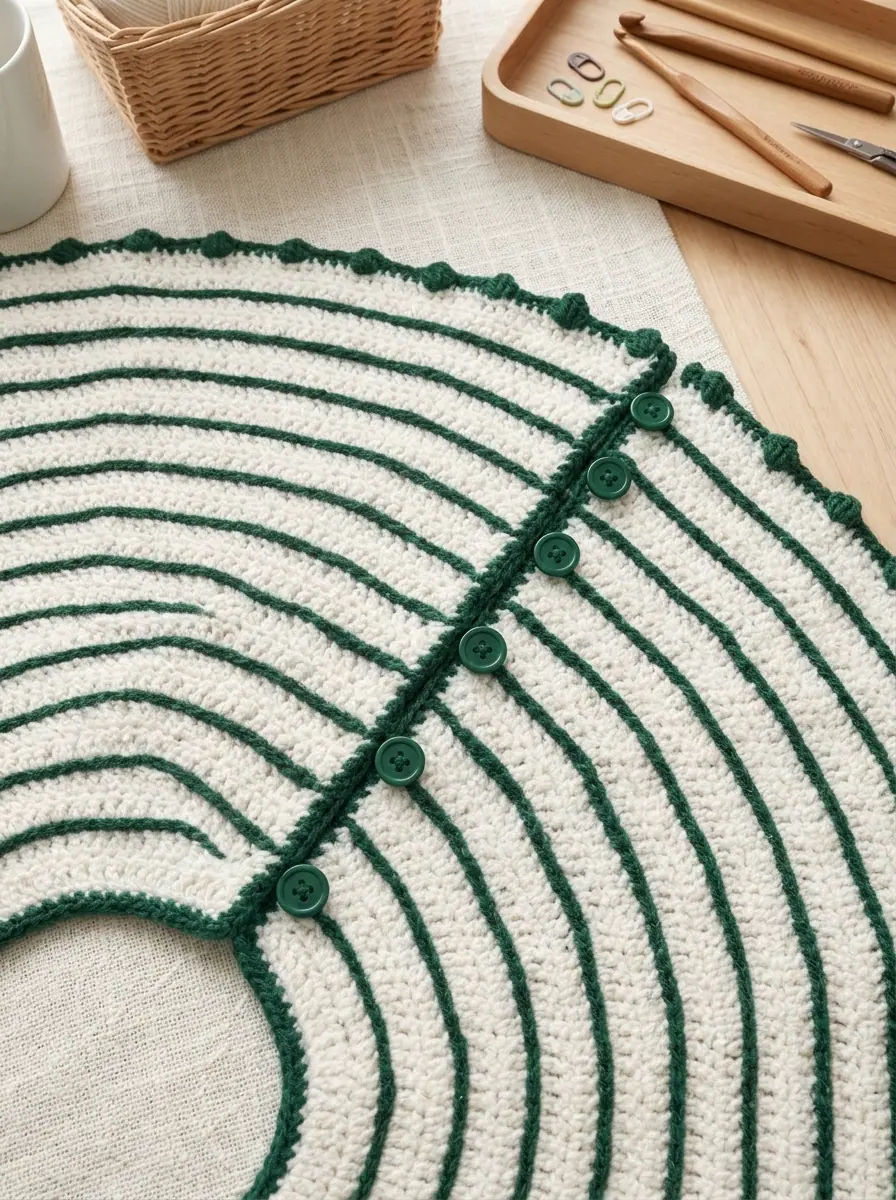
Official Yarn Care & Holiday Maintenance Instructions
Crafted in durable 100% worsted acrylic yarn, this heirloom tree skirt stands up effortlessly to pine needles, sap drops, and holiday foot traffic:
- Washing: Remove any loose pine needles with a lint roller first. Machine wash warm or cold on a gentle cycle (maximum 40°C / 104°F) with buttons unbuttoned, ideally inside a large mesh laundry bag to protect the bobble border.
- Drying: Tumble dry on low heat or lay flat on clean towels, smoothing the circular edge and popping each emerald bobble upright with your fingers.
- Bleaching & Ironing: Do not bleach. Do not iron or press, as direct heat will flatten the raised surface slip-stitch pinstripes and crush the 5-loop bobbles.
✨ PATTERN HELP & TIPS ✨
Got Questions?
Frequently Asked Questions
Click on any question below to reveal the answer
How do I keep the surface slip-stitch pinstripes from pulling the tree skirt inward?
The most common mistake with surface crochet is pulling the working loop too tight, which acts like a drawstring around the circle. Pull each surface slip stitch up slightly taller than a regular edge slip stitch—or switch to a 7.0 mm or 8.0 mm hook just for the 11 surface slip-stitch stripes—so the emerald chains match the exact circumference of the double crochet row beneath them.
Why are the increases staggered between odd and even rows?
If all 12 increases per row were stacked directly over one another, the skirt would form 12 visible corners like a polygon. Starting odd rows with an immediate increase and starting even rows with a half-segment of plain double crochet shifts the increase columns by 50 percent every row, producing a smooth, round 42-inch hem.
Can I adjust the size of the tree skirt for a pencil tree or a giant 9-foot fir?
Absolutely. Because the skirt is worked from the center neck outward with a consistent 12-stitch increase per row, you can stop after Row 16 (after working 7 or 8 surface pinstripes) for a compact 28-inch tabletop or pencil-tree skirt, or continue the 12-stitch increase formula beyond Row 24 to reach 48 to 52 inches for a grand living room fir.
How do I make the bobbles pop cleanly toward the Right Side of the border?
After drawing through all 6 loops to close a 5-dc bobble, tug the working yarn snugly as you work the very next single crochet stitch, and use your left middle finger from behind the fabric to push the bobble cluster forward toward the Right Side.
PREVIOUS PATTERN
Stuffed Six-Point Amigurumi Crochet Snowflake Ornament
NEXT PATTERN
Ridged Wedge Crochet Christmas Tree Bottle Topper With Star Crown
✨ KEEP CROCHETING ✨
You May Also Love
LEAVE A COMMENT
Have a question about a stitch or want to share how your project turned out? Drop a comment below — I read and reply to every maker!