
 Crochet Sweaters & Cardigans
*This post may contain affiliate links to support the cost of this blog. At no cost to you, I may make a small commission if you purchase through these links. Read our Privacy Policy HERE
Searching for a modern crochet sweater design that looks like classic knitwear without complicated stitch charts or heavy bulk? The Caron Vertical Ridges Crochet Sweater is an easy, sideways-constructed pullover that uses half double crochet worked into the horizontal bar (hdchb) and back-loop single crochet (scbl) to create Vertical knit-look columns from cuff to cuff and hem to shoulder. Worked flat in Bulky weight #5 wool-blend yarn with a 6 mm (US J/10) crochet hook, this size-inclusive garment covers six adult size ranges from XS/S all the way to 4/5XL.
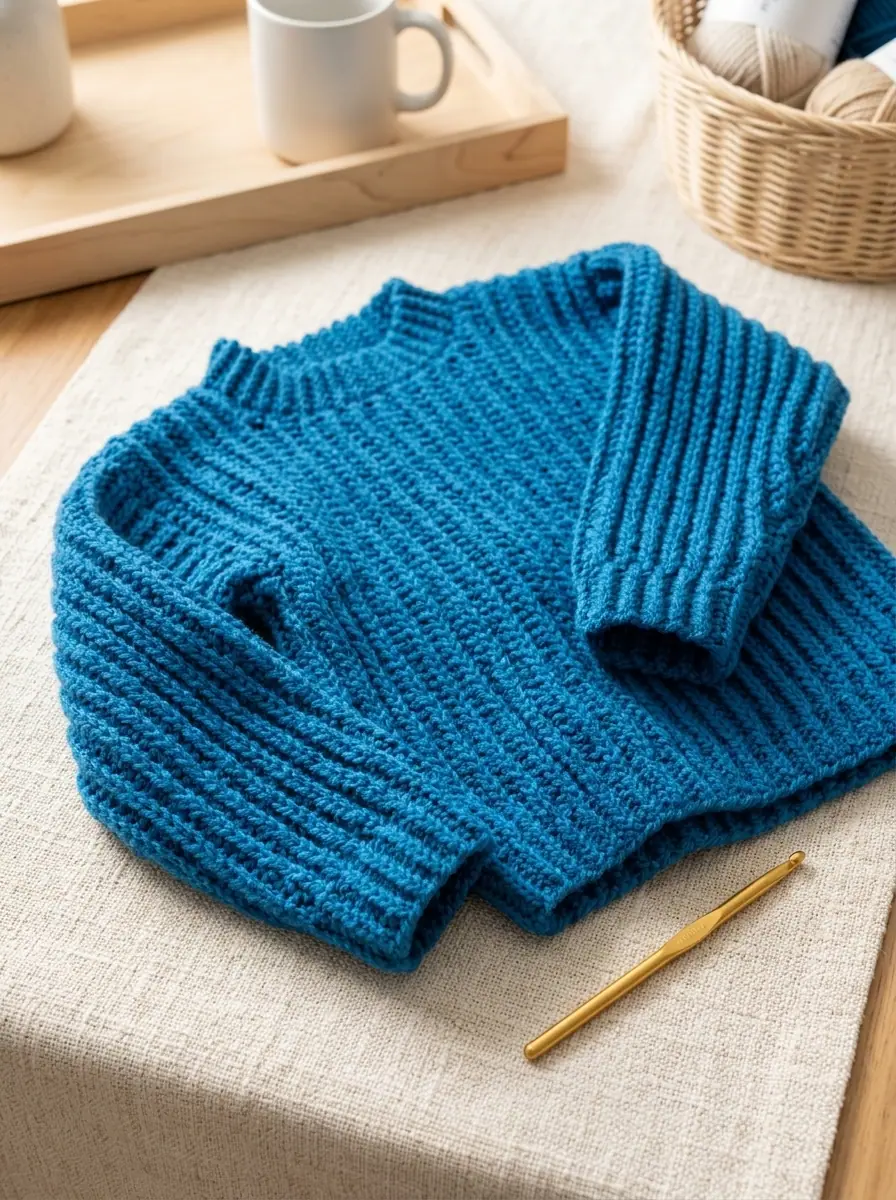
Unlike traditional top-down or bottom-up pullovers where rows create horizontal stripes, working a crochet sweater pattern from side to side turns every row of stitches into a vertical column. That vertical orientation naturally elongates the torso, provides comfortable horizontal stretch across the chest and sleeves, and builds the bottom ribbed hem right into the main rows so you never have to pick up hundreds of stitches around the waist at the end.
Pattern Overview
- Pattern Name: Caron Vertical Ridges Crochet Sweater (Official SKU:
CAC0829-37665M) - Skill Level: Easy (Side-to-side flat construction using basic stitches worked into specific loops)
- Yarn Weight: Bulky Weight
#5(62% Acrylic, 20% Nylon, 18% Wool) - Recommended Hook: U.S. J/10 (
6 mm) crochet hook (or size needed to obtain gauge) - Available Sizes: Adult XS/S, M, L, XL, 2/3XL, and 4/5XL
- Finished Chest Circumference:
40" [101.5 cm](XS/S) up to62" [157.5 cm](4/5XL) - Gauge:
11 sts and 9.5 rows = 4" [10 cm]in Half Double Crochet in Horizontal Bar (hdchb) pattern
Table of Contents
- Why Side-to-Side Crochet Sweater Design Works So Well
- Materials & Tools Required
- Complete Size Chart & Gauge Guide
- Stitch Abbreviations & Special Stitches
- Step-by-Step Caron Vertical Ridges Crochet Sweater Pattern
- Frequently Asked Questions
- Official Yarn Care & Washing Instructions
- Pin This Crochet Sweater Design for Later!
Why Side-to-Side Crochet Sweater Design Works So Well
When makers browse for a beginner-friendly crochet sweater design, one of the biggest frustrations is bulky seams or stiff fabric. By pairing Caron Simply Me (a soft bulky blend of acrylic, nylon, and wool) with a 6 mm hook and sideways construction, this pullover solves three common garment challenges at once:
- Built-In Bottom Hem & Cuff Ribbing: The 6-stitch single crochet back-loop (
scbl) border at the lower edge of the Back, Front, and Sleeves is worked right at the start or end of each vertical row. As you crochet across the width of the sweater, your bottom waist ribbing grows automatically. - Pronounced Vertical Ridges: Working half double crochet into the horizontal bar created below the top loops (
hdchb) pushes the top two V-loops forward, forming crisp, raised vertical ribs on both the Right Side and Wrong Side of the sweater. - Clean Square Armholes: Shaping the armholes and neckline is done simply by chaining extra stitches at the armhole edge or leaving stitches unworked at the end of a row, avoiding complex curved decreases.
Materials & Tools Required
To crochet the Caron Vertical Ridges Crochet Sweater in your chosen size, gather the exact materials specified in the Yarnspirations blueprint:
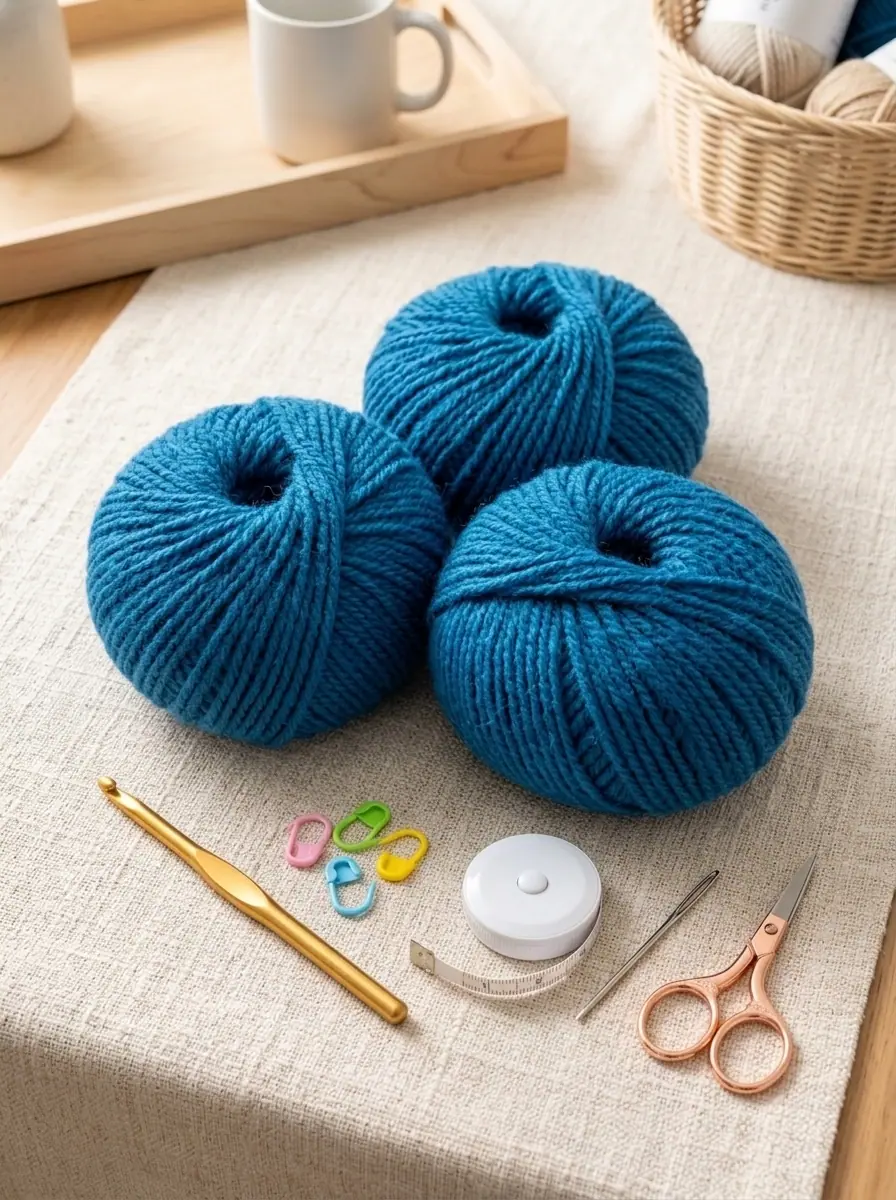
Yarn: Caron Simply Me (Bulky Weight #5; 7 oz / 200 g; 246 yds / 225 m per ball; 62% Acrylic, 20% Nylon, 18% Wool) in shade Blue Topaz (08008) or Aran (08013).
Balls & Yardage by Size:
• Size XS/S: 5 balls (1,165 yds / 1,060 m)
• Size M: 6 balls (1,282 yds / 1,165 m)
• Size L: 6 balls (1,405 yds / 1,275 m)
• Size XL: 7 balls (1,520 yds / 1,380 m)
• Size 2/3XL: 7 balls (1,640 yds / 1,490 m)
• Size 4/5XL: 8 balls (1,750 yds / 1,590 m)
Crochet Hook: Size U.S. J/10 (6 mm) Susan Bates Silvalume crochet hook, or the hook size required to match the stated gauge.
Notions: Locking stitch markers (at least 4 markers for tracking armhole and neckline shaping points), blunt-tipped yarn needle for seaming, soft measuring tape, and sharp craft scissors.
Complete Size Chart & Gauge Guide
This pattern is written for six adult sizes with generous positive ease (approximately 6" to 10" of ease depending on your chest measurement) for a relaxed, cozy fit. Throughout the instructions below, numbers are listed in the order: XS/S (M – L – XL – 2/3XL – 4/5XL). When only a single number is shown, it applies to all six sizes.
| Size | To Fit Chest Measurement | Finished Chest Circumference | Yarn Required (Balls) | Total Yardage / Meterage |
|---|---|---|---|---|
| XS/S | 28–34″ [71–86.5 cm] | 40″ [101.5 cm] | 5 balls | 1,165 yds / 1,060 m |
| M | 36–38″ [91.5–96.5 cm] | 43″ [109 cm] | 6 balls | 1,282 yds / 1,165 m |
| L | 40–42″ [101.5–106.5 cm] | 48″ [122 cm] | 6 balls | 1,405 yds / 1,275 m |
| XL | 44–46″ [112–117 cm] | 51″ [129.5 cm] | 7 balls | 1,520 yds / 1,380 m |
| 2/3XL | 48–54″ [122–137 cm] | 56″ [142 cm] | 7 balls | 1,640 yds / 1,490 m |
| 4/5XL | 56–62″ [142–157.5 cm] | 62″ [157.5 cm] | 8 balls | 1,750 yds / 1,590 m |
Checking Your Side-to-Side Gauge
Before starting the Back panel, crochet a 5" x 5" swatch in the hdchb pattern: 11 stitches and 9.5 rows = 4″ [10 cm]. Because the sweater is worked from side to side, your stitch gauge (11 sts per 4″) controls the vertical length of the sweater from hem to shoulder, while your row gauge (9.5 rows per 4″) controls the horizontal width across the chest.
Maker Tip: When working
hdchb (half double crochet in the horizontal bar), tilt the top of the previous row slightly toward you. You will see the standard front loop and back loop at the very top, and a third horizontal strand running right underneath them on the side facing you. Insert your 6 mm hook under that third horizontal bar so the top V-loops roll forward to form a crisp knit-look rib.
Stitch Abbreviations & Special Stitches
Review these US crochet terms and special stitch definitions before beginning:
| Abbreviation | Term & Exact Definition |
|---|---|
| Beg | Beginning |
| Ch | Chain(s) |
| Cont | Continue / Continuity |
| Hdc | Half double crochet |
| Hdchb | Half Double Crochet in Horizontal Bar: Work 1 hdc into the horizontal bar created below in the previous row (the bar lies directly below the loops normally worked on the Wrong Side). |
| Hdchb2tog | Half Double Crochet 2 Together in Horizontal Bar: [Yarn over hook and draw up a loop in next horizontal bar created below in previous row] twice. Yarn over hook and draw through all 5 loops on hook (1 stitch decreased). |
| Pat | Pattern |
| PM | Place marker |
| Rem | Remain(ing) |
| Rep | Repeat |
| RS / WS | Right Side / Wrong Side |
| Sc | Single crochet |
| Scbl | Single crochet in back loop only |
| Sl st | Slip stitch |
| St(s) | Stitch(es) |
| Yoh | Yarn over hook |
Essential Construction Notes:
- Both the Sweater body panels (Back and Front) and the Sleeves are worked flat from side to side.
Ch 2at the beginning of a row does not count as a stitch.
✨ FREE CROCHET EBOOK ✨
Master Gauge & Blocking
Get Our Free Crochet Ebook!
Download The Ultimate Stitch, Gauge & Blocking Guide — packed with printable stitch charts, tension secrets, and step-by-step tutorials delivered straight to your inbox.
🔒 100% Free Instant PDF Download • Unsubscribe anytime
Step-by-Step Caron Vertical Ridges Crochet Sweater Pattern
Part 1: Crocheting the Back Panel (Right Edge & Right Armhole Shaping)
You will begin at the lower right side seam of the Back panel and work vertically between the body and the 6-stitch bottom hem border:
- Foundation Chain: Beginning at the right side edge,
ch 48. - 1st Row (RS): Work
1 hdcin the 3rd ch from hook and in each ch across to the last 6 ch. Work1 scin each of the last 6 ch (these 6 sc form the bottom ribbed hem). Turn. You have 46 sts total (40 hdc + 6 sc). Place Marker (PM) at the end of this row. - 2nd Row (WS):
Ch 1. Work1 scblin each of the first 6 sc. Work1 hdchbin each hdc to the end of the row. Turn. (46 sts) - 3rd Row (RS):
Ch 2. Work1 hdchbin each hdc across to the last 6 sc. Work1 scblin each of the last 6 sc. Turn. (46 sts) - Underarm Side Extension: Repeat the last 2 rows (Rows 2 and 3) 0 (0 – 1 – 1 – 2 – 2) time(s) more, then work the 2nd Row once more.
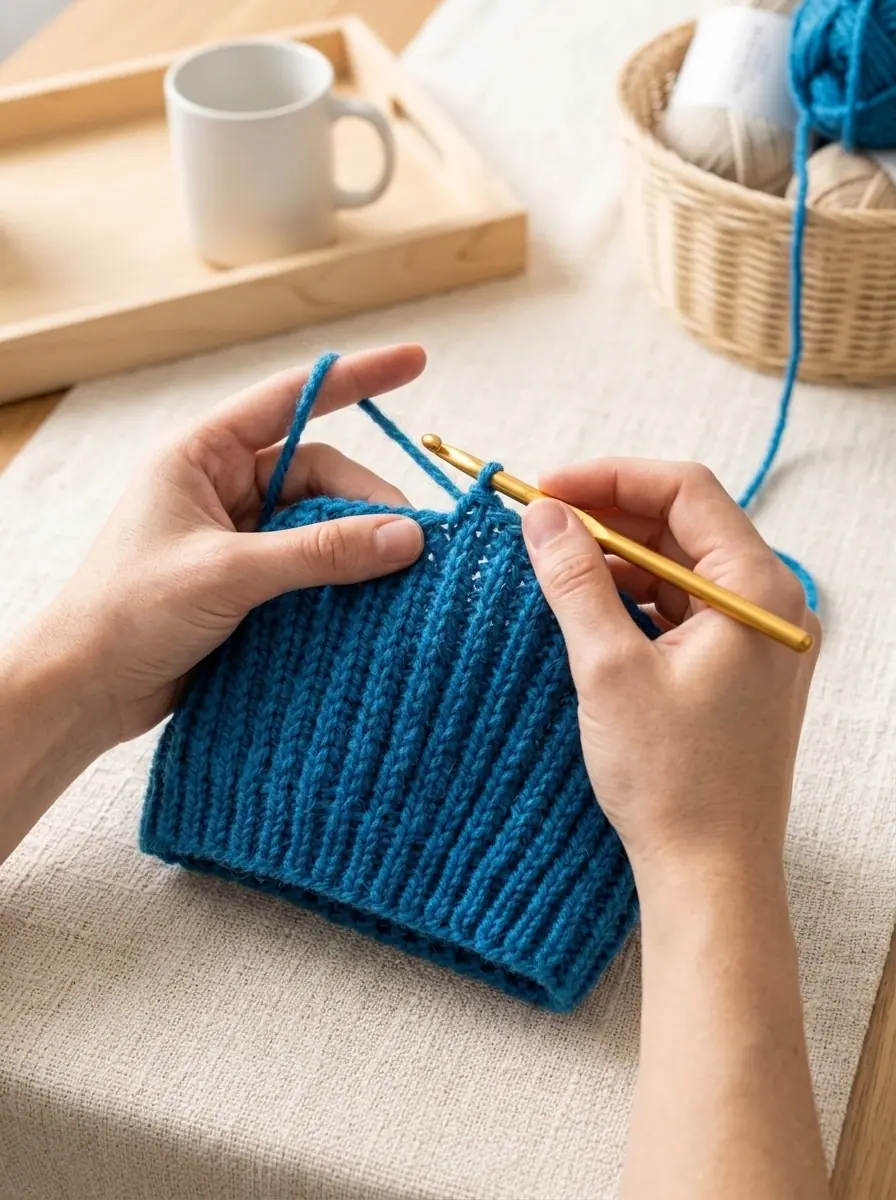
Shaping the Right Armhole
Now extend the top edge of the panel upward by chaining new stitches for the upper chest and shoulder height:
- 1st Row (RS):
Ch 26 (28 - 29 - 30 - 33 - 35). Work1 hdcin the 3rd ch from hook and in each of the next23 (25 - 26 - 27 - 30 - 32) ch. Continue across the existing panel by working1 hdchbin each of the next 40 hdc, then1 scblin each of the last 6 sc. Turn. You now have 70 (72 – 73 – 74 – 77 – 79) sts. - 2nd Row (WS):
Ch 1. Work1 scblin each of the first 6 sc. Work1 hdchbin each of the next64 (66 - 67 - 68 - 71 - 73) hdcto the top shoulder edge. Turn. - 3rd Row (RS):
Ch 2. Work1 hdchbin each hdc across to the last 6 sc. Work1 scblin each of the last 6 sc. Turn. - Right Shoulder Width: Repeat the last 2 rows (Rows 2 and 3) until the work measured horizontally from the first marked row reaches 6 (7.5 – 8 – 9 – 10 – 10.5)” [15 (19 – 20.5 – 23 – 25.5 – 26.5) cm], ending after completing a 3rd Row (RS).
Shaping the Back Neckline & Left Side
- Shape Right Back Neck Edge — 1st Row (WS):
Ch 1. Work1 scblin each of the first 6 sc. Work1 hdchbin each hdc across to the last 3 hdc. WorkHdchb2togover the next 2 hdc. Turn, leaving the remaining 1 st unworked at the neck edge. Place Marker (2nd marker) at the beginning of THIS row. - 2nd Row (RS):
Ch 2. Work1 hdchbin each hdc across to the last 6 sc. Work1 scblin each of the last 6 sc. Turn. (68 [70 – 71 – 72 – 75 – 77] sts) - 3rd Row (WS):
Ch 1. Work1 scblin each of the first 6 sc. Work1 hdchbin each hdc to the end of the row. Turn. - Center Back Neck Width: Repeat the last 2 rows (Rows 2 and 3) until the work from the last marked row (2nd marker) measures 6 (6 – 7 – 7 – 8 – 9)” [15 (15 – 18 – 18 – 20.5 – 23) cm], ending on a 2nd Row (RS).
- Shape Left Back Neck Edge — 1st Row (WS):
Ch 1. Work1 scblin each of the first 6 sc. Work1 hdchbin each hdc to the last hdc. Work2 hdchbin the last hdc. Turn. - 2nd Row (RS):
Ch 3. Work1 hdcin the 3rd ch from hook. Work1 hdchbin each hdc across to the last 6 sc. Work1 scblin each of the last 6 sc. Turn. Place Marker (3rd marker) on the last stitch. You are back to 70 (72 – 73 – 74 – 77 – 79) sts. - Left Shoulder Section — 3rd Row (WS):
Ch 1. Work1 scblin each of the first 6 sc. Work1 hdchbin each hdc to the end of the row. Turn. - 4th Row (RS):
Ch 2. Work1 hdchbin each hdc across to the last 6 sc. Work1 scblin each of the last 6 sc. Turn. - Match Right Shoulder Width: Repeat the last 2 rows (Rows 3 and 4) until the work from the 3rd marker measures 1 row less than the number of rows worked on the right side between the Armhole shaping and Neck shaping, ending on a 4th Row (RS).
- Shape Left Armhole — 1st Row (WS):
Ch 1. Work1 scblin each of the first 6 sc. Work1 hdchbin each of the next 40 hdc. Turn, leaving the remaining upper armhole stitches unworked. (46 sts) - 2nd Row (RS):
Ch 2. Work1 hdchbin each hdc to the last 6 sc. Work1 scblin each of the last 6 sc. Turn. (46 sts) - 3rd Row (WS):
Ch 1. Work1 scblin each of the first 6 sc. Work1 hdchbin each hdc to the end of the row. Turn. - Complete Left Underarm Edge: Repeat the last 2 rows (Rows 2 and 3) 0 (0 – 1 – 1 – 2 – 2) time(s) more, then work the 2nd Row once more. Fasten off.
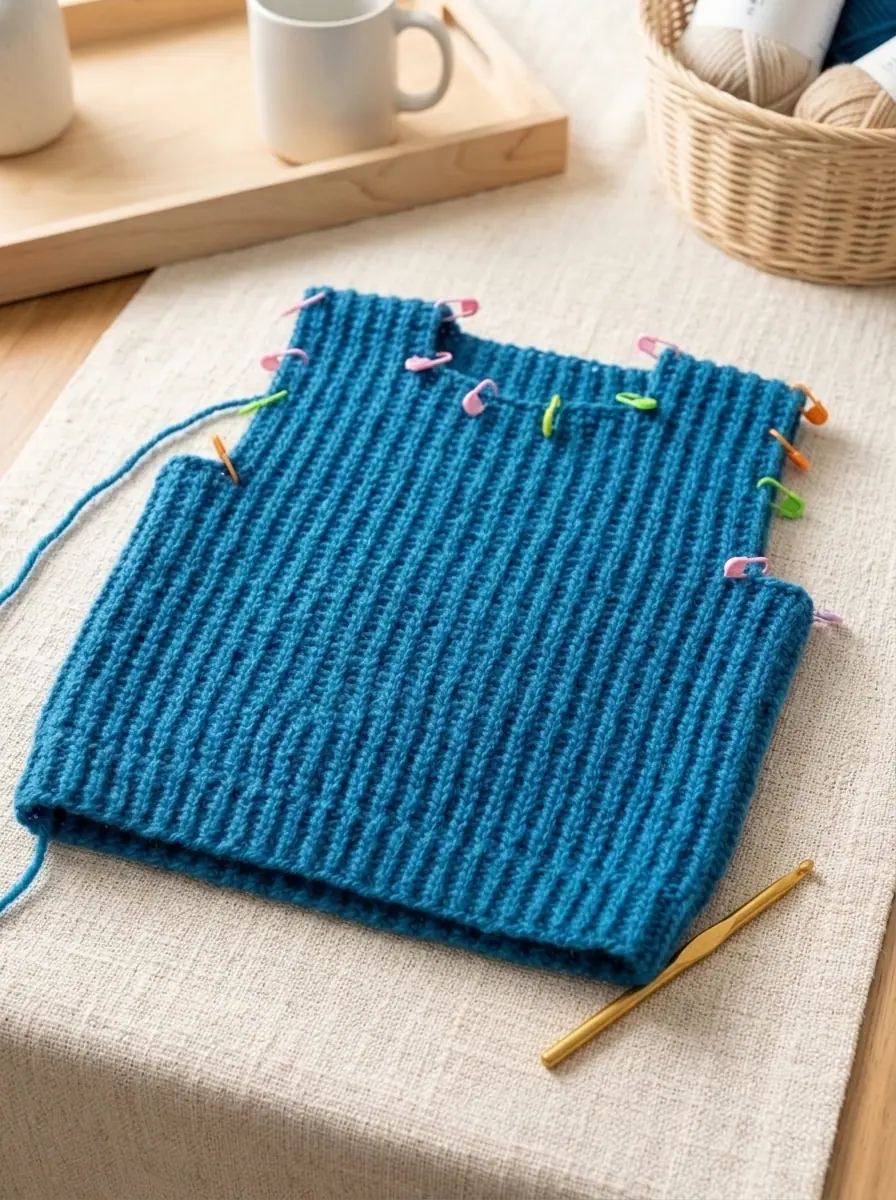
Part 2: Crocheting the Front Panel (Deeper Front Neck Shaping)
The Front panel begins identically to the Back panel from the lower left edge through the first shoulder:
- Initial Section & First Armhole: Work all instructions from the beginning of the Back panel through the end of Shape Right Armhole (ending on a 3rd Row when the panel measures
6 [7.5 - 8 - 9 - 10 - 10.5]"from the first marker). - Shape Left Front Neck Edge — 1st Row (WS):
Ch 1. Work1 scblin each of the first 6 sc. Work1 hdchbin each hdc across to the last 10 hdc. WorkHdchb2togover the next 2 hdc. Turn, leaving the remaining 8 neck stitches unworked. Place Marker (2nd marker) at the beginning of THIS row. (61 [63 – 64 – 65 – 68 – 70] sts) - 2nd Row (RS):
Ch 2. WorkHdchb2togover the first 2 sts. Work1 hdchbin each hdc to the last 6 sc. Work1 scblin each of the last 6 sc. Turn. (60 [62 – 63 – 64 – 67 – 69] sts) - 3rd Row (WS):
Ch 1. Work1 scblin each of the first 6 sc. Work1 hdchbin each hdc to the last 2 sts. WorkHdchb2togover the last 2 sts. Turn. (59 [61 – 62 – 63 – 66 – 68] sts) - Center Front Neck Width: Work even in pattern (maintaining
scblon the 6 hem stitches andhdchbon all body stitches without further decreases) until the work from the 2nd marker measures 6 (6 – 7 – 7 – 8 – 9)” [15 (15 – 18 – 18 – 20.5 – 23) cm], ending on a 2nd Row (RS). - Shape Right Front Neck Edge — 1st Row (WS):
Ch 1. Work1 scblin each of the first 6 sc. Work1 hdchbin each hdc across to the last hdc. Work2 hdcin the last hdc. Turn. (60 [62 – 63 – 64 – 67 – 69] sts) - 2nd Row (RS):
Ch 2. Work2 hdcin the first hdc. Work1 hdchbin each hdc across to the last 6 sc. Work1 scblin each of the last 6 sc. Turn. Place Marker (3rd marker) on the last stitch. (61 [63 – 64 – 65 – 68 – 70] sts) - 3rd Row (WS):
Ch 1. Work1 scblin each of the first 6 sc. Work1 hdchbin each hdc to the last hdc. Work2 hdchbin the last hdc. Turn. (62 [64 – 65 – 66 – 69 – 71] sts) - 4th Row (RS):
Ch 10. Work1 hdcin the 3rd ch from hook and in each of the next 7 ch (8 new neck stitches added). Work1 hdchbin each hdc across to the last 6 sc. Work1 scblin each of the last 6 sc. Turn. You are back to 70 (72 – 73 – 74 – 77 – 79) sts. - Finish Second Shoulder & Armhole: Complete the remainder of the Front panel by following the Back panel instructions from Left Shoulder Section — 3rd Row (WS) through the end of Shape Left Armhole, then fasten off.
Part 3: Crocheting the Side-to-Side Sleeves (Make 2)
To prevent stair-step edges along the underarm seam, the Sleeves are shaped gradually in stepped sections:
- Initial Upper-Side Edge:
Ch 13 (13 - 11 - 11 - 10 - 9). - 1st Row (RS): Work
1 hdcin the 3rd ch from hook and in each ch to the end of the chain. Turn. (11 [11 – 9 – 9 – 8 – 7] hdc) - 2nd Row (WS):
Ch 12 (12 - 10 - 10 - 9 - 7). Work1 hdcin the 3rd ch from hook and in each of the next9 (9 - 7 - 7 - 6 - 5) ch. Work1 hdchbin each hdc across to the end of the row. Turn. (21 [21 – 16 – 16 – 15 – 13] hdc) - 3rd Row (RS):
Ch 2. Work1 hdchbin each hdc to the end of the row. Turn. - Stepped Sleeve Increases: Repeat the last 2 rows (Rows 2 and 3) 2 (2 – 3 – 3 – 3 – 4) times more. You now have 41 (41 – 41 – 41 – 36 – 37) hdc.
- Add the 6-Stitch Cuff Border (WS):
Ch 11 (11 - 11 - 11 - 11 - 8). Work1 scin the 2nd ch from hook and in each of the next 5 ch (6 cuff sc). Work1 hdchbin each hdc across to the end of the row. Turn. You now have 51 (51 – 51 – 51 – 46 – 44) sts. Place Marker at the beginning of this row. - Main Sleeve Width — Next Row (RS):
Ch 2. Work1 hdchbin each hdc to the last 6 sc. Work1 scblin each of the last 6 sc. Turn. - Next Row (WS):
Ch 1. Work1 scblin each of the first 6 sc. Work1 hdchbin each hdc to the end of the row. Turn. - Work Even Across Sleeve Width: Repeat the last 2 rows until the sleeve from the marked row measures 10 (11 – 10 – 11 – 12 – 12)” [25.5 (28 – 25.5 – 28 – 30.5 – 30.5) cm], ending on a WS row.
- Stepped Sleeve Decreases — Next Row (RS):
Ch 2. Work1 hdchbin each of the next39 (39 - 39 - 39 - 34 - 35) hdc. Turn, leaving the remaining cuff-side stitches unworked. - Next Row (WS):
Ch 2. Work1 hdchbin each hdc to the end of the row. Turn. - Next Row (RS):
Ch 2. Work1 hdchbin each hdc across to the last10 (10 - 8 - 8 - 7 - 5) hdc. Turn, leaving the remaining stitches unworked. - Repeat Decreases: Repeat the last 2 rows 2 (2 – 3 – 3 – 3 – 4) times more until 13 (13 – 11 – 11 – 10 – 9) hdc remain.
- Final Row:
Ch 2. Work1 hdchbin each hdc to the end of the row. Fasten off.
✨ PATTERN HELP & TIPS ✨
Got Questions?
Frequently Asked Questions
Click on any question below to reveal the answer
How does side-to-side sweater construction work?
Instead of crocheting from the bottom hem upward, you crochet vertically from cuff/shoulder across the torso to the other shoulder. This makes the half double crochet horizontal bar stitches run vertically like elongating knit ribs!
How can I make the sweater longer or shorter?
Adjust your starting foundation chain before Row 1! Every 2 chains adds or removes approximately 1/2 inch of body length from hem to shoulder.
Will bulky yarn make the sweater feel too heavy?
Caron Simply Me is a blown/chainette-style bulky blend, so it creates plush, lofty vertical ridges at half the weight of traditional plied bulky yarn.
Would you like to save this pattern?
Enter your email below and we will send you a direct link to this Caron Vertical Ridges Crochet Sweater tutorial and official size chart.
Part 4: Ribbed Neckband, Damp-Cloth Blocking & Assembly
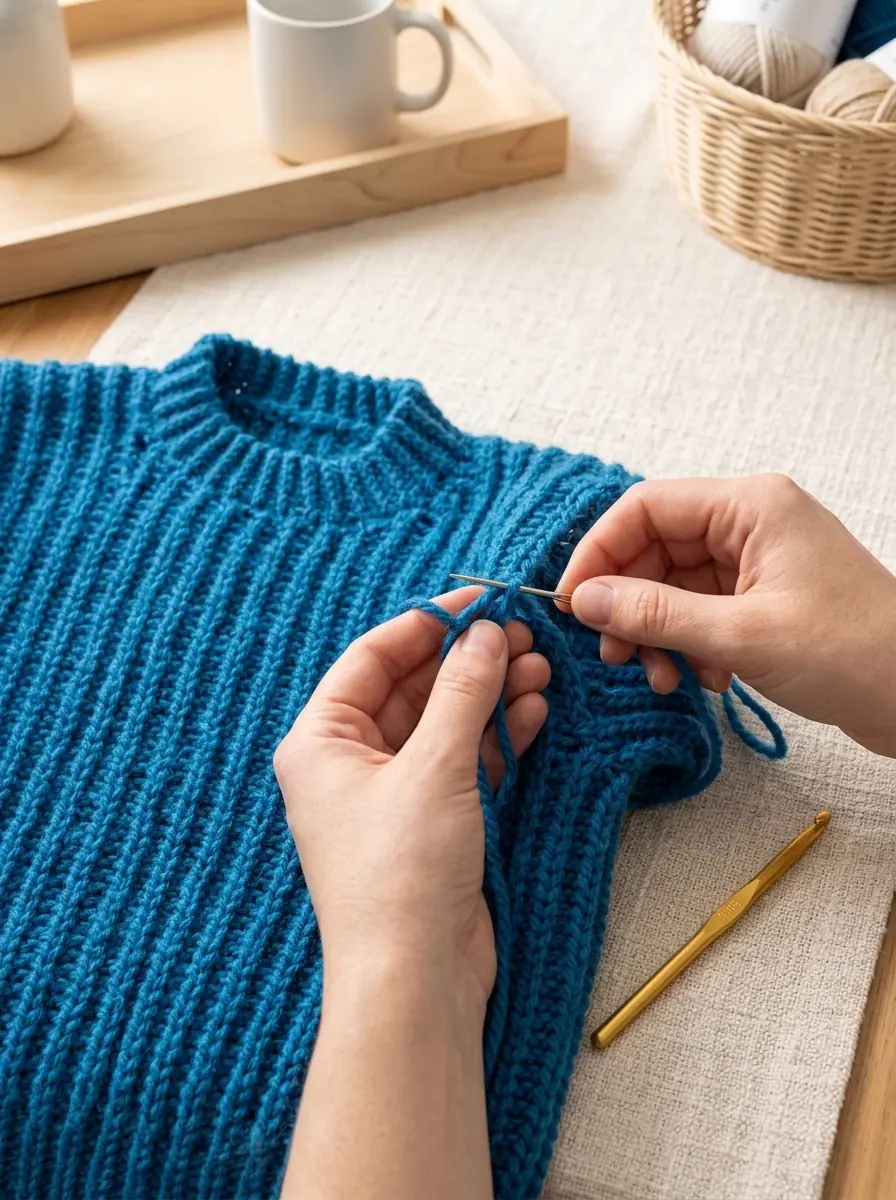
- Damp-Cloth Blocking Before Seaming: Pin the Back panel, Front panel, and both Sleeves to their schematic measurements on a foam blocking mat. Cover the pieces with a clean, damp cotton cloth and leave the cloth to dry completely. (Never touch the wool-blend yarn with a hot iron.)
- Sew Right Shoulder Seam: With Right Sides together, use a yarn needle and matching Blue Topaz yarn to sew the right shoulder seam.
- Crochet the Ribbed Neckband:
Ch 8.- 1st Row (RS): Work
1 scin the 2nd ch from hook and in each ch to the end of the chain. Turn. (7 sts) - 2nd Row:
Ch 1. Work1 scblin each sc across to the end of the row. Turn. (7 sts) - Repeat the 2nd Row until the neckband strip, when slightly stretched, fits smoothly around the entire neck edge. Fasten off.
- Attach Neckband & Left Shoulder: Beginning at the open left shoulder, sew the long edge of the neckband evenly around the neckline. Then sew the short ends of the neckband together and seam the left shoulder closed.
- Set In the Square Sleeves: Place a marker on each side of the sleeve 1.5 (1.5 – 2.5 – 2.5 – 3.25 – 3.25)” [4 (4 – 6 – 6 – 8.5 – 8.5) cm] down from the wider top edge of the sleeve. Sew the top of the sleeve into the armhole, aligning the stitches above the sleeve markers with the horizontal step of the armhole shaping to form clean square armholes.
- Final Seams: Fold the sweater at the shoulders and sew the continuous underarm sleeve seams and side body seams neatly. Weave in all remaining yarn tails on the Wrong Side.
Official Yarn Care & Washing Instructions
Because Caron Simply Me blends 62% acrylic, 20% nylon, and 18% wool, following the official Yarnspirations care label keeps your vertical ridges crisp and prevents felting or stretching:
- Washing: Machine wash on a cold, delicate cycle using a mild wool-safe detergent.
- Drying: Tumble dry on gentle / low heat, or lay the sweater flat on a mesh drying rack reshaped to its finished dimensions.
- No Heat Pressing: Do not iron, do not bleach, and do not dry clean.
Pin This Crochet Sweater Design for Later!
Save either of the two official pattern collage pins below to your favorite Crochet Sweater Patterns or DIY Winter Wearables board on Pinterest so you have the full size chart and stitch guide handy whenever you cast on:
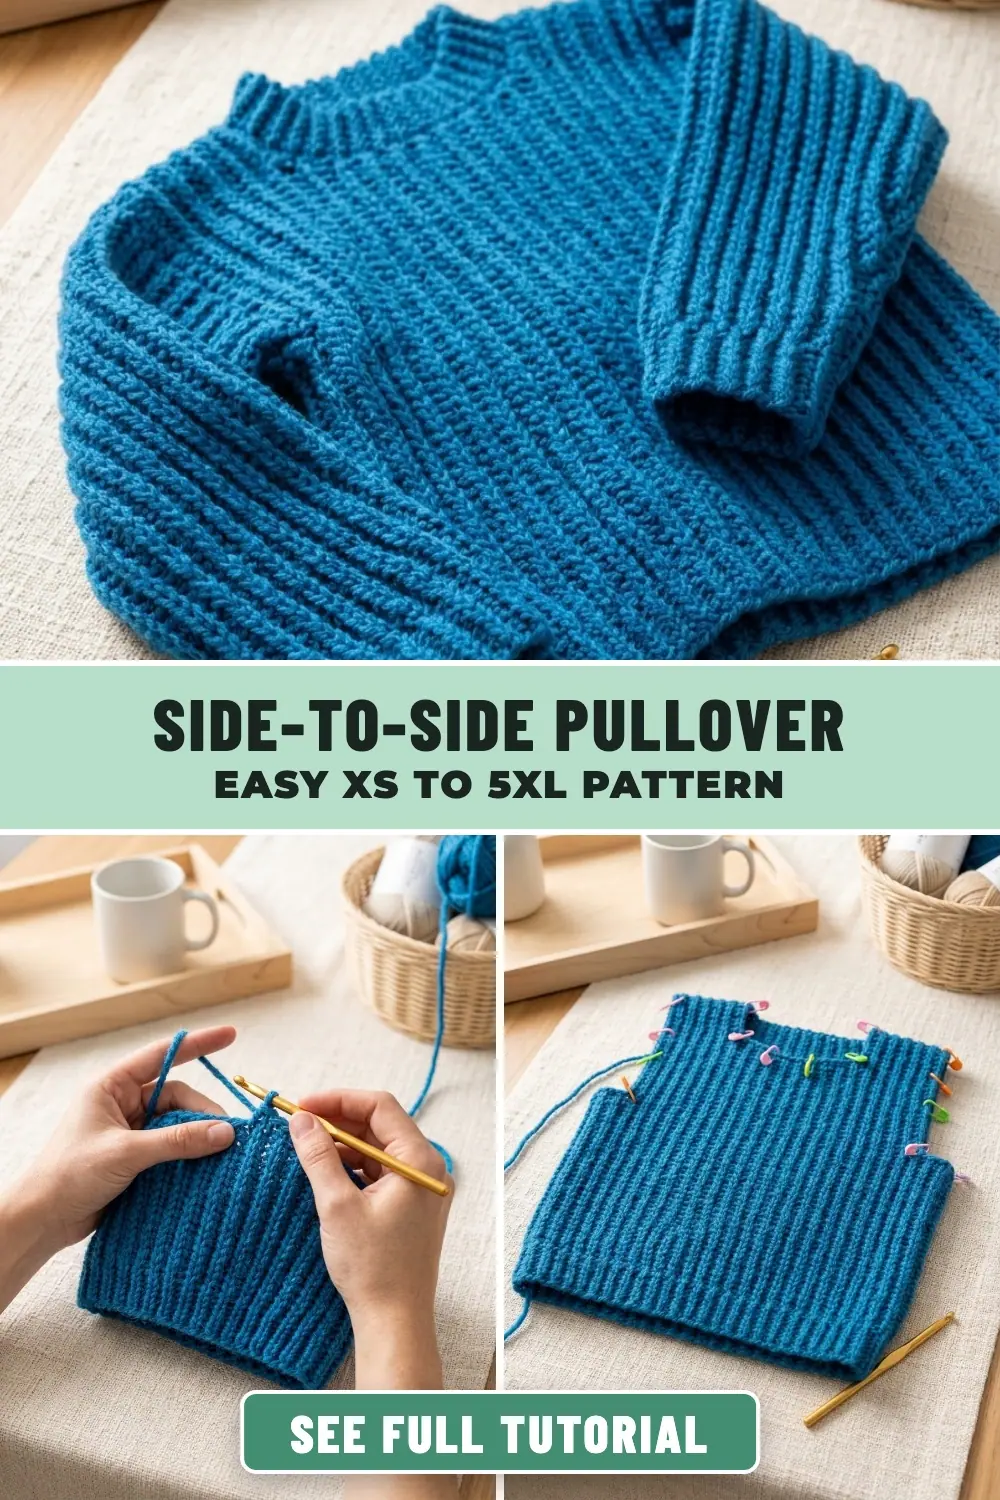
PREVIOUS PATTERN
Crossing Paths Cabled Lattice Oversized Crochet Super Scarf
NEXT PATTERN
Deep-Pocket 3D Waffle Stitch Cotton Crochet Kitchen Dishcloth
✨ KEEP CROCHETING ✨
You May Also Love
LEAVE A COMMENT
Have a question about a stitch or want to share how your project turned out? Drop a comment below — I read and reply to every maker!