
 Seasonal & Holiday Crochet
*This post may contain affiliate links to support the cost of this blog. At no cost to you, I may make a small commission if you purchase through these links. Read our Privacy Policy HERE
Winter holiday decorating takes on a whole new warmth when handmade fiber art hangs from evergreen branches, mantel garlands, and wrapped gift packages. This Stuffed Six-Point Amigurumi Crochet Snowflake Ornament combines crisp geometric symmetry with soft plush dimension, transforming a classic winter motif into a three-dimensional keepsake worked in crisp snow white worsted-weight yarn with delicate classic charcoal black embroidered facial details. Measuring approximately 3 inches (7.5 cm) tall excluding its braided hanging loop, each ornament works up with just 27 yards (24.5 m) of medium weight (#4) yarn and a 4 mm (US G-6) crochet hook, making it an ideal weekend stash-buster or twelve-day holiday countdown project.
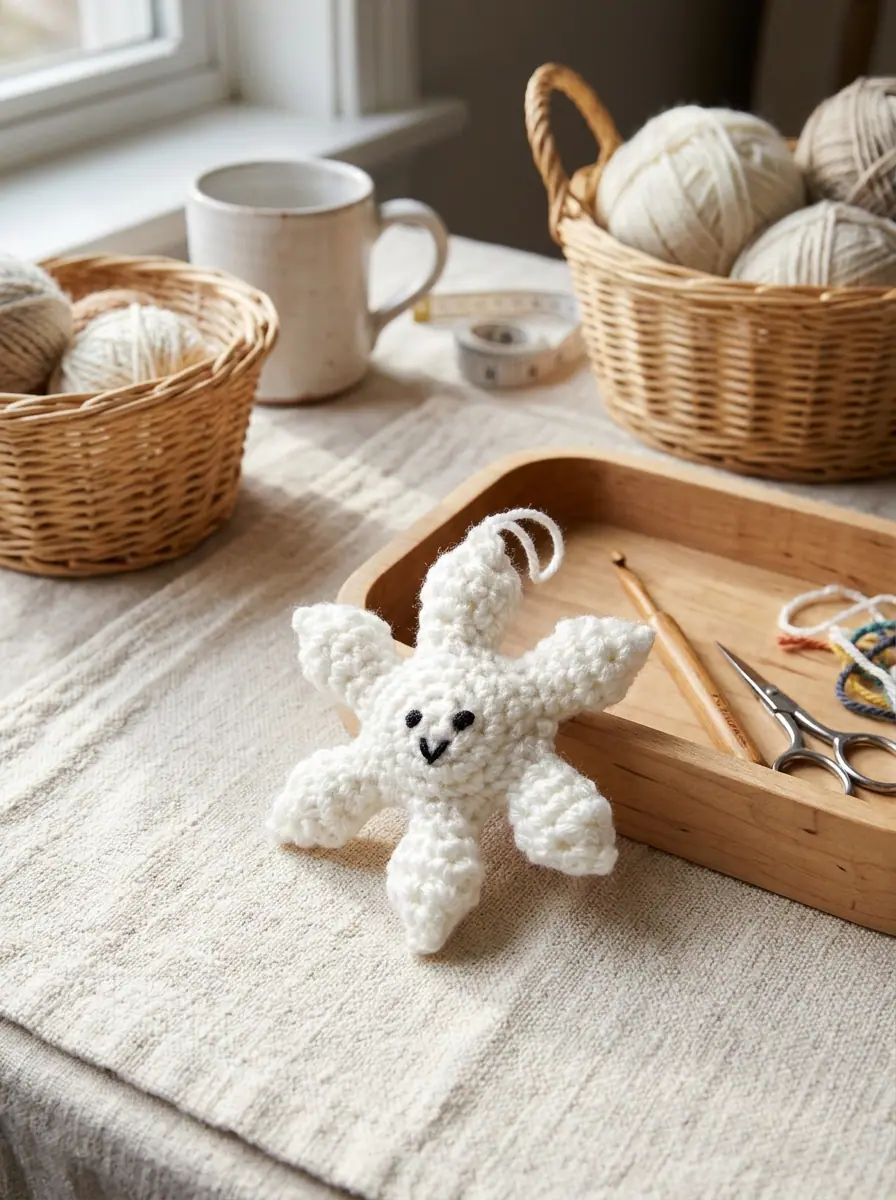
Unlike flat lace snowflakes that require starch blocking and rust-proof pins to hold their shape, this amigurumi construction is engineered from the inside out. You first crochet two identical circular center discs in continuous spirals—a Snowflake Back and a Snowflake Front—each expanding from a 6-stitch magic ring to an 18-stitch round. Holding those two discs wrong sides together without cutting the working yarn, you then crochet six individual three-dimensional points directly across opposing 3-stitch segments of both layers at once. As each point tapers from 12 stitches down to 3 stitches using single crochet decreases, a pinch of polyester fiberfill gives the star its plump, pillowy profile.
Project Overview & Technical Specifications
- Skill Level: Easy (Beginner-friendly amigurumi construction in continuous and joined rounds)
- Finished Dimensions: Approximately 3 inches (7.5 cm) tall, excluding the 2.5-inch hanging loop
- Yarn Weight: Medium Weight #4 (Worsted / Aran acrylic yarn)
- Primary Colorway: Color A — Crisp Snow White (27 yds / 24.5 m) | Color B — Classic Charcoal Black (small length of 2-ply split strand for embroidered eyes and smile)
- Recommended Hook: Size U.S. G-6 (4 mm) crochet hook, or size needed to obtain gauge
- Gauge: 18 single crochet and 20 rows = 4 inches (10 cm) in firm single crochet fabric
- Construction Method: Two 4-round circular center panels joined directly by six 6-round tubular points worked in the round
Table of Contents
Why Makers Love Three-Dimensional Amigurumi Holiday Ornaments
When you pair this plush snowflake ornament with festive seasonal projects like our Festive Granny Square Holiday Crochet Throw Blanket or rustic winter table accents like the Textured Bobble and Fringe Square Crochet Throw Pillow, you create a cohesive, tactile holiday home. Because the snowflake uses firm amigurumi tension with a 4 mm hook on worsted-weight yarn, the stitches lock tightly together so no polyester stuffing peeks through the surface.
Working all six points directly onto the paired center discs also eliminates the most frustrating part of small amigurumi assembly: sewing tiny separate limbs onto a round body. Here, every point is anchored structurally by working Round 1 across 3 stitches of the front disc and 3 aligned stitches of the back disc. The only seam work required at the end is a quick whipstitch in the tiny V-valleys between adjacent points and weaving the tail through the final 3 stitches of each tip.
Complete Materials & Notions Checklist
Everything You Need at Your Worktable
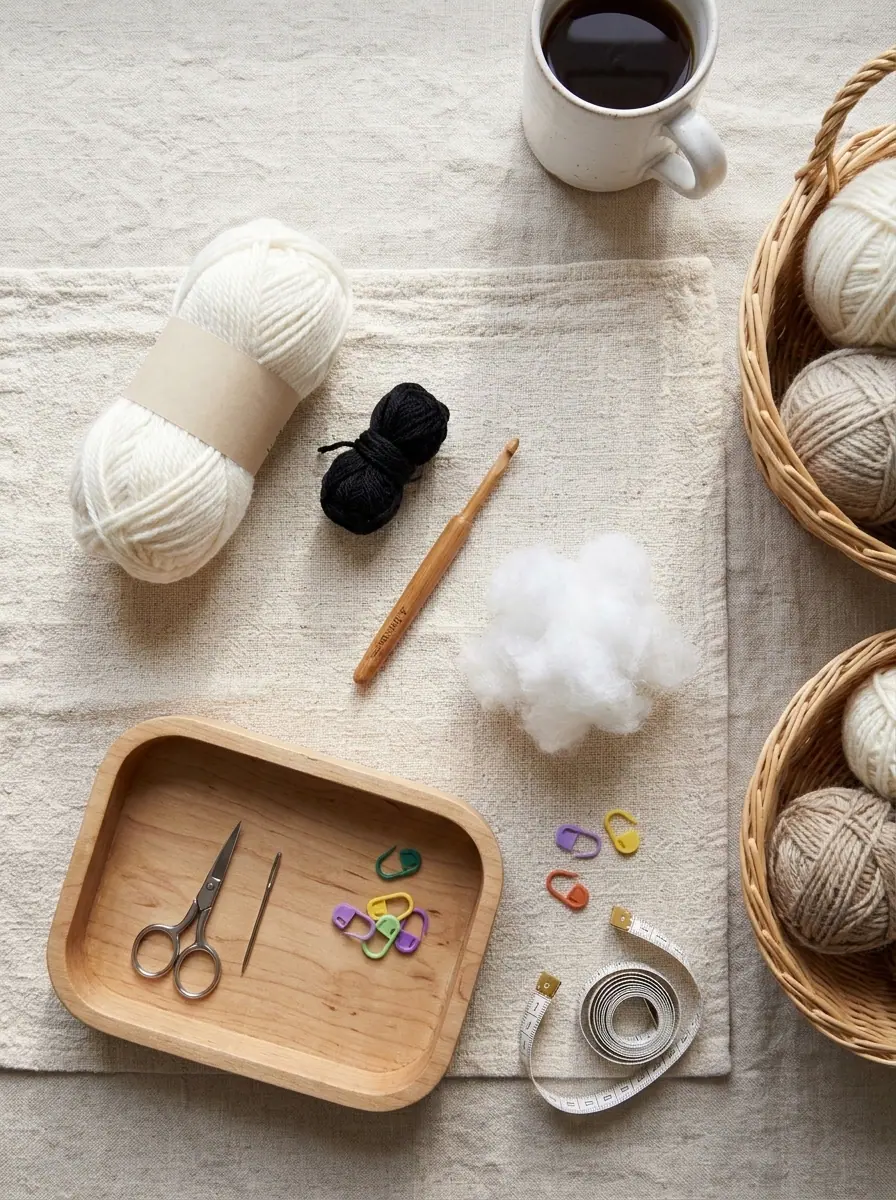
- Main Yarn (Color A): Medium Weight #4 Worsted Acrylic Yarn in Crisp Snow White — approximately 27 yards (24.5 meters), or roughly 15 grams of a standard skein.
- Embroidery Contrast (Color B): Scrap length (approximately 18 inches / 45 cm) of Medium Weight #4 yarn in Classic Charcoal Black, split into 2 plies for crisp miniature satin-stitch eyes and a V-shaped smile.
- Crochet Hook: Size U.S. G-6 (4.0 mm) aluminum or ergonomic warm birchwood crochet hook.
- Stuffing: High-loft washable polyester fiberfill (a small handful divided into pea-sized tufts for the six points and center cushion).
- Notions: Locking stitch marker (essential for tracking continuous rounds), blunt-tipped metal yarn needle for closing point tips and embroidering the face, and sharp embroidery scissors.
- Optional Hardware: Metal keychain clasp or lobster swivel hook if converting the ornament into a winter backpack charm or stocking tag.
Gauge, Tension & Stitch Abbreviations
In amigurumi ornament making, consistent tension matters even more than exact millimeter dimensions. Aim for a firm, gap-free fabric measuring 18 single crochet stitches and 20 rows per 4 inches (10 cm). If you notice pinholes between your stitches when you lightly stretch the center circle, drop down to a 3.5 mm (US E-4) hook so the polyester stuffing stays completely invisible behind the crisp snow white stitches.
Standard US Crochet Abbreviations Used
- Approx: Approximately
- Beg: Beginning
- Ch: Chain(s)
- PM: Place marker
- Rep: Repeat
- Rnd(s): Round(s)
- RS: Right side (the smooth outer V-surface facing outward)
- Sc: Single crochet
- Sc2tog: Single crochet 2 together — draw up a loop in each of next 2 stitches, yarn over hook and draw through all 3 loops on hook (1 stitch decreased)
- Sl st: Slip stitch
- Sp(s): Space(s)
- St(s): Stitch(es)
- Tog: Together
- WS: Wrong side (the interior surface that holds the fiberfill)
- Yoh: Yarn over hook
Step-by-Step Crochet Instructions
Part 1 — Crocheting the Snowflake Back & Front Center Discs
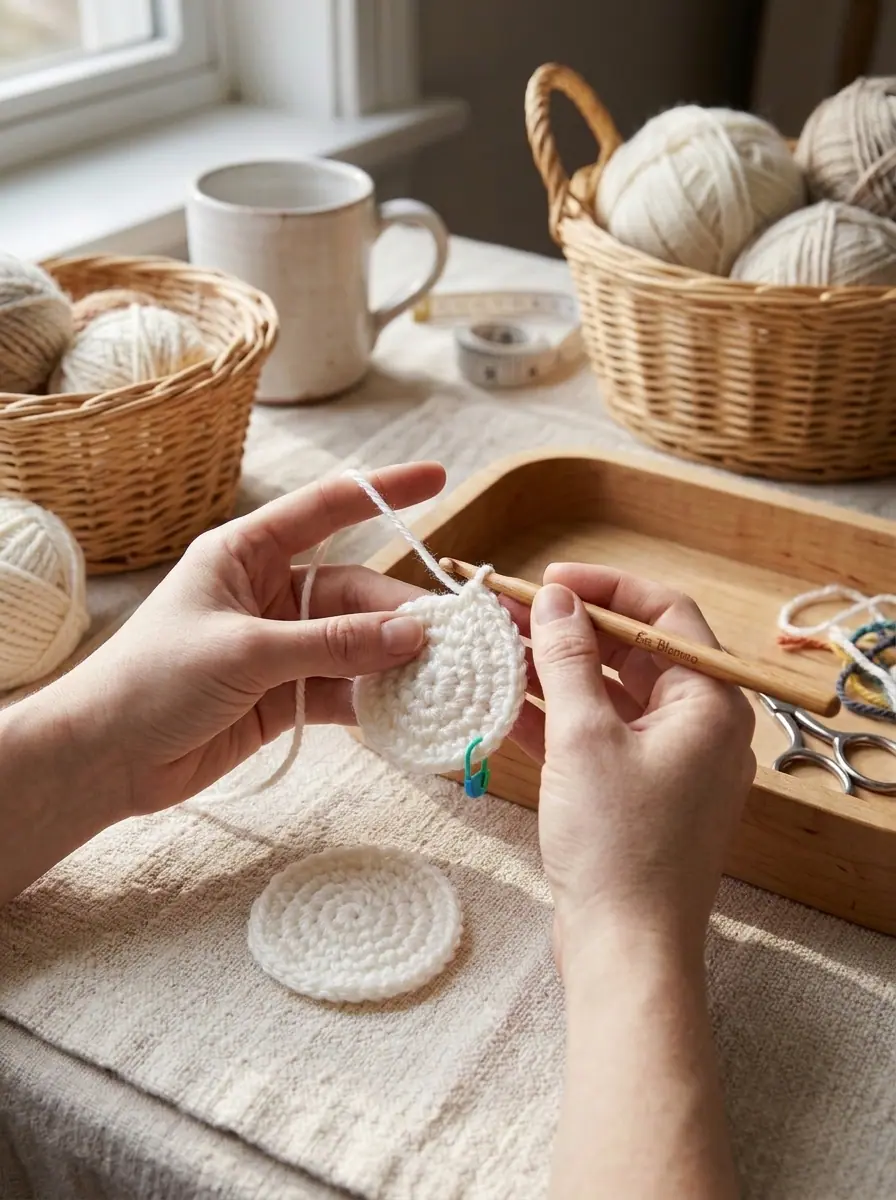
Both circular center faces are worked in continuous spirals without joining at the end of each round. Keep your locking stitch marker clipped into the first stitch of the current round and move it upward as each round begins.
Snowflake Back Disc (Rounds 1 to 4)
With Color A (Crisp Snow White) and your 4 mm hook, form an adjustable magic loop.
- Round 1 (RS): Ch 1. Work 6 sc into the magic loop. Place marker (PM) on the first st. Pull the magic loop tail firmly to close the center hole completely. Do not join. (6 sc)
- Round 2: Work 2 sc in each sc around. Move marker to the first st. (12 sc)
- Round 3: [1 sc in next sc, 2 sc in next sc] 6 times around. (18 sc)
- Round 4: Work 1 sc in each sc around. (18 sc)
- Finish Back Disc: Sl st in next sc to level the edge and fasten off neatly. Set the Snowflake Back disc aside.
Snowflake Front Disc & Layer Alignment
With Color A (Crisp Snow White), make a second magic loop and work Rounds 1 through 4 exactly as given for the Snowflake Back disc (18 sc at the end of Round 4).
Crucial Alignment Note: Do NOT fasten off at the end of the Snowflake Front disc! Hold the Snowflake Front and Snowflake Back discs with their Wrong Sides (WS) together so both smooth Right Sides face outward. Align the final slip stitch of the Snowflake Back with the next unworked stitch of the Snowflake Front. Because each disc has 18 stitches around its perimeter, the circle divides cleanly into six equal segments of 3 stitches each (6 points x 3 stitches = 18 stitches per disc).
Part 2 — Shaping the Six Three-Dimensional Snowflake Points
Unlike the spiral center discs, all six Snowflake Points are worked in joined rounds: at the end of each round, join with a slip stitch to the first single crochet of the round and chain 1 to begin the next round. This creates crisp, symmetrical sculptural ridges along each star arm.
First Snowflake Point (Rounds 1 to 6)
Continuing with the live loop attached to the Snowflake Front and working into stitches on both discs to form a 6-stitch ring:
- Round 1: Work 1 sc in each of the next 3 sc of the Snowflake Front. Turn the piece slightly so the Snowflake Back is facing you, then work 1 sc in each of the next 3 sc of the Snowflake Back that sit directly aligned behind the 3 stitches just worked on the Front. Join with a sl st to the first sc. (6 sc around the base of the point)
- Round 2: Ch 1. Work 1 sc in each sc around. Join with sl st to first sc. (6 sc)
- Round 3 (Flare Increase for Side Crystallites): Ch 1. [1 sc in each of next 2 sc, 3 sc in next sc] twice. Join with sl st to first sc. (10 sc — the two 3-sc increases create the signature flared side nubs of a crystal snowflake arm)
- Round 4: Ch 1. [1 sc in each of next 4 sc, 2 sc in next sc] twice. Join with sl st to first sc. (12 sc)
- Round 5 (Taper Decrease): Ch 1. [Sc2tog] 6 times around. Join with sl st to first sc. (6 sc)
- Stuffing the Point: Pause here and use the blunt end of your crochet hook to tuck a small, light tuft of polyester fiberfill into the First Point so the flared Round 3–4 ridges stand out cleanly without over-stretching the stitches.
- Round 6 (Tip Closure): Ch 1. [Sc2tog] 3 times around. Join with sl st to first sc. (3 sc)
- Fasten Off Point: Cut yarn leaving an 8-inch (20 cm) tail. Thread the tail onto your yarn needle, weave through the front loops of the 3 stitches in Round 6, pull snug to seal the tip to a crisp point, and hide the tail inside the arm.
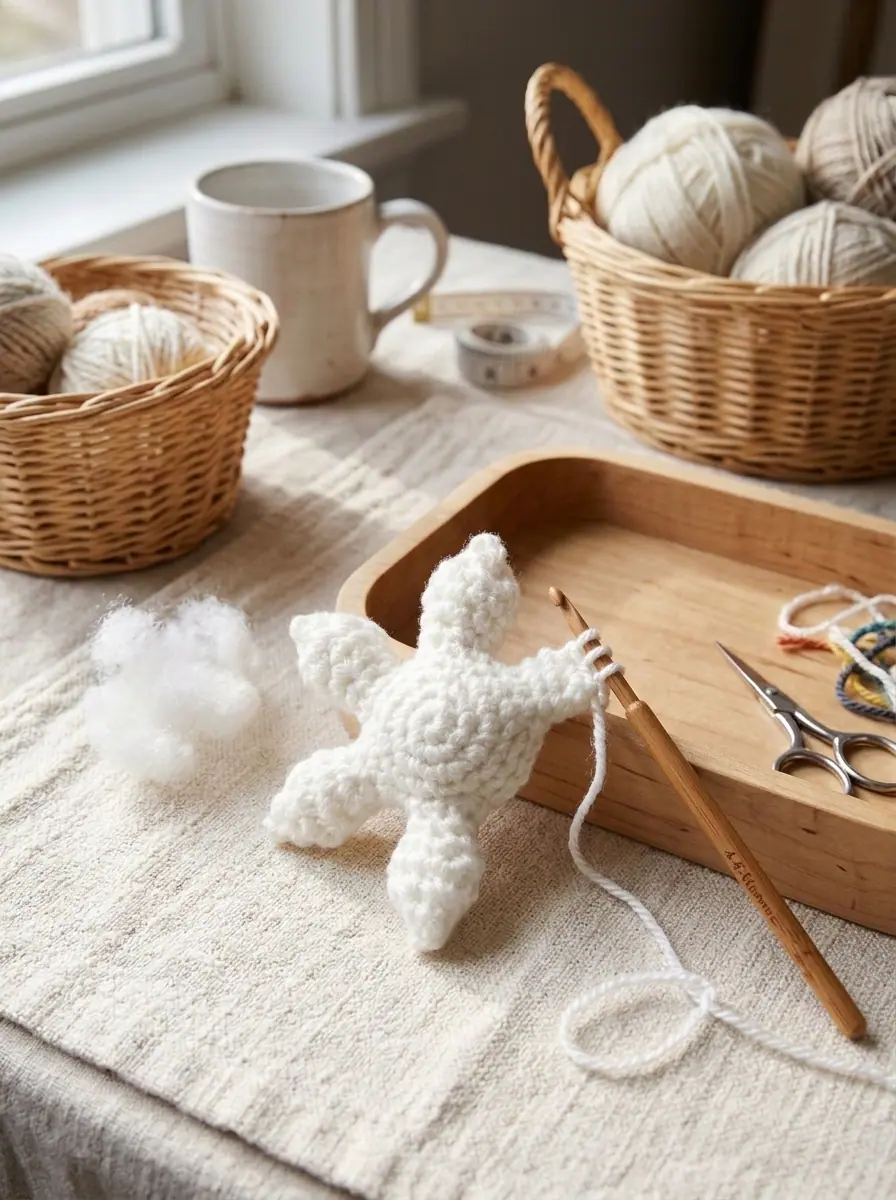
Second through Sixth Snowflake Points & Core Stuffing
- Second Point: With the Snowflake Front facing you, join Color A with a sl st to the next unworked sc on the Snowflake Front (immediately adjacent to the base of the First Point). Ch 1. Beginning in the same st as the joining sl st, work Rounds 1 through 6 exactly as given for the First Point, making sure Round 1 captures 3 stitches on the Front disc and the 3 matching unworked stitches directly behind them on the Back disc.
- Third, Fourth, and Fifth Points: Repeat the Second Point instructions 3 more times around the perimeter until 5 Snowflake Points are complete and only one 3-stitch gap remains open at the top of the disc.
- Stuffing the Center Cushion: Before working the Sixth Point, push small tufts of polyester stuffing through the remaining 3-stitch opening to lightly plump the central circular body of the snowflake. Keep the center pillowy and rounded rather than spherical so the ornament hangs flat against tree branches.
- Sixth Point: Join Color A with a sl st in the next unworked sc of the Snowflake Front and work Rounds 1 through 6 across the final 3 Front stitches and final 3 Back stitches. Lightly stuff the Sixth Point after Round 5 and cinch the 3 tip stitches closed after Round 6. (6 Snowflake Points completed in total)
- Seaming Between Points: Thread a length of Color A onto your yarn needle and whipstitch the tiny junctions between each Snowflake Point where the Front and Back discs meet so no gaps remain at the inner valleys. Weave in all yarn tails securely.
Part 3 — Embroidering the Nordic Slate Expression & Attaching the Hanging Loop
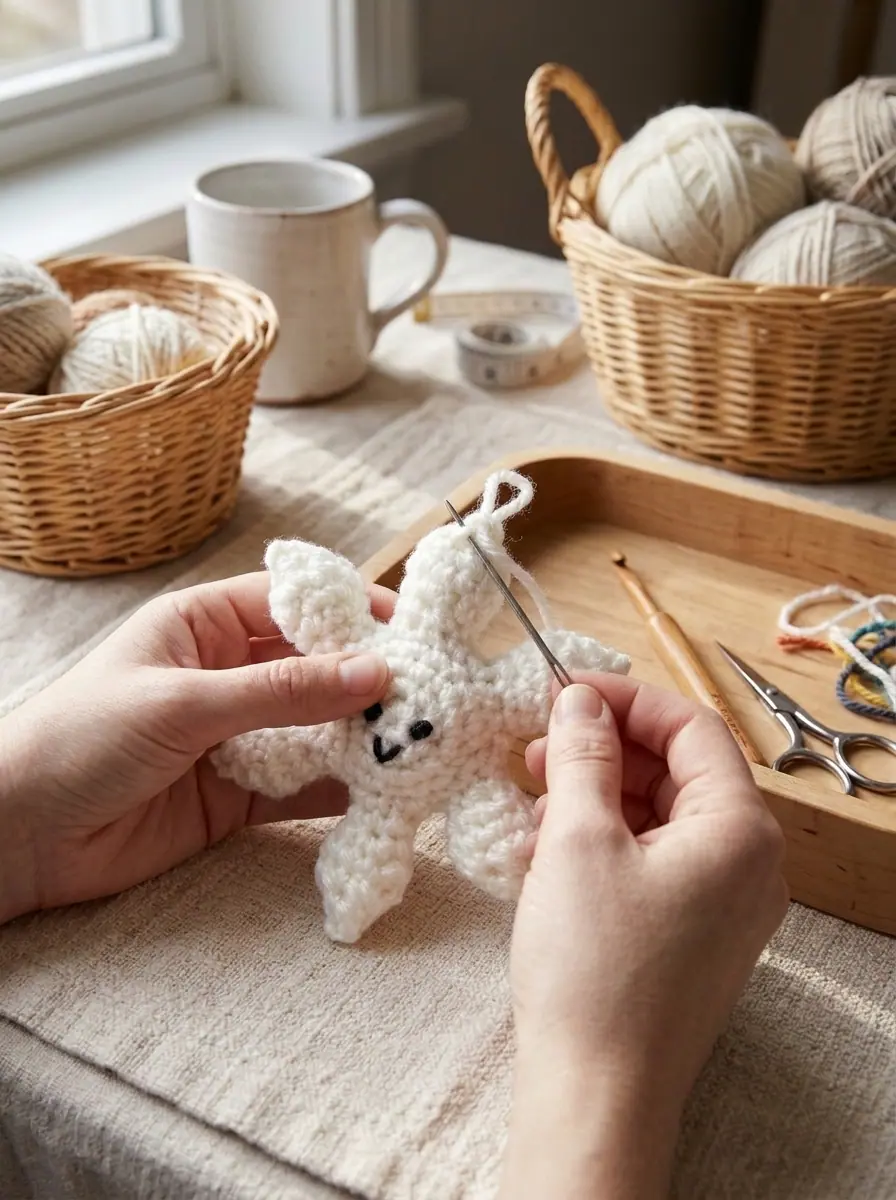
Once all six points are stuffed and sealed, add the whimsical embroidered face on the center of the Snowflake Front using your contrast strand of Color B (Classic Charcoal Black), then attach the top hanging loop.
Embroidered Face & Hanging Loop Assembly
- Splitting the Embroidery Strand: Cut an 18-inch (45 cm) strand of Color B (Classic Charcoal Black) 4-ply worsted yarn and gently untwist it to separate 2 plies. Using a finer 2-ply strand ensures delicate, crisp eyes and mouth proportions on a 3-inch ornament.
- Satin-Stitch Eyes: Thread the 2-ply strand onto your yarn needle. Position the two eyes horizontally across Round 2 of the Snowflake Front, spaced approximately 2 stitches apart. Work 4 to 5 vertical satin stitches wrapped closely over a single crochet post for each eye so they form neat oval dots.
- Sweet V-Smile: Bring the needle up centered 1 round below the eyes, form a small downward V-shape (or tiny curved catch-stitch smile) spanning 1 stitch width, and anchor the bottom point of the V with a tiny couching tack. Knot the ends together on the back and bury the knot inside the stuffing.
- Standard Yarn Hanging Loop: Cut a 5-inch (12.5 cm) strand of Color A. Fold the strand in half and knot the cut ends together to create a closed loop. Insert your crochet hook through the very tip of the top Snowflake Point, draw the folded loop halfway through, pass the knotted end through the loop (lark’s head knot), and pull taut.
- Keychain Clasp Option: If attaching a metal keychain clasp for a winter bag charm, thread Color A onto your yarn needle and whipstitch the base swivel ring directly to the apex of the top Snowflake Point 4 times before weaving the tail into the arm.
Official Yarn Care & Holiday Storage Instructions
Because these ornaments are crafted from resilient worsted acrylic yarn and stuffed with washable polyester fiberfill, they are remarkably easy to care for season after season:
- Washing: Spot clean gently with a damp cloth and mild soap, or machine wash cold inside a mesh delicates bag on a gentle cycle (maximum 30°C / 86°F) if no metal keychain clasp is attached.
- Drying: Reshape the six points with your fingers while damp and air dry flat on a clean towel. Tumble dry low only if needed.
- Ironing & Pressing: Do not iron or press. High heat will flatten the three-dimensional amigurumi stuffing and melt acrylic yarn fibers.
- Off-Season Storage: Store inside a breathable cotton pouch or acid-free tissue box without heavy items stacked on top so the six points keep their crisp sculptural loft for next winter.
✨ PATTERN HELP & TIPS ✨
Got Questions?
Frequently Asked Questions
Click on any question below to reveal the answer
How do I keep small gaps from forming at the base between each snowflake point?
When joining new yarn for Points 2 through 6, always insert your hook into the very next unworked stitch immediately beside the previous point without skipping any stitch. After all six points are finished, use a 10-inch length of Crisp Snow White yarn on a tapestry needle to take two small whipstitches across the inner V-valley between each pair of points, which pulls the Front and Back center discs snugly together.
Can I make a larger pillow-sized version of this stuffed crochet snowflake?
Yes! By holding two strands of worsted yarn together with a 6.5 mm (US K-10.5) hook—or switching to super-bulky (#6) chenille blanket yarn with an 8.0 mm (US L-11) hook—the exact same round-by-round stitch counts scale up into an 8-inch to 10-inch plush winter accent pillow.
Why do we work Round 3 of each point with 3 single crochets in a single stitch?
Those two 3-sc increases on opposite sides of Round 3 (raising the count from 6 stitches to 10 stitches) create the characteristic side crystal branches of a natural snowflake before Round 5 decreases rapidly back down to 6 stitches. Lightly stuffing right after Round 5 locks that diamond-shaped crystal silhouette in place.
How many snowflake ornaments can I crochet from one standard skein of worsted yarn?
Each snowflake uses only 27 yards (24.5 meters) of main color yarn. A single standard 7-ounce (198 g / 364 yd) skein of worsted acrylic yarn yields up to 13 matching snowflake ornaments—enough to decorate an entire tabletop tree, string into a mantel bunting, or tie onto every family holiday gift.
PREVIOUS PATTERN
Geometric Filet Mesh Cotton Crochet Table Runner With Lattice Fringe
NEXT PATTERN
Circular Pinstripe Crochet Christmas Tree Skirt With Bobble Trim
✨ KEEP CROCHETING ✨
You May Also Love
LEAVE A COMMENT
Have a question about a stitch or want to share how your project turned out? Drop a comment below — I read and reply to every maker!